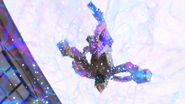
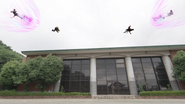
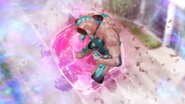
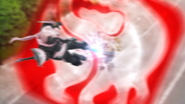
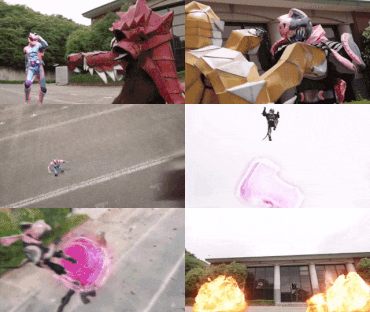
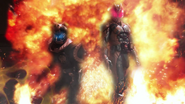
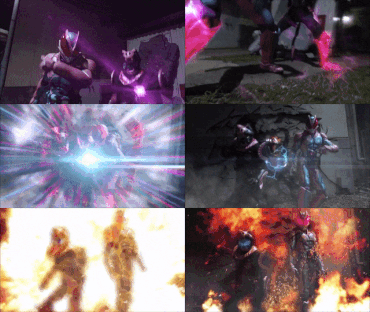
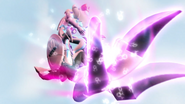
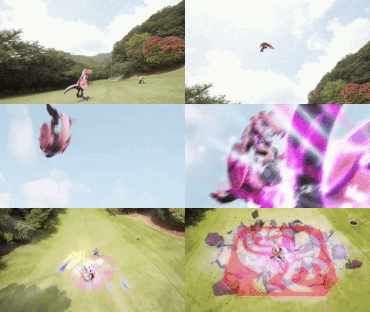
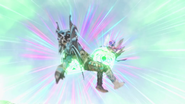
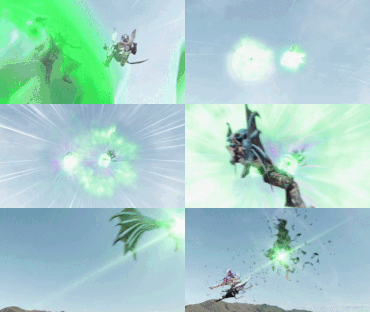
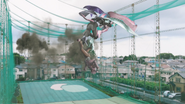
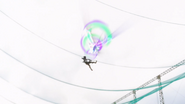
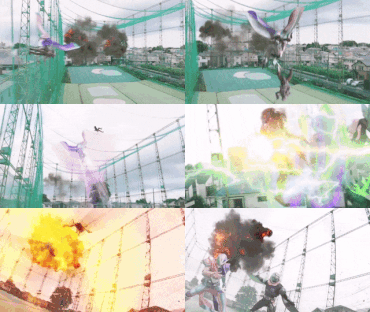
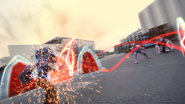
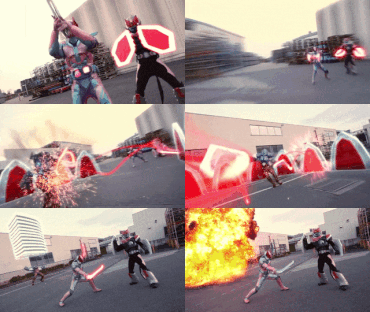
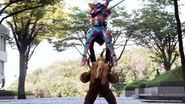
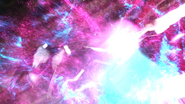
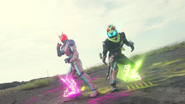
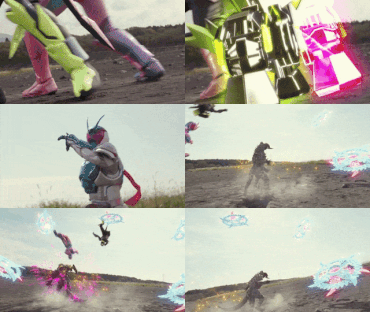
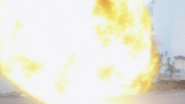
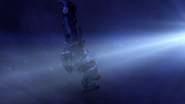
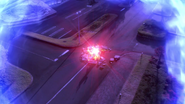
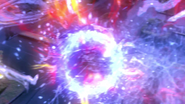
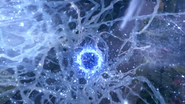
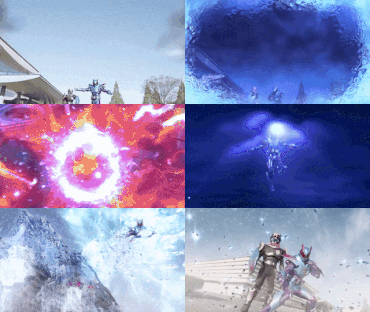
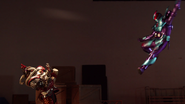
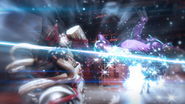
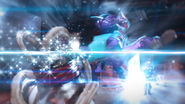
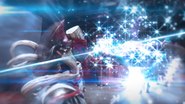
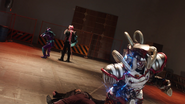
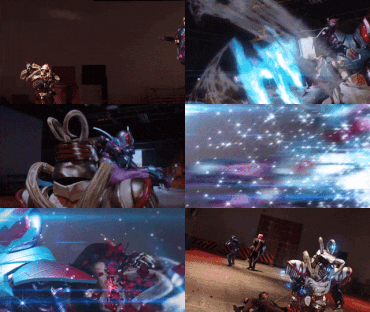
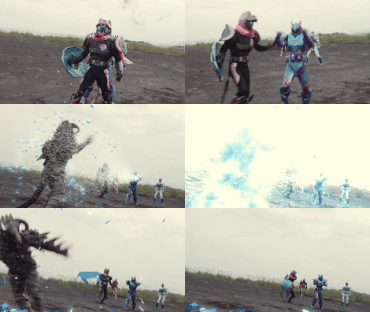
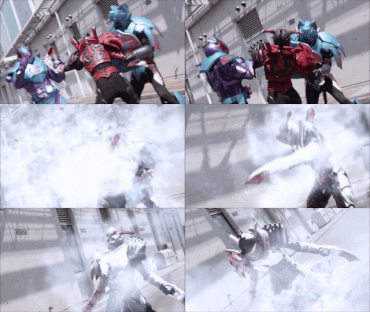
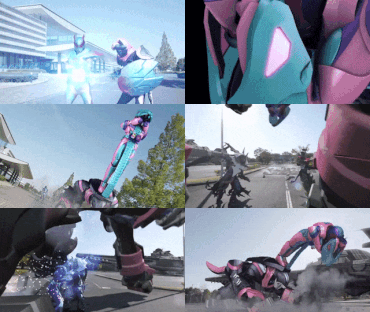
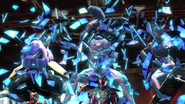
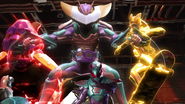
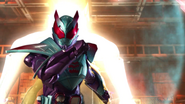
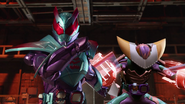
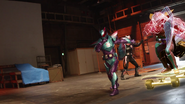
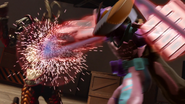
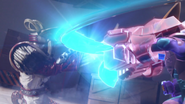
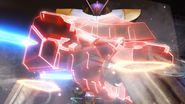
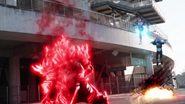
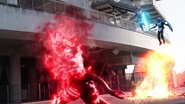
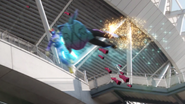
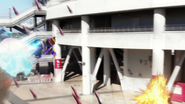
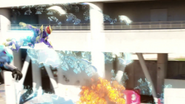
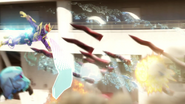
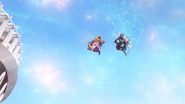
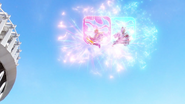
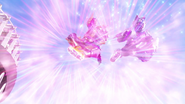
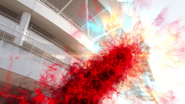
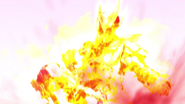
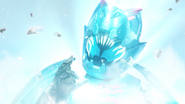
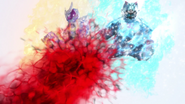
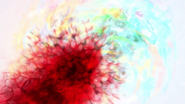
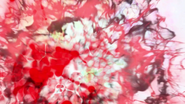
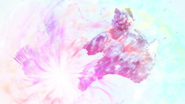
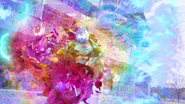
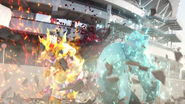
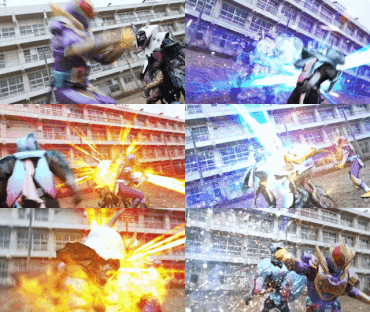
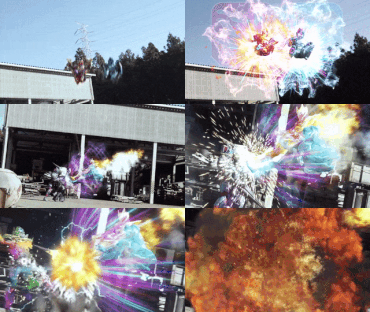
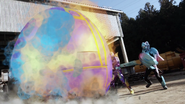
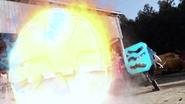
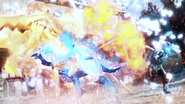
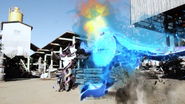
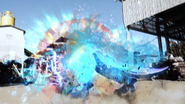
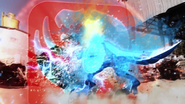
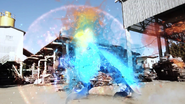
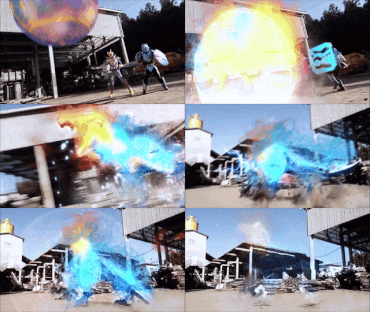
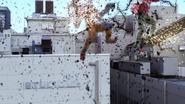
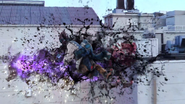
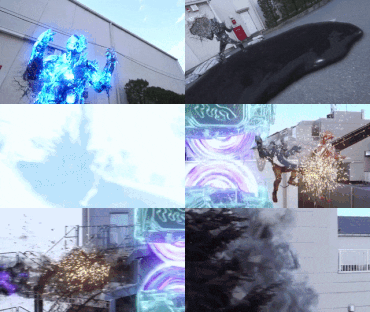
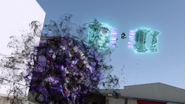
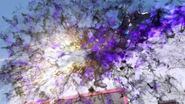
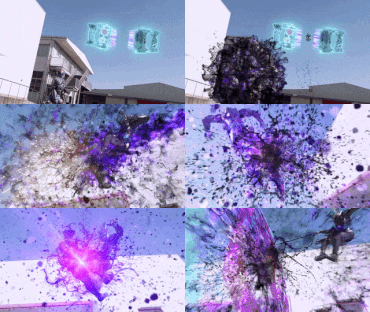
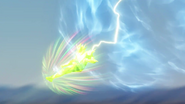
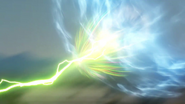
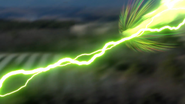
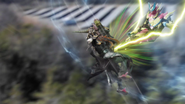
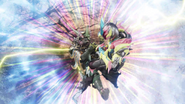
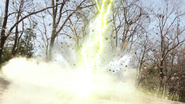
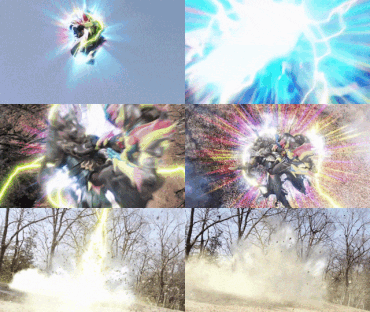
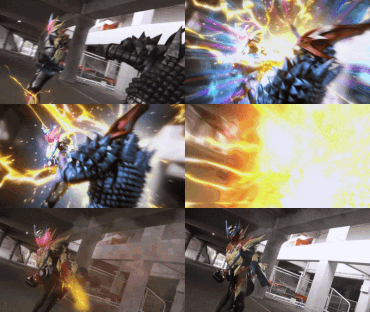
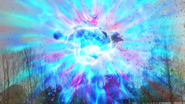
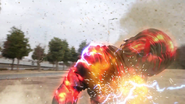
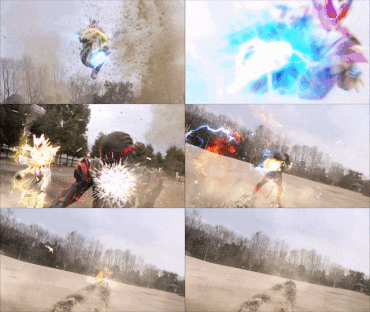
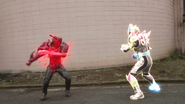
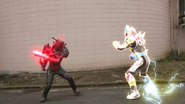
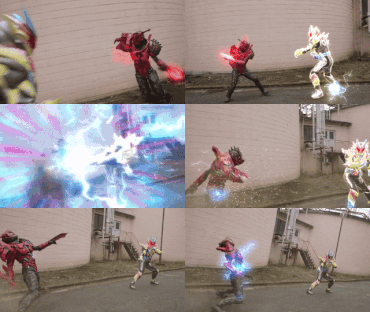
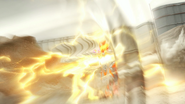
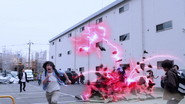
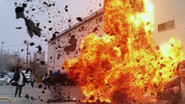
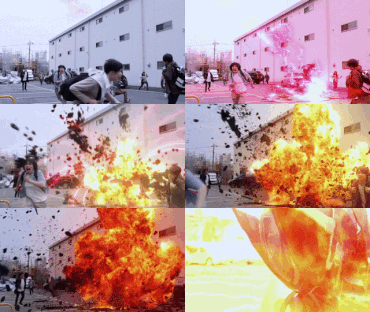
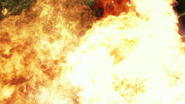
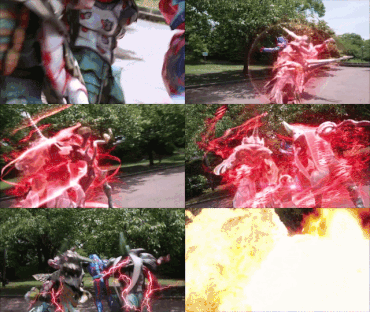
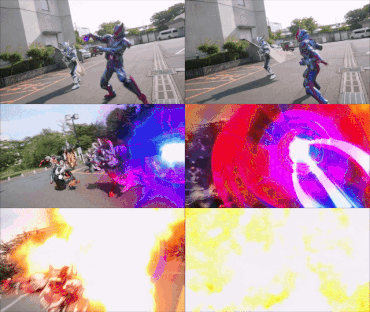
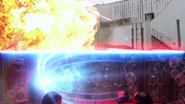
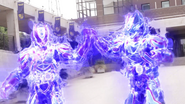
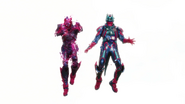
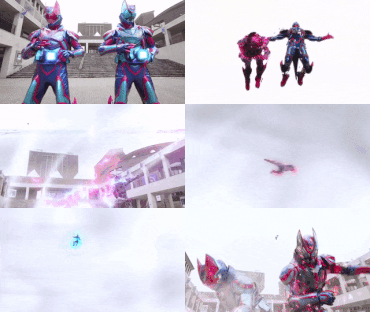
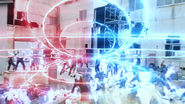
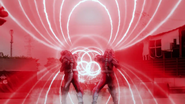
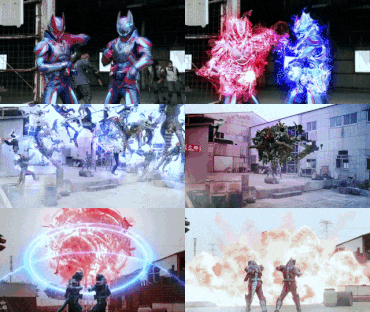
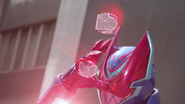
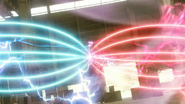
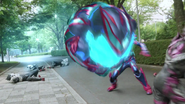
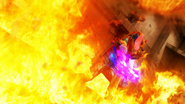
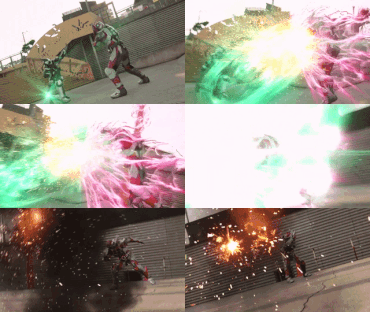
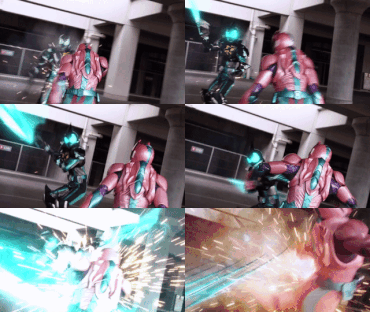
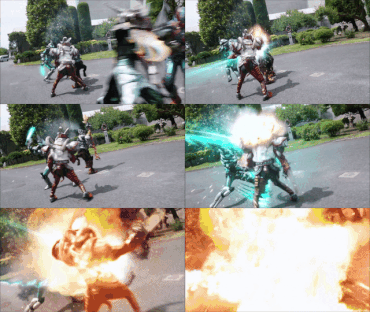
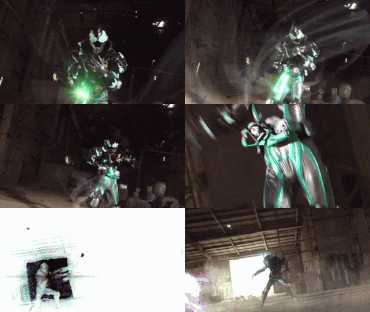
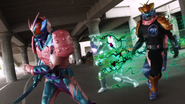
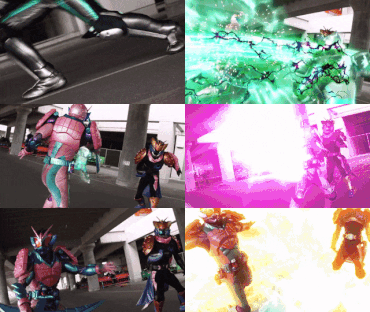
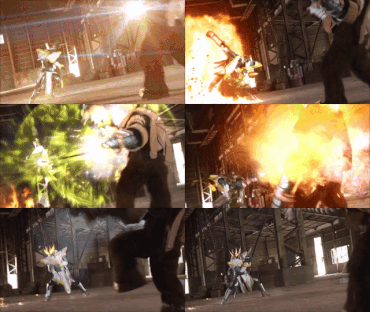
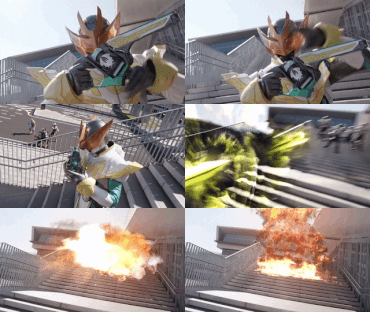
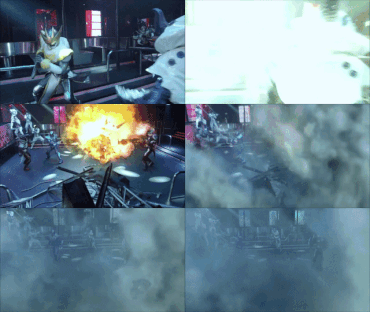
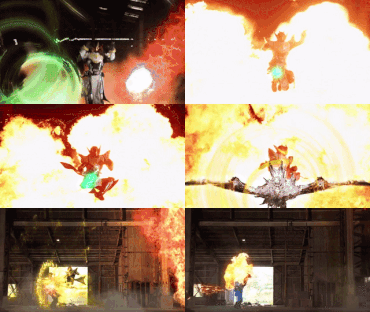
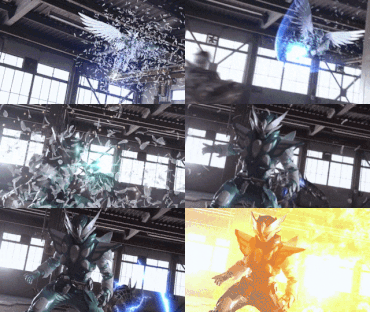
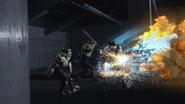
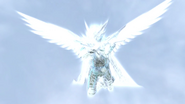
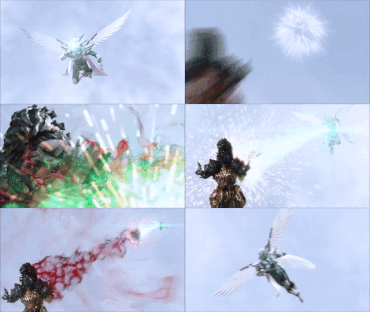
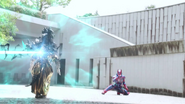
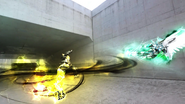
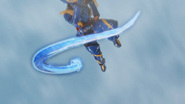
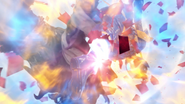
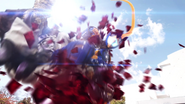
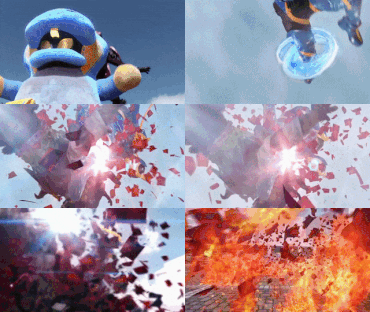
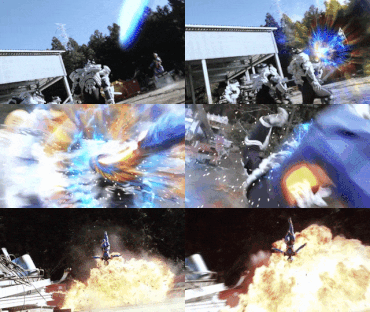
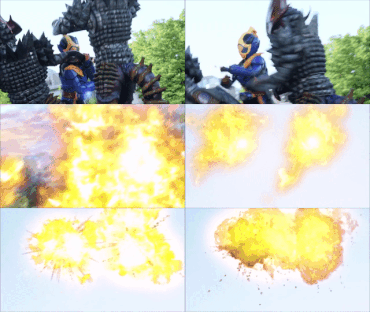
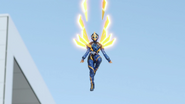
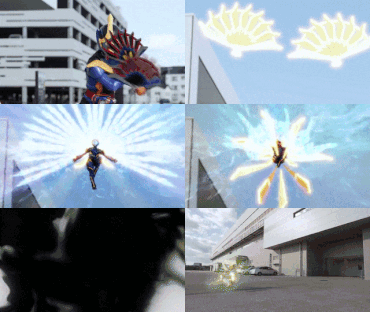
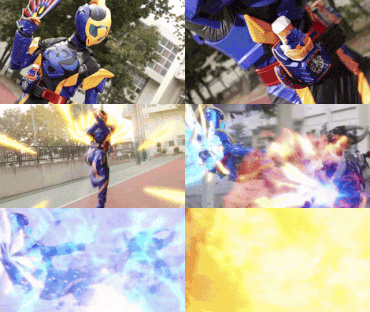
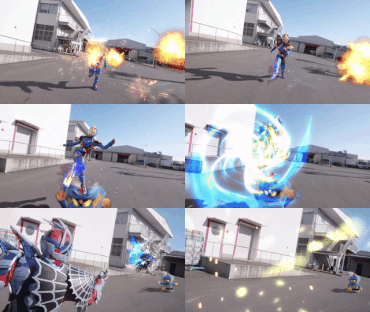
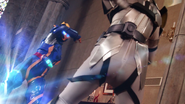
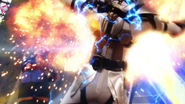
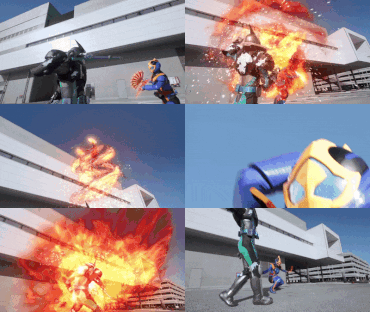
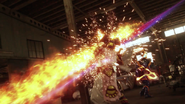
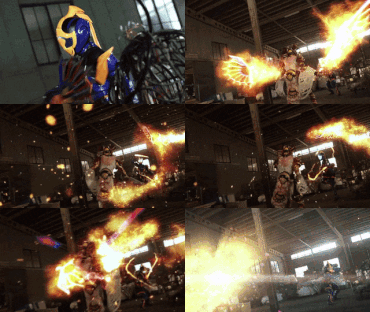
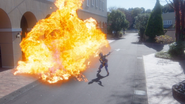
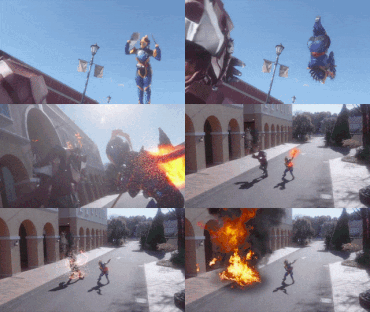
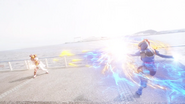
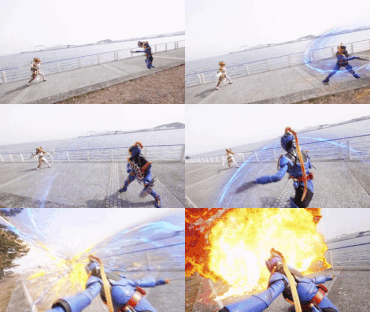
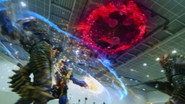
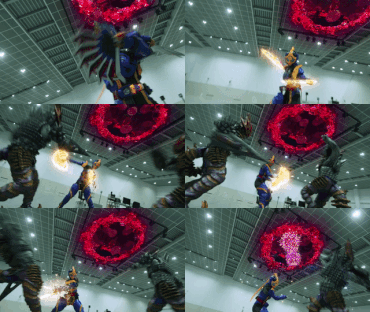
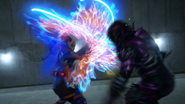
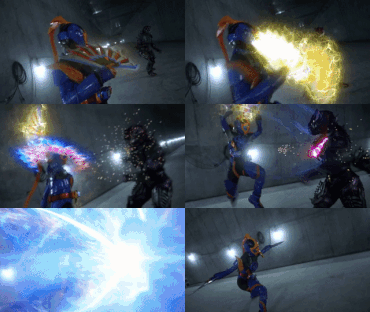
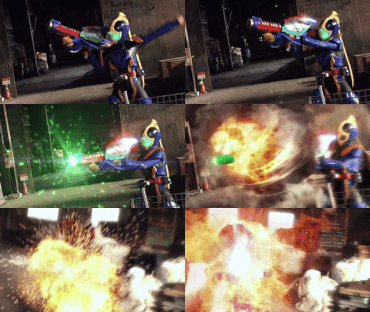
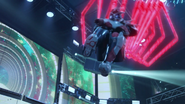
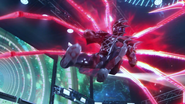
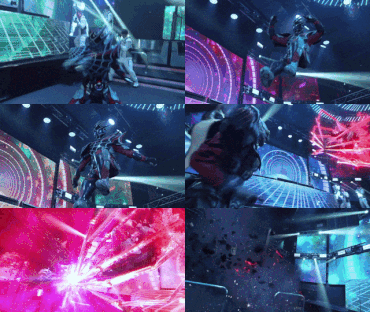
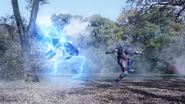
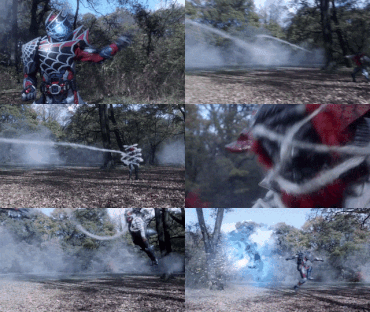
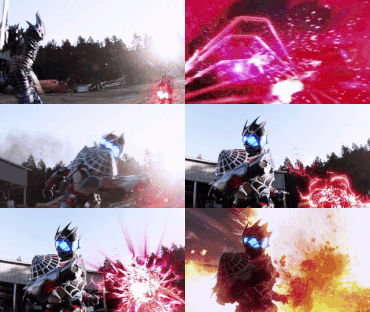
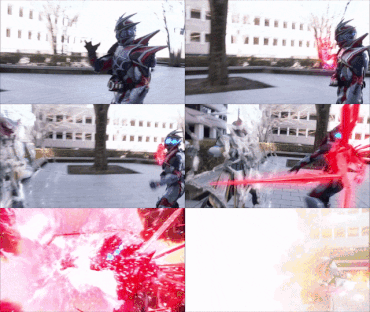
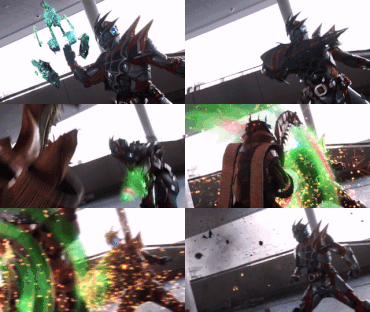
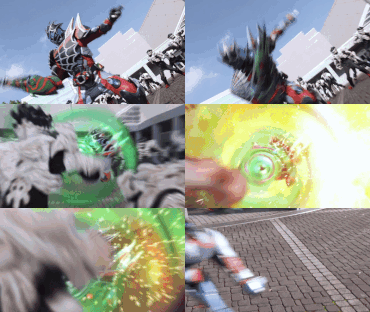
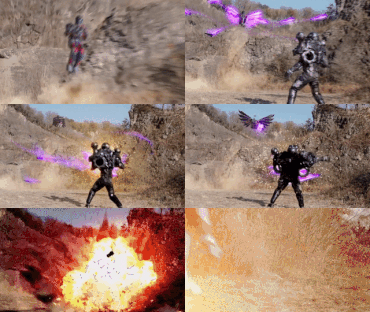
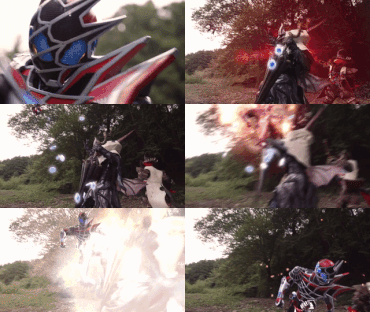
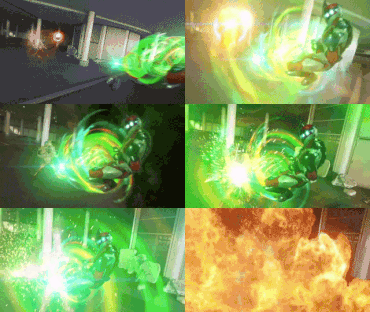
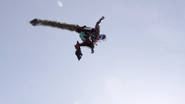
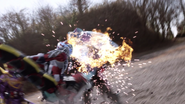
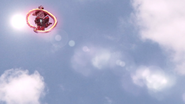
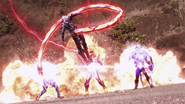
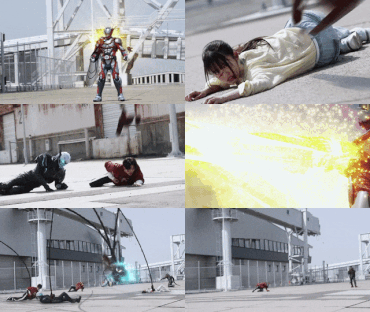
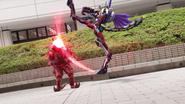
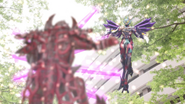
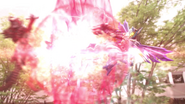
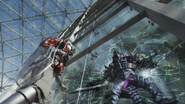
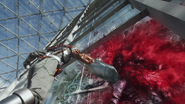
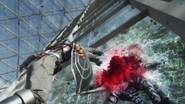
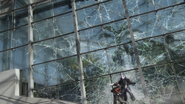
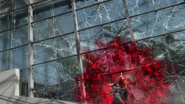
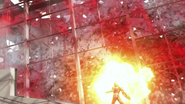
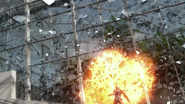
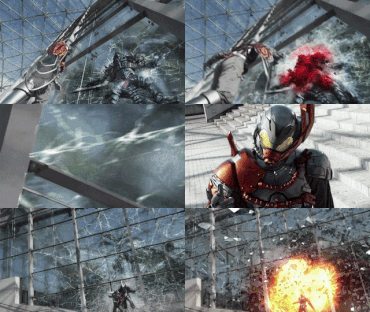
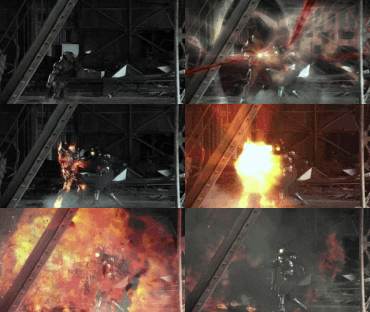
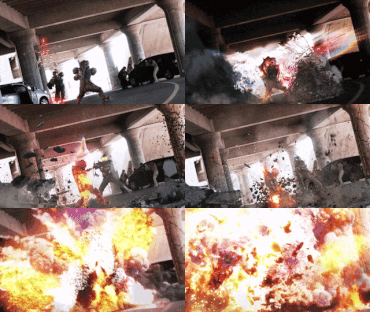
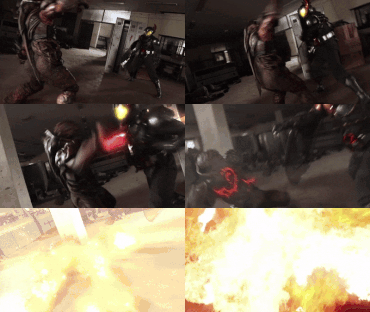
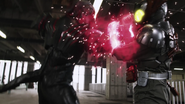
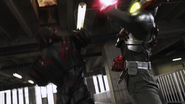
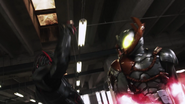
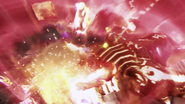
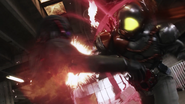
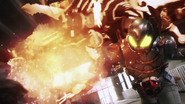
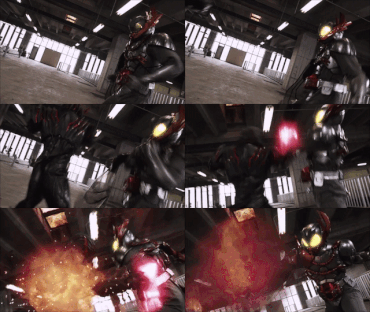
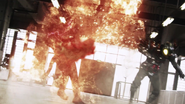
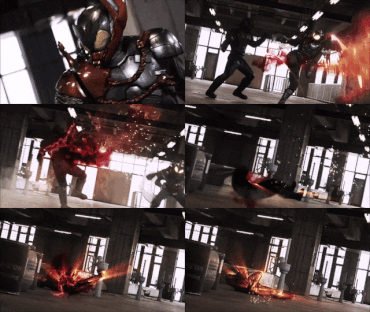
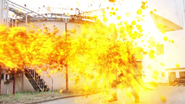
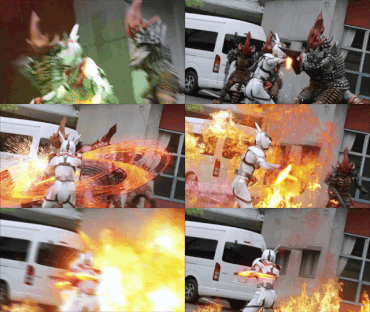
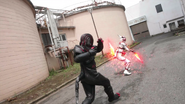
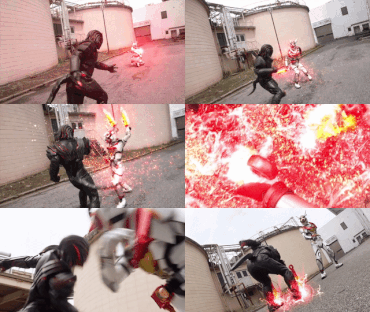
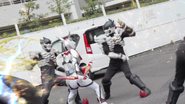
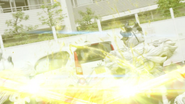
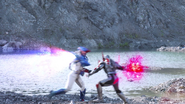
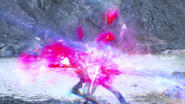
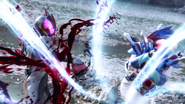
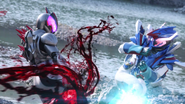
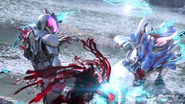
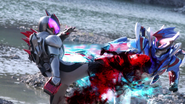
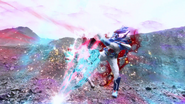
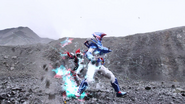
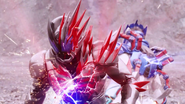
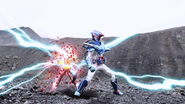
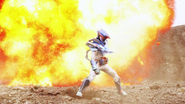
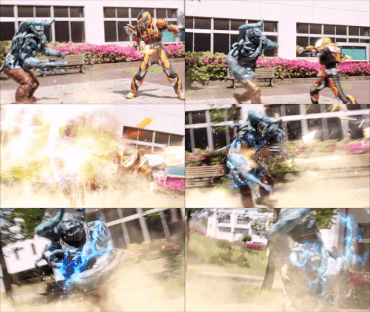
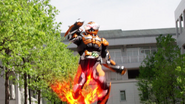
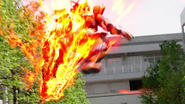
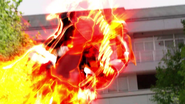
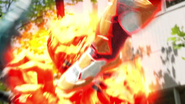
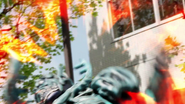
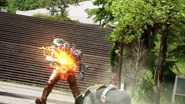
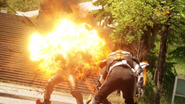
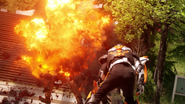
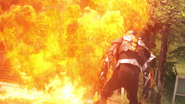
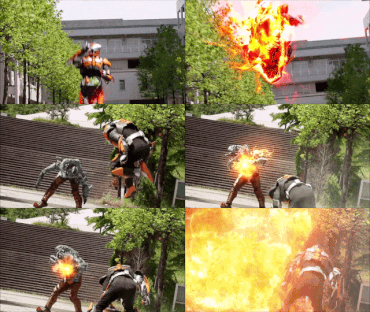
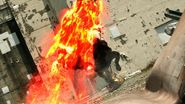
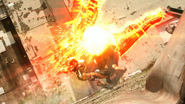
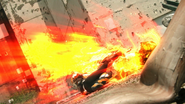
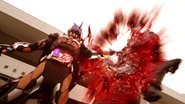
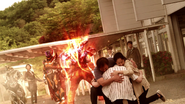
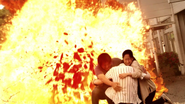
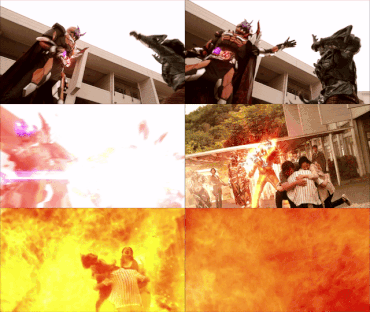
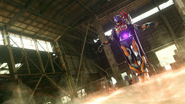
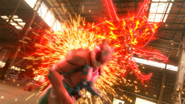
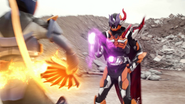
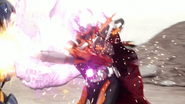
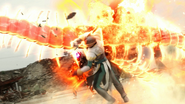
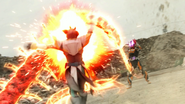
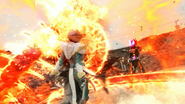
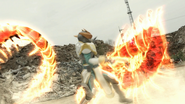
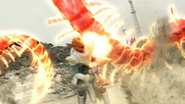
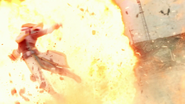
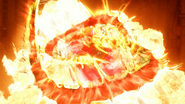
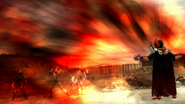
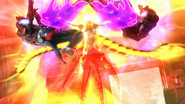
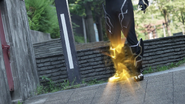
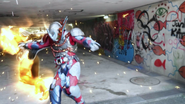
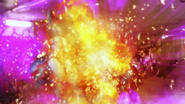
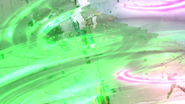
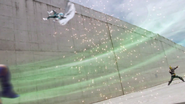
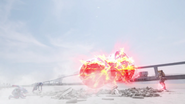
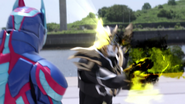
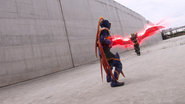
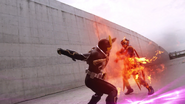
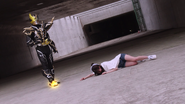
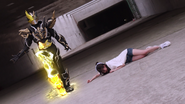
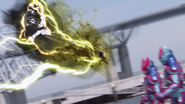
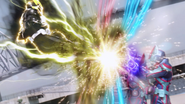
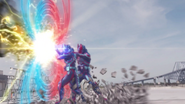
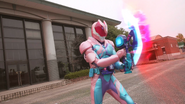
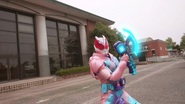
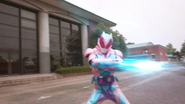
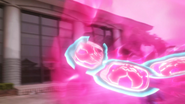
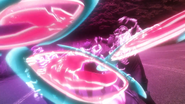
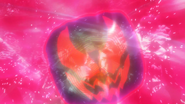
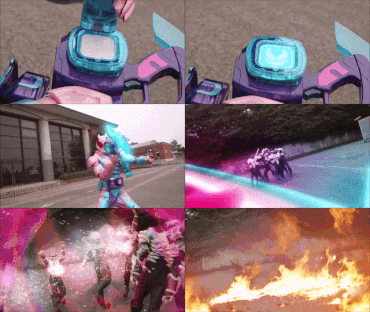
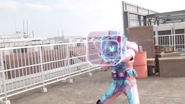
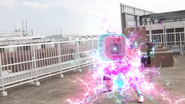
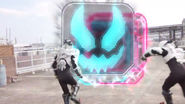
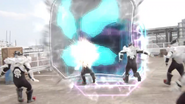
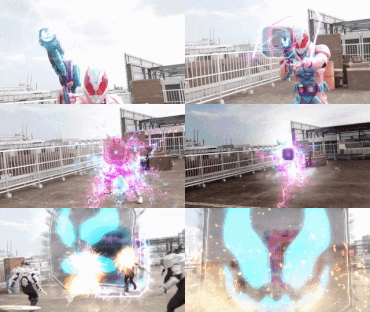
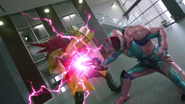
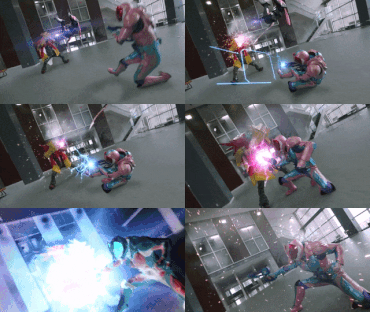
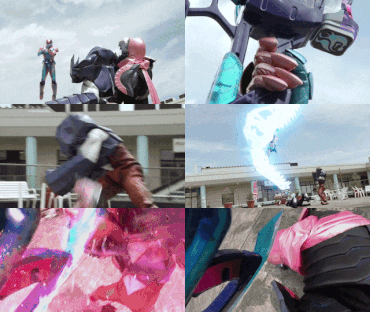
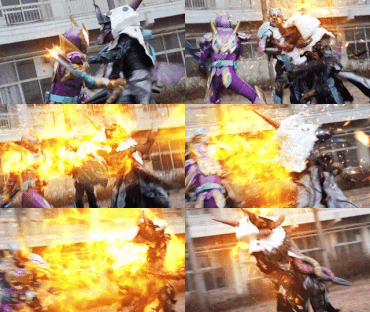
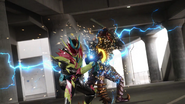
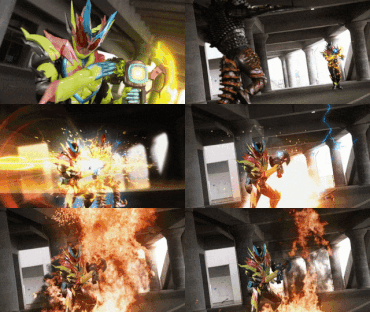
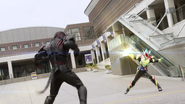
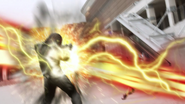
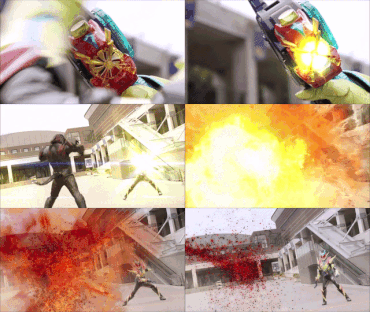
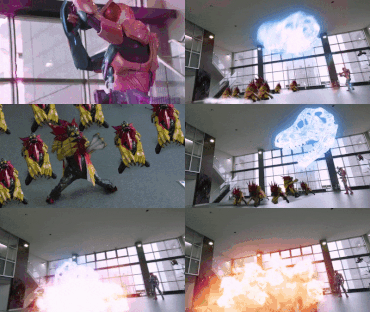
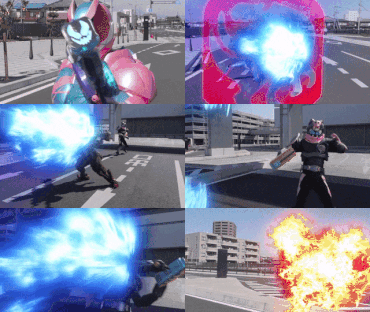
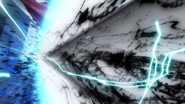
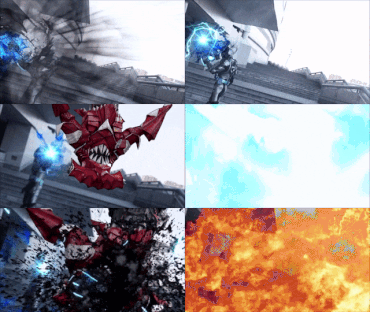
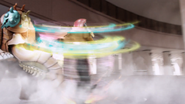
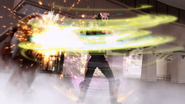
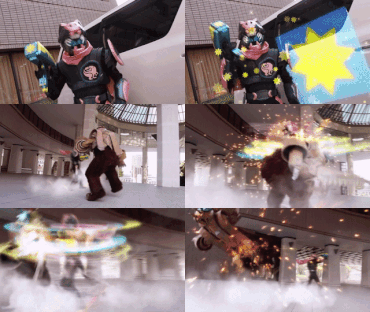
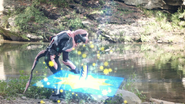
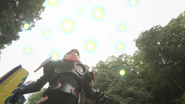
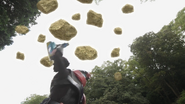
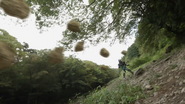
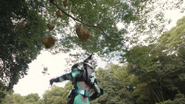
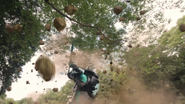
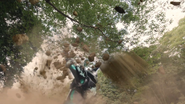
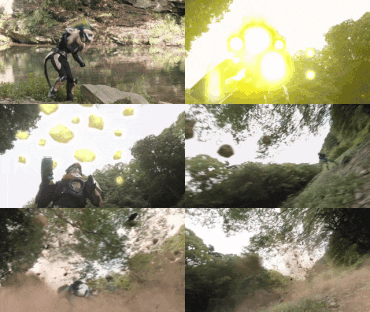
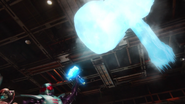
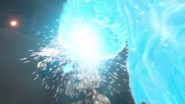
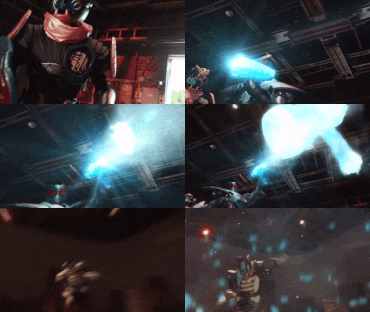
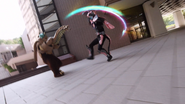
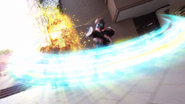
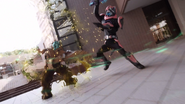
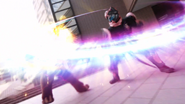
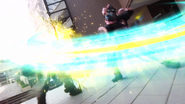
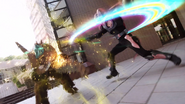
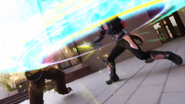
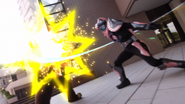
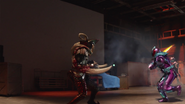
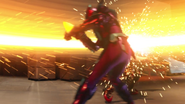
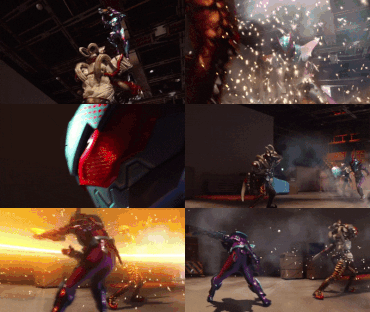
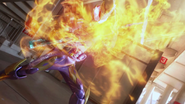
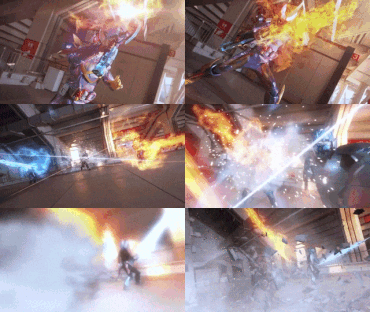
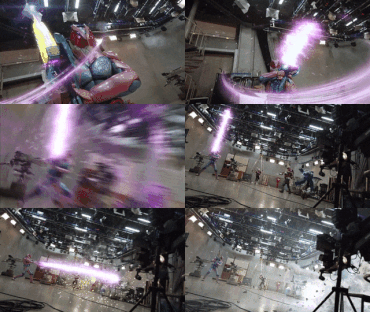
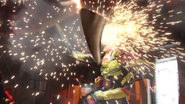
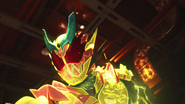
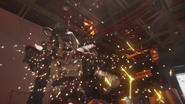
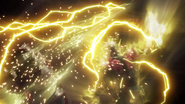
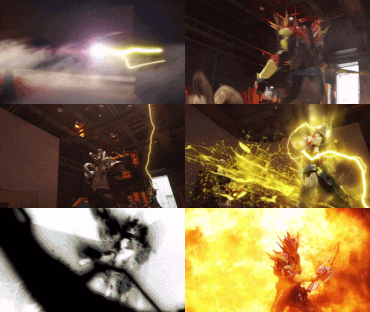
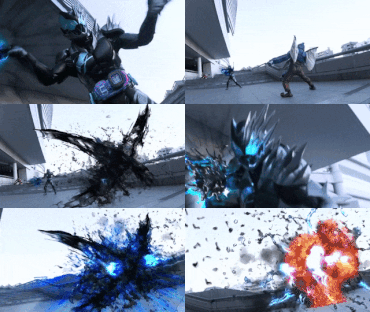
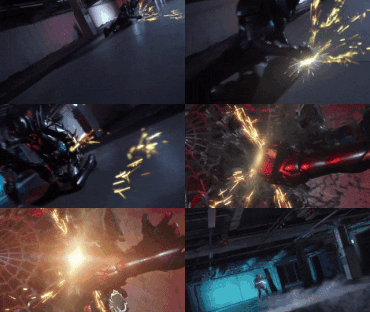
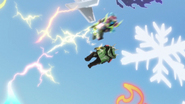
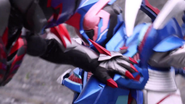
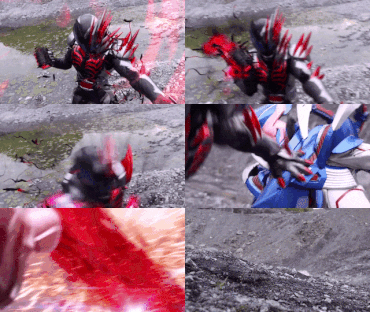
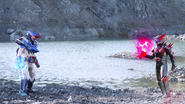
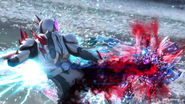
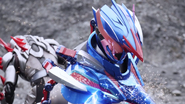
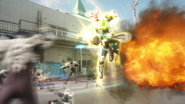
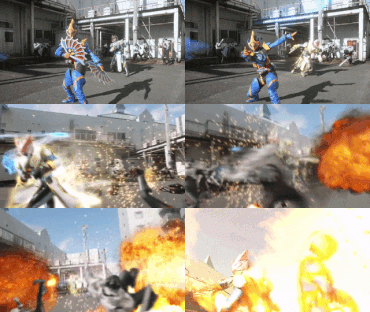
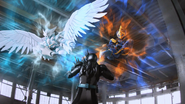
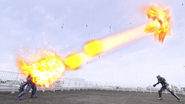
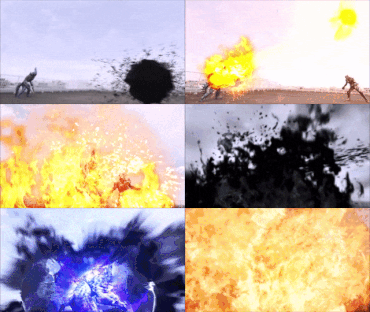
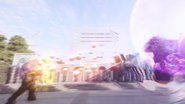
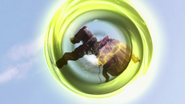
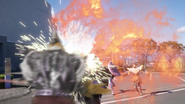
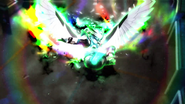
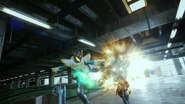
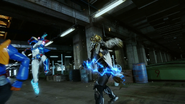
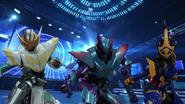
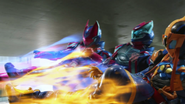
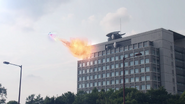
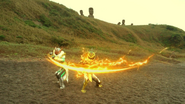
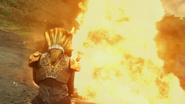
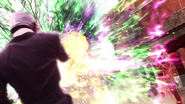
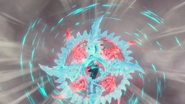
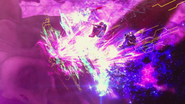
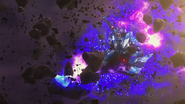
(No finisher announcement was featured for Jackal) |
No edit summary Tag: Source edit |
||
| (267 intermediate revisions by 14 users not shown) | |||
| Line 1: | Line 1: | ||
| + | {{Update|Needs to be updated with recent media (i.e. Juuga vs. Orteca and Revice Forward).}} |
||
| + | {{ArticleRevice|set of finishers}} |
||
<tabber> |
<tabber> |
||
1={{Quote|(Vistamp name) Stamping Finish!|[[Revice Driver]] finisher announcement|Kamen Rider Revice}} |
1={{Quote|(Vistamp name) Stamping Finish!|[[Revice Driver]] finisher announcement|Kamen Rider Revice}} |
||
| Line 12: | Line 14: | ||
6={{Quote|Hissatsu Shonin! (Vistamp name) Darkness Finish!|[[Two Sidriver]] finisher announcement for Kamen Rider Evil|Kamen Rider Revice}} |
6={{Quote|Hissatsu Shonin! (Vistamp name) Darkness Finish!|[[Two Sidriver]] finisher announcement for Kamen Rider Evil|Kamen Rider Revice}} |
||
|-| |
|-| |
||
| − | 7={{Quote|Hissatsu Shonin! (Vistamp name) |
+ | 7={{Quote|Hissatsu Shonin! (Vistamp name) Justis Finish!|[[Two Sidriver]] finisher announcement for Kamen Rider Live|Kamen Rider Revice}} |
|-| |
|-| |
||
8={{Quote|Charge! Demons Finish!|[[Demons Driver]] finisher announcement|Kamen Rider Revice}} |
8={{Quote|Charge! Demons Finish!|[[Demons Driver]] finisher announcement|Kamen Rider Revice}} |
||
|-| |
|-| |
||
| − | 9={{Quote|More! (Vistamp name) Demons |
+ | 9={{Quote|More! (Vistamp name) Demons Requiem!|[[Demons Driver]] Genomix finisher announcement|Kamen Rider Revice}} |
|-| |
|-| |
||
10={{Quote|(Vistamp name) Stamping Smash!|[[Libera Driver]] finisher announcement|Kamen Rider Revice}} |
10={{Quote|(Vistamp name) Stamping Smash!|[[Libera Driver]] finisher announcement|Kamen Rider Revice}} |
||
|-| |
|-| |
||
| − | 11={{Quote|(Vistamp name) Liberal Smash!|[[Libera Driver]] second finisher announcement|Kamen Rider Revice}} |
+ | 11={{Quote|Hissatsu Shonin! (Vistamp name) Liberal Smash!|[[Libera Driver]] second finisher announcement|Kamen Rider Revice}} |
| + | |-| |
||
| + | 12={{Quote|Charge! Vailing Impact!|[[Vail Driver]] standard announcements|Kamen Rider Revice}} |
||
| + | |-| |
||
| + | 13={{Quote|(Vistamp name) Stamping Break!|[[Week Endriver]] finisher announcement|Kamen Rider Revice}} |
||
| + | |-| |
||
| + | 14={{Quote|Hissatsu Shonin! (Vistamp name) Stamping Destroy!|[[Week Endriver]] second finisher announcement|Kamen Rider Revice}} |
||
| + | |-| |
||
| + | 15={{Quote|Charge! Destream Finish!|[[Destream Driver]] finisher announcement|Kamen Rider Revice}} |
||
| + | |-| |
||
| + | 16={{Quote|More! (Vistamp name) Destream Nova!|[[Destream Driver]] Genomix finisher announcement|Kamen Rider Revice}} |
||
| + | |-| |
||
| + | 17={{Quote|Vail Up! Crimson Impact!|Crimson Vail Vistamp first finisher announcement|Kamen Rider Revice}} |
||
| + | |-| |
||
| + | 18={{Quote|Vail Up! Crimson Finish!|Crimson Vail Vistamp second finisher announcement|Kamen Rider Revice}} |
||
| + | |-| |
||
| + | 19={{Quote|Painting Finish!|Crimson Vail Vistamp scanned Vistamp finisher announcement|Kamen Rider Revice}} |
||
| + | |-| |
||
| + | 20={{Quote|Impulse Genome Edge!|[[Juuga Driver]] first finisher announcement|Kamen Rider Revice}} |
||
| + | |-| |
||
| + | 21={{Quote|Crash Genome Edge!|[[Juuga Driver]] second finisher announcement|Kamen Rider Revice}} |
||
| + | |-| |
||
| + | 22={{Quote|Powered Genome Edge!|[[Juuga Driver]] third finisher announcement|Kamen Rider Revice}} |
||
| + | |-| |
||
| + | 23={{Quote|Amazing Finish!|[[Juuga Driver]] fourth finisher announcement|Kamen Rider Revice}} |
||
</tabber> |
</tabber> |
||
==Transformation Devices== |
==Transformation Devices== |
||
| − | {{ |
+ | {{tabber| |
| − | Revice Driver |
+ | Revice Driver| |
| − | {{ |
+ | {{tabber| |
| + | Revice| |
||
| − | Standard= |
||
| − | {{ |
+ | {{tabber| |
| + | Standard| |
||
| − | Rex= |
||
| − | {{ |
+ | {{tabber| |
| − | Rex |
+ | Rex| |
| + | {{tabber| |
||
| − | {{nihongo|'''Rex Stamping Finish'''|レックススタンピングフィニッシュ|Rekkusu Sutanpingu Finisshu}}: This finisher has four variations. |
||
| + | Rex Genome| |
||
| − | {{#tag:tabber| |
||
| + | {{nihongo|'''Rex Stamping Finish'''|レックススタンピングフィニッシュ|Rekkusu Sutanpingu Finisshu}}: This finisher has six variations. |
||
| − | Version 1= |
||
| + | {{tabber| |
||
| + | Version 1| |
||
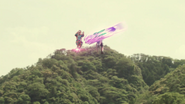
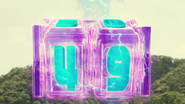
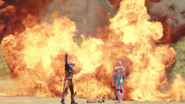
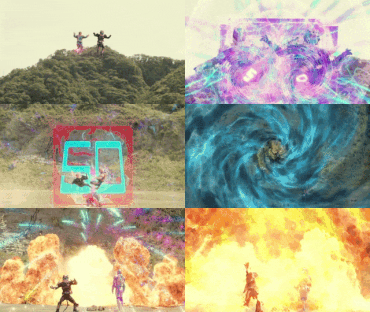
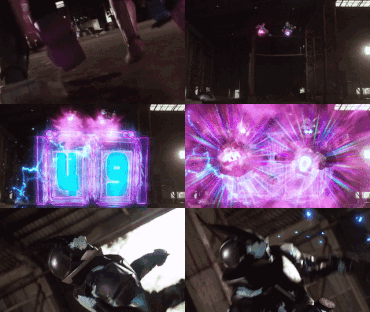
Revi and Vice both leap into the air as a purple energy construct of a numbering stamp with cyan numbers then appears from Revi's foot. Initially displaying the number 48, it changes to 49 and then finally 50 when Revi and Vice pass through the construct while peforming flying kicks surrouded in spiraling purple and cyan energy, with a pink number "5" on the sole of Revi's foot and "0" on the sole of Vice's foot. A large red projection of the Rex Vistamp's seal is created upon impact, which a blue number "50" attaches to. The enemy is then launched backward while leaving behind a vortex of dark blue energy until exploding, creating multicolored fireworks-like sparks before a second explosive wave occurs. |
Revi and Vice both leap into the air as a purple energy construct of a numbering stamp with cyan numbers then appears from Revi's foot. Initially displaying the number 48, it changes to 49 and then finally 50 when Revi and Vice pass through the construct while peforming flying kicks surrouded in spiraling purple and cyan energy, with a pink number "5" on the sole of Revi's foot and "0" on the sole of Vice's foot. A large red projection of the Rex Vistamp's seal is created upon impact, which a blue number "50" attaches to. The enemy is then launched backward while leaving behind a vortex of dark blue energy until exploding, creating multicolored fireworks-like sparks before a second explosive wave occurs. |
||
<gallery> |
<gallery> |
||
| Line 51: | Line 79: | ||
Rex Stamping Finish 1.gif|Rex Stamping Finish (Version 1) |
Rex Stamping Finish 1.gif|Rex Stamping Finish (Version 1) |
||
</gallery> |
</gallery> |
||
| + | |||
| − | {{!}}-{{!}} |
||
| + | | |
||
| − | Version 2= |
||
| + | Version 2| |
||
The Rex Vistamp emblem on Vice's chest glows and produces magenta energy that travels down his body before covering his legs. Revi delivers a kick covered in pink and blue energy to the enemy before performing a second kick covered in the same energy that launches the enemy into the air. Meanwhile, Vice grabs a second enemy's arms and pulls them on top of himself before launching the opponent into the air with a kick covered in pink and blue energy of his own. Revi and Vice then jump into the air along with two large pink energy constructs of the Rex Vistamp. Each of them performs a flying kick into one of the Vistamp constructs and flies downward along with it, which produces a dome of pink and blue energy. The Vistamp constructs collide with the enemies and transform into large red projections of the Rex Vistamp's seal. Then, Revi and Vice each perform a second kick that creates another Rex Vistamp seal and sends the enemy flying back toward the ground. Revi's kick creates a blue energy line while Vice's kick creates a pink energy line. The enemies fall along the energy lines and crash into the ground before exploding. |
The Rex Vistamp emblem on Vice's chest glows and produces magenta energy that travels down his body before covering his legs. Revi delivers a kick covered in pink and blue energy to the enemy before performing a second kick covered in the same energy that launches the enemy into the air. Meanwhile, Vice grabs a second enemy's arms and pulls them on top of himself before launching the opponent into the air with a kick covered in pink and blue energy of his own. Revi and Vice then jump into the air along with two large pink energy constructs of the Rex Vistamp. Each of them performs a flying kick into one of the Vistamp constructs and flies downward along with it, which produces a dome of pink and blue energy. The Vistamp constructs collide with the enemies and transform into large red projections of the Rex Vistamp's seal. Then, Revi and Vice each perform a second kick that creates another Rex Vistamp seal and sends the enemy flying back toward the ground. Revi's kick creates a blue energy line while Vice's kick creates a pink energy line. The enemies fall along the energy lines and crash into the ground before exploding. |
||
<gallery> |
<gallery> |
||
| Line 86: | Line 115: | ||
Rex Stamping Finish.gif|Rex Stamping Finish (Version 2) |
Rex Stamping Finish.gif|Rex Stamping Finish (Version 2) |
||
</gallery> |
</gallery> |
||
| + | |||
| − | {{!}}-{{!}} |
||
| + | | |
||
| − | Version 3= |
||
| + | Version 3| |
||
Revi activates the Rex Stamping Finish alone while falling and performs a flying kick into a pink energy construct of the Rex Vistamp that pierces the enemy's body, leaving a large hole. When Revi performed this finisher, Vice was spinning though the air due to reverting to Rex Genome after flying as Ptera Genome. After Revi's attack breaks through the enemy, the spinning Vice collides with the enemy, destroying them. |
Revi activates the Rex Stamping Finish alone while falling and performs a flying kick into a pink energy construct of the Rex Vistamp that pierces the enemy's body, leaving a large hole. When Revi performed this finisher, Vice was spinning though the air due to reverting to Rex Genome after flying as Ptera Genome. After Revi's attack breaks through the enemy, the spinning Vice collides with the enemy, destroying them. |
||
<gallery> |
<gallery> |
||
| Line 100: | Line 130: | ||
Rex Stamping Finish 2.gif|Rex Stamping Finish (Version 3) |
Rex Stamping Finish 2.gif|Rex Stamping Finish (Version 3) |
||
</gallery> |
</gallery> |
||
| + | |||
| − | {{!}}-{{!}} |
||
| + | | |
||
| − | Version 4= |
||
| + | Version 4| |
||
| − | Revi jumps into the air with his right leg covered in pink energy while a large pink energy construct of the Rex Vistamp appears. He then performs a flying kick into the Vistamp construct, creating a red projection of the Rex Vistamps's seal before the Vistamp and kick are covered in pink and blue energy. |
||
| + | Revi jumps into the air with his right leg covered in pink energy while a large pink energy construct of the Rex Vistamp appears. He then performs a flying kick into the Vistamp construct, creating a red projection of the Rex Vistamps's seal before the attack is surrounded by pink and blue energy. |
||
<gallery> |
<gallery> |
||
Rex Stamping Finish Ver 4 Step 1.png|Rex Stamping Finish (Version 4) (Step 1: Jump) |
Rex Stamping Finish Ver 4 Step 1.png|Rex Stamping Finish (Version 4) (Step 1: Jump) |
||
| Line 108: | Line 139: | ||
Rex Stamping Finish Ver 4 Step 3.png|Rex Stamping Finish (Version 4) (Step 3: Rex Vistamp seal) |
Rex Stamping Finish Ver 4 Step 3.png|Rex Stamping Finish (Version 4) (Step 3: Rex Vistamp seal) |
||
Rex Stamping Finish Ver 4 Step 4.png|Rex Stamping Finish (Version 4) (Step 4: Flying kick with Vistamp seal) |
Rex Stamping Finish Ver 4 Step 4.png|Rex Stamping Finish (Version 4) (Step 4: Flying kick with Vistamp seal) |
||
| + | Rex Stamping Finish 4.gif|Rex Stamping Finish (Version 4) |
||
</gallery> |
</gallery> |
||
| + | |||
| − | {{!}}-{{!}} |
||
| + | | |
||
| − | Version 5= |
||
| + | Version 5| |
||
| − | The Rex Vistamp emblem on Vice's chest glows and produces magenta energy that travels down his body and down his left leg. At the same time, four blue and pink energy strands of DNA flow from the Revice Driver and into Revi's right leg. As a result, the two Riders' legs are covered in magenta energy. They then each deliver a side kick to an enemy against a well, producing a red projection of the Rex Vistamps seal and creating an imprint of the same seal in the wall behind the opponent. Revi and Vice turn away before the enemy explodes. |
||
| + | The Rex Vistamp emblem on Vice's chest glows and produces magenta energy that travels down his body and down his left leg. At the same time, four blue and pink energy strands of DNA flow from the Revice Driver and into Revi's right leg. As a result, the two Riders' legs are covered in magenta energy. They then each deliver a side kick to an enemy against a well, producing a red projection of the Rex Vistamp's seal and creating an imprint of the same seal in the wall behind the opponent. Revi and Vice turn away before the enemy explodes. |
||
<gallery> |
<gallery> |
||
Rex Stamping Finish Ver 5 Step 1.png|Rex Stamping Finish (Version 5) (Step 1: Vice's emblem glowing) |
Rex Stamping Finish Ver 5 Step 1.png|Rex Stamping Finish (Version 5) (Step 1: Vice's emblem glowing) |
||
| Line 119: | Line 152: | ||
Rex Stamping Finish Ver 5 Step 5.png|Rex Stamping Finish (Version 5) (Step 5: Turning away and seal imprinted in wall) |
Rex Stamping Finish Ver 5 Step 5.png|Rex Stamping Finish (Version 5) (Step 5: Turning away and seal imprinted in wall) |
||
Rex Stamping Finish Ver 5 Step 6.png|Rex Stamping Finish (Version 5) (Step 6: Explosion) |
Rex Stamping Finish Ver 5 Step 6.png|Rex Stamping Finish (Version 5) (Step 6: Explosion) |
||
| + | Rex Stamping Finish 5.gif|Rex Stamping Finish (Version 5) |
||
| + | </gallery> |
||
| + | |||
| + | | |
||
| + | Version 6| |
||
| + | Revi and Vice jump into the air as two large pink energy constructs of the Rex Vistamp appear. They each perform a flying kick into one of the Vistamp constructs before the attacks are surrounded by pink and blue energy. After the kicks strike the target, the enemy is launched backward in an explosion. |
||
| + | <gallery> |
||
| + | Rex Stamping Finish Ver 6 Step 1.png|Rex Stamping Finish (Version 6) (Step 1: Jump) |
||
| + | Rex Stamping Finish Ver 6 Step 2.png|Rex Stamping Finish (Version 6) (Step 2: Vistamp constructs) |
||
| + | Rex Stamping Finish Ver 6 Step 3.png|Rex Stamping Finish (Version 6) (Step 3: Flying kicks) |
||
| + | Rex Stamping Finish Ver 6 Step 4.png|Rex Stamping Finish (Version 6) (Step 4: Impact) |
||
| + | Rex Stamping Finish Ver 6 Step 5.png|Rex Stamping Finish (Version 6) (Step 5: Explosion) |
||
| + | Rex Stamping Finish 6.gif|Rex Stamping Finish (Version 6) |
||
| + | </gallery> |
||
| + | |||
| + | | |
||
| + | Version 7| |
||
| + | Revi jumps into the air while flipping sideways, producing a shockwave of teal energy on the ground beneath him. In the process, he passes over the enemy and lands behind them, producing another teal shockwave. Revi's arm is then surrounded by magenta flame-like energy as more magenta energy flows into it. He uses the arm to deliver an uppercut to the opponent, producing a magenta shockwave and causing them to fly into the air while spinning. |
||
| + | <gallery> |
||
| + | Rex Stamping Finish Ver 7 Step 1.png|Rex Stamping Finish (Version 7) (Step 1: Jumping) |
||
| + | Rex Stamping Finish Ver 7 Step 2.png|Rex Stamping Finish (Version 7) (Step 2: Flipping over enemy) |
||
| + | Rex Stamping Finish Ver 7 Step 3.png|Rex Stamping Finish (Version 7) (Step 3: Landing) |
||
| + | Rex Stamping Finish Ver 7 Step 4.png|Rex Stamping Finish (Version 7) (Step 4: Arm covered in energy) |
||
| + | Rex Stamping Finish Ver 7 Step 5.png|Rex Stamping Finish (Version 7) (Step 5: Additional energy flowing into arm) |
||
| + | Rex Stamping Finish Ver 7 Step 6.png|Rex Stamping Finish (Version 7) (Step 6: Performing punch) |
||
| + | Rex Stamping Finish Ver 7 Step 7.png|Rex Stamping Finish (Version 7) (Step 7: Impact) |
||
| + | Rex Stamping Finish Ver 7 Step 8.png|Rex Stamping Finish (Version 7) (Step 8: Enemy launched) |
||
| + | </gallery> |
||
| + | |||
| + | | |
||
| + | Version 8| |
||
| + | Revi jumps into the air while a large magenta energy construct flies in front of him. It then combines with his leg as he performs a flying kick, with his foot covered in magenta energy and surrounded by lines of multicolored energy. The kick produces a magenta shockwave upon impact. |
||
| + | <gallery> |
||
| + | Rex Stamping Finish Ver 8 Step 1.png|Rex Stamping Finish (Version 8) (Step 1: Jumping and Vistamp construct) |
||
| + | Rex Stamping Finish Ver 8 Step 2.png|Rex Stamping Finish (Version 8) (Step 2: Vistamp construct aligning with foot) |
||
| + | Rex Stamping Finish Ver 8 Step 3.png|Rex Stamping Finish (Version 8) (Step 3: Flying kick) |
||
| + | Oomukade Edge vs Rex Stamping Finish.png|Rex Stamping Finish (Version 8) (Step 4: Approaching enemy) |
||
| + | Rex Stamping Finish Ver 8 Step 5.png|Rex Stamping Finish (Version 8) (Step 5: About to strike enemy) |
||
| + | Rex Stamping Finish Ver 8 Step 6.png|Rex Stamping Finish (Version 8) (Step 6: Impact) |
||
</gallery> |
</gallery> |
||
}} |
}} |
||
| + | |||
| − | {{!}}-{{!}} |
||
| + | | |
||
| − | Revice Rex= |
||
| + | Revice Rex| |
||
{{nihongo|'''Rex Stamping Finish'''|レックススタンピングフィニッシュ|Rekkusu Sutanpingu Finisshu}}: Revice Rex leaps into the air and somersaults several times before performing a flying kick covered in pink and blue energy. The kick produces a shockwave and a large projection of the Rex Vistamp's seal upon impact. |
{{nihongo|'''Rex Stamping Finish'''|レックススタンピングフィニッシュ|Rekkusu Sutanpingu Finisshu}}: Revice Rex leaps into the air and somersaults several times before performing a flying kick covered in pink and blue energy. The kick produces a shockwave and a large projection of the Rex Vistamp's seal upon impact. |
||
<gallery> |
<gallery> |
||
| Line 133: | Line 206: | ||
</gallery> |
</gallery> |
||
}} |
}} |
||
| + | |||
| − | {{!}}-{{!}} |
||
| + | | |
||
| − | Eagle= |
||
| + | Eagle| |
||
| − | {{#tag:tabber| |
||
| + | {{tabber| |
||
| − | Eagle Genome= |
||
| + | Eagle Genome| |
||
| − | {{!}}-{{!}} |
||
| + | {{nihongo|'''Eagle Stamping Finish'''|イーグルスタンピングフィニッシュ|Īguru Sutanpingu Finisshu}}: Two large green energy constructs of the Eagle Vistamp appear as Revi and Vice are in the air. They each perform a flying kick into one of the Vistamp constructs, with the resulting attack being surrounded by pink and blue energy as well as producing green shockwaves. Larger versions of the seals on the Vistamp constructs appear upon striking the target before the two Riders pass through the body of the enemy. |
||
| − | Revice Eagle= |
||
| + | <gallery> |
||
| + | Eagle Stamping Finish Step 1.png|Eagle Stamping Finish (Step 1: Revi and Vice in the air) |
||
| + | Eagle Stamping Finish Step 2.png|Eagle Stamping Finish (Step 2: Vistamp constructs) |
||
| + | Eagle Stamping Finish Step 3.png|Eagle Stamping Finish (Step 3: Kicks) |
||
| + | Eagle Stamping Finish Step 4.png|Eagle Stamping Finish (Step 4: Approaching enemy) |
||
| + | Eagle Stamping Finish Step 5.png|Eagle Stamping Finish (Step 5: Seals and impact) |
||
| + | Eagle Stamping Finish Step 6.png|Eagle Stamping Finish (Step 6: Passing through enemy) |
||
| + | Eagle Stamping Finish.gif|Eagle Stamping Finish |
||
| + | </gallery> |
||
| + | |||
| + | | |
||
| + | Revice Eagle| |
||
{{nihongo|'''Eagle Stamping Finish'''|イーグルスタンピングフィニッシュ|Īguru Sutanpingu Finisshu}}: This finisher has two variations. |
{{nihongo|'''Eagle Stamping Finish'''|イーグルスタンピングフィニッシュ|Īguru Sutanpingu Finisshu}}: This finisher has two variations. |
||
*Revice Eagle grabs the enemy by the leg using one of their talons before kicking the opponent into the air. Revice then flies up above the enemy and rams into them while spinning and surrounded by spiraling green and purple energy. Eventually, Revice breaks through the target's body, causing the enemy to explode and leaving behind a large projection of the Eagle Vistamp's seal. |
*Revice Eagle grabs the enemy by the leg using one of their talons before kicking the opponent into the air. Revice then flies up above the enemy and rams into them while spinning and surrounded by spiraling green and purple energy. Eventually, Revice breaks through the target's body, causing the enemy to explode and leaving behind a large projection of the Eagle Vistamp's seal. |
||
| Line 159: | Line 244: | ||
Eagle Stamping Finish Remix Vers 2 Step 4.png|Eagle Stamping Finish (Revice Eagle) (Version 2) (Step 4: Ramming enemies in the air) |
Eagle Stamping Finish Remix Vers 2 Step 4.png|Eagle Stamping Finish (Revice Eagle) (Version 2) (Step 4: Ramming enemies in the air) |
||
Eagle Stamping Finish Remix Vers 2 Step 5.png|Eagle Stamping Finish (Revice Eagle) (Version 2) (Step 5: Continued attacking and surrounded by lightning) |
Eagle Stamping Finish Remix Vers 2 Step 5.png|Eagle Stamping Finish (Revice Eagle) (Version 2) (Step 5: Continued attacking and surrounded by lightning) |
||
| − | Eagle Stamping Finish Remix |
+ | Eagle Stamping Finish Remix 2.gif|Eagle Stamping Finish Remix (Version 2) |
</gallery> |
</gallery> |
||
}} |
}} |
||
| + | |||
| − | {{!}}-{{!}} |
||
| + | | |
||
| − | Mammoth= |
||
| + | Mammoth| |
||
| − | {{#tag:tabber| |
||
| + | {{tabber| |
||
| − | Mammoth Genome= |
||
| + | Mammoth Genome| |
||
| − | {{nihongo|'''Mammoth Stamping Finish'''|マンモススタンピングフィニッシュ|Manmosu Sutanpingu Finisshu}}: Vice charges his Glacier Shields with light red energy while Revi charges his Mammoth Gashers with the same energy. Revi throws the Mammoth Gashers toward the enemy, leaving behind trails of red energy, while Vice strikes the ground with the Glacier Shields, causing twelve large energy copies of the shields to energy from the ground in a semicircle around the enemy. The Mammoth Gashers miss the enemy but then swing back around due to being boomerangs and strike the enemy from behind. The Mammoth Gashers then rebound off of the Glacier Shield projections and continue striking the enemy from multiple angles. Afterward, the Mammoth Gashers return to Revi before the Glacier shields stack above the enemy and crush them. |
||
| + | {{nihongo|'''Mammoth Stamping Finish'''|マンモススタンピングフィニッシュ|Manmosu Sutanpingu Finisshu}}: This finisher has two variations. |
||
| + | *Vice charges his Glacier Shields with light red energy while Revi charges his Mammoth Gashers with the same energy. Revi throws the Mammoth Gashers toward the enemy, leaving behind trails of red energy, while Vice strikes the ground with the Glacier Shields, causing twelve large energy copies of the shields to energy from the ground in a semicircle around the enemy. The Mammoth Gashers miss the enemy but then swing back around due to being boomerangs and strike the enemy from behind. The Mammoth Gashers then rebound off of the Glacier Shield projections and continue striking the enemy from multiple angles. Afterward, the Mammoth Gashers return to Revi before the Glacier shields stack above the enemy and crush them. |
||
| + | *Revi throws both Mammoth Gashers, which simultaneously slash the opponent. As Revi battles the enemy himself, the Mammoth Gashers continue flying around and occasionally slash the target. Revi is soon joined by Vice, who fights alongside him. The two Riders then simultaneously punch the enemy, creating a red shockwave, before the Mammoth Gashers slash the opponent for the final time. |
||
<gallery> |
<gallery> |
||
| − | Mammoth Stamping Finish Step 1.png|Mammoth Stamping Finish (Step 1: Charging weapons) |
+ | Mammoth Stamping Finish Step 1.png|Mammoth Stamping Finish (Version 1) (Step 1: Charging weapons) |
| − | Mammoth Stamping Finish Step 2.png|Mammoth Stamping Finish (Step 2: Revi throwing Mammoth Gashers and Vice striking ground) |
+ | Mammoth Stamping Finish Step 2.png|Mammoth Stamping Finish (Version 1) (Step 2: Revi throwing Mammoth Gashers and Vice striking ground) |
| − | Mammoth Stamping Finish Step 3.png|Mammoth Stamping Finish (Step 3: Energy trails of Mammoth Gashers and Glacier Shields emerging from ground) |
+ | Mammoth Stamping Finish Step 3.png|Mammoth Stamping Finish (Version 1) (Step 3: Energy trails of Mammoth Gashers and Glacier Shields emerging from ground) |
| − | Mammoth Stamping Finish Step 4.png|Mammoth Stamping Finish (Step 4: Mammoth Gashers returning) |
+ | Mammoth Stamping Finish Step 4.png|Mammoth Stamping Finish (Version 1) (Step 4: Mammoth Gashers returning) |
| − | Mammoth Stamping Finish Step 5.png|Mammoth Stamping Finish (Step 5: Mammoth Gashers striking enemy from behind) |
+ | Mammoth Stamping Finish Step 5.png|Mammoth Stamping Finish (Version 1) (Step 5: Mammoth Gashers striking enemy from behind) |
| − | Mammoth Stamping Finish Step 6.png|Mammoth Stamping Finish (Step 6: Mammoth Gashers rebounding off of Glacier Shields) |
+ | Mammoth Stamping Finish Step 6.png|Mammoth Stamping Finish (Version 1) (Step 6: Mammoth Gashers rebounding off of Glacier Shields) |
| − | Mammoth Stamping Finish Step 7.png|Mammoth Stamping Finish (Step 7: Rebounding from behind) |
+ | Mammoth Stamping Finish Step 7.png|Mammoth Stamping Finish (Version 1) (Step 7: Rebounding from behind) |
| − | Mammoth Stamping Finish Step 8.png|Mammoth Stamping Finish (Step 8: Striking enemy again) |
+ | Mammoth Stamping Finish Step 8.png|Mammoth Stamping Finish (Version 1) (Step 8: Striking enemy again) |
| − | Mammoth Stamping Finish Step 9.png|Mammoth Stamping Finish (Step 9: Continued rebounding and attacking enemy) |
+ | Mammoth Stamping Finish Step 9.png|Mammoth Stamping Finish (Version 1) (Step 9: Continued rebounding and attacking enemy) |
| − | Mammoth Stamping Finish Step 10.png|Mammoth Stamping Finish (Step 10: Mammoth Gashers returning to Revi) |
+ | Mammoth Stamping Finish Step 10.png|Mammoth Stamping Finish (Version 1) (Step 10: Mammoth Gashers returning to Revi) |
| − | Mammoth Stamping Finish Step 11.png|Mammoth Stamping Finish (Step 11: Glacier Shields stacked above enemy) |
+ | Mammoth Stamping Finish Step 11.png|Mammoth Stamping Finish (Version 1) (Step 11: Glacier Shields stacked above enemy) |
| − | Mammoth Stamping Finish Step 12.png|Mammoth Stamping Finish (Step 12: Crushing enemy) |
+ | Mammoth Stamping Finish Step 12.png|Mammoth Stamping Finish (Version 1) (Step 12: Crushing enemy) |
| − | Mammoth Stamping Finish Step 13.png|Mammoth Stamping Finish (Step 13: Explosion) |
+ | Mammoth Stamping Finish Step 13.png|Mammoth Stamping Finish (Version 1) (Step 13: Explosion) |
| − | Mammoth Stamping Finish.gif|Mammoth Stamping Finish |
+ | Mammoth Stamping Finish.gif|Mammoth Stamping Finish (Version 1) |
| + | Mammoth Stamping Finish Ver 2 Step 1.png|Mammoth Stamping Finish (Version 2) (Step 1: Throwing Mammoth Gashers) |
||
| + | Mammoth Stamping Finish Ver 2 Step 2.png|Mammoth Stamping Finish (Version 2) (Step 2: Slashing enemy) |
||
| + | Mammoth Stamping Finish Ver 2 Step 3.png|Mammoth Stamping Finish (Version 2) (Step 3: Mammoth Gashers flying around) |
||
| + | Mammoth Stamping Finish Ver 2 Step 4.png|Mammoth Stamping Finish (Version 2) (Step 4: Mammoth Gasher intervening in Revi's fight) |
||
| + | Mammoth Stamping Finish Ver 2 Step 5.png|Mammoth Stamping Finish (Version 2) (Step 5: Mammoth Gasher slashing enemy) |
||
| + | Mammoth Stamping Finish Ver 2 Step 6.png|Mammoth Stamping Finish (Version 2) (Step 6: Revi and Vice fighting) |
||
| + | Mammoth Stamping Finish Ver 2 Step 7.png|Mammoth Stamping Finish (Version 2) (Step 7: About to punch enemy) |
||
| + | Mammoth Stamping Finish Ver 2 Step 8.png|Mammoth Stamping Finish (Version 2) (Step 8: Simultaneous punch) |
||
| + | Mammoth Stamping Finish Ver 2 Step 9.png|Mammoth Stamping Finish (Version 2) (Step 9: Final Mammoth Gasher slash) |
||
| + | Mammoth Stamping Finish 2.gif|Mammoth Stamping Finish (Version 2) |
||
</gallery> |
</gallery> |
||
| + | |||
| − | {{!}}-{{!}} |
||
| + | | |
||
| − | Revice Mammoth= |
||
| + | Revice Mammoth| |
||
}} |
}} |
||
| + | |||
| − | {{!}}-{{!}} |
||
| + | | |
||
| − | Ptera= |
||
| + | Ptera| |
||
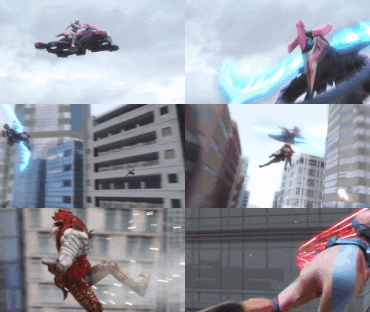
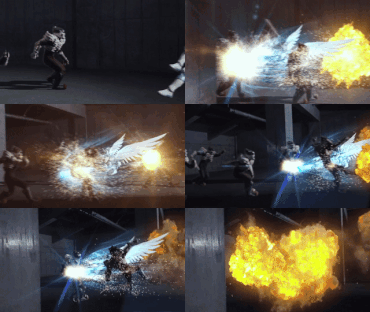
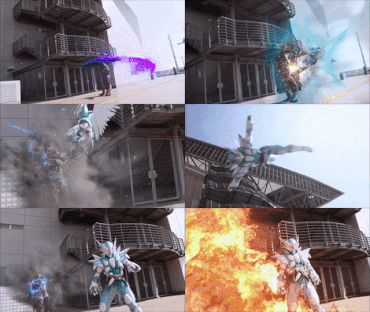
{{nihongo|'''[[Rider Kick|Ptera Stamping Finish]]'''|プテラスタンピングフィニッシュ|Putera Sutanpingu Finisshu}}: Revi jumps off of Vice Ptera Genome before dashing away at high speeds. A red projection of the Ptera Vistamp's seal then appears behind Vice before he generates blue energy blades similar to wings from his sides. Vice uses the energy blades to delivering a flying slash to the target, causing the target to be launched away and crash into a nearby building. Vice then delivers a second flying slash once the target has recovered, then flies behind them before spinning like a top and grinding against the opponent. Revi then appears while running on the side of a building with his accelerator still active before jumping off and kicking the enemy, creating a large multicolored projection of the Ptera Vistamp's seal. |
{{nihongo|'''[[Rider Kick|Ptera Stamping Finish]]'''|プテラスタンピングフィニッシュ|Putera Sutanpingu Finisshu}}: Revi jumps off of Vice Ptera Genome before dashing away at high speeds. A red projection of the Ptera Vistamp's seal then appears behind Vice before he generates blue energy blades similar to wings from his sides. Vice uses the energy blades to delivering a flying slash to the target, causing the target to be launched away and crash into a nearby building. Vice then delivers a second flying slash once the target has recovered, then flies behind them before spinning like a top and grinding against the opponent. Revi then appears while running on the side of a building with his accelerator still active before jumping off and kicking the enemy, creating a large multicolored projection of the Ptera Vistamp's seal. |
||
<gallery> |
<gallery> |
||
| Line 207: | Line 307: | ||
Ptera Stamping Finish.gif|Ptera Stamping Finish |
Ptera Stamping Finish.gif|Ptera Stamping Finish |
||
</gallery> |
</gallery> |
||
| + | |||
| − | {{!}}-{{!}} |
||
| + | | |
||
| − | Megalodon= |
||
| + | Megalodon| |
||
| − | {{#tag:tabber| |
||
| + | {{tabber| |
||
| − | Megalodon Genome= |
||
| + | Megalodon Genome| |
||
{{nihongo|'''Megalodon Stamping Finish'''|メガロドンスタンピングフィニッシュ|Megarodon Sutanpingu Finisshu}}: This finisher has two variations: |
{{nihongo|'''Megalodon Stamping Finish'''|メガロドンスタンピングフィニッシュ|Megarodon Sutanpingu Finisshu}}: This finisher has two variations: |
||
*Revi and Vice perform a series of punches, kicks, and slashes covered in pink energy at high speeds while leaving behind afterimages. |
*Revi and Vice perform a series of punches, kicks, and slashes covered in pink energy at high speeds while leaving behind afterimages. |
||
| Line 226: | Line 327: | ||
Megalodon Stamping Finish Vers 2.gif|Megalodon Stamping Finish (Version 2) |
Megalodon Stamping Finish Vers 2.gif|Megalodon Stamping Finish (Version 2) |
||
</gallery> |
</gallery> |
||
| + | |||
| − | {{!}}-{{!}} |
||
| + | | |
||
| − | Revice Megalodon= |
||
| + | Revice Megalodon| |
||
{{nihongo|'''Megalodon Stamping Finish'''|メガロドンスタンピングフィニッシュ|Megarodon Sutanpingu Finisshu}}: Underwater, Revice Megalodon delivers a tail strike to the opponent, launching them into the air. Revice then jumps out of the water in pursuit and is covered in magenta and purple energy before biting the enemy, resulting in an explosion with blue electricity and a large red projection of the Megalodon Vistamp's seal. |
{{nihongo|'''Megalodon Stamping Finish'''|メガロドンスタンピングフィニッシュ|Megarodon Sutanpingu Finisshu}}: Underwater, Revice Megalodon delivers a tail strike to the opponent, launching them into the air. Revice then jumps out of the water in pursuit and is covered in magenta and purple energy before biting the enemy, resulting in an explosion with blue electricity and a large red projection of the Megalodon Vistamp's seal. |
||
<gallery> |
<gallery> |
||
| Line 241: | Line 343: | ||
</gallery> |
</gallery> |
||
}} |
}} |
||
| + | |||
| − | {{!}}-{{!}} |
||
| + | | |
||
| − | Lion= |
||
| + | Lion| |
||
| − | {{#tag:tabber| |
||
| + | {{tabber| |
||
| − | Lion Genome= |
||
| + | Lion Genome| |
||
| − | {{!}}-{{!}} |
||
| + | |||
| − | Revice Lion= |
||
| + | | |
||
| + | Revice Lion| |
||
{{nihongo|'''Lion Stamping Finish'''|ライオンスタンピングフィニッシュ|Raion Sutanpingu Finisshu}}: This finisher has two variations. |
{{nihongo|'''Lion Stamping Finish'''|ライオンスタンピングフィニッシュ|Raion Sutanpingu Finisshu}}: This finisher has two variations. |
||
*Revice Lion jumps onto an enemy and bites them before jumping back off, flipping, and landing on the opponent again. Revice Lion then scratches the enemy with their hind claws before biting and scratching at the same time. Eventually, the combined Riders jump off of the enemy and land back on the ground. |
*Revice Lion jumps onto an enemy and bites them before jumping back off, flipping, and landing on the opponent again. Revice Lion then scratches the enemy with their hind claws before biting and scratching at the same time. Eventually, the combined Riders jump off of the enemy and land back on the ground. |
||
| Line 259: | Line 363: | ||
Lion Stamping Finish Remix Step 7.png|Lion Stamping Finish (Revice Lion) (Version 1) (Step 7: Biting and scratching simultaneously) |
Lion Stamping Finish Remix Step 7.png|Lion Stamping Finish (Revice Lion) (Version 1) (Step 7: Biting and scratching simultaneously) |
||
Lion Stamping Finish Remix Step 8.png|Lion Stamping Finish (Revice Lion) (Version 1) (Step 8: Jumping off of enemy) |
Lion Stamping Finish Remix Step 8.png|Lion Stamping Finish (Revice Lion) (Version 1) (Step 8: Jumping off of enemy) |
||
| + | Lion Stamping Finish (Revice Lion).gif|Lion Stamping Finish (Revice Lion) |
||
Lion Stamping Finish Remix Vers 2 Step 1.png|Lion Stamping Finish (Revice Lion) (Version 2) (Step 1: Covered in gold energy) |
Lion Stamping Finish Remix Vers 2 Step 1.png|Lion Stamping Finish (Revice Lion) (Version 2) (Step 1: Covered in gold energy) |
||
Lion Stamping Finish Remix Vers 2 Step 2.png|Lion Stamping Finish (Revice Lion) (Version 2) (Step 2: Charging at enemy) |
Lion Stamping Finish Remix Vers 2 Step 2.png|Lion Stamping Finish (Revice Lion) (Version 2) (Step 2: Charging at enemy) |
||
Lion Stamping Finish Remix Vers 2 Step 3.png|Lion Stamping Finish (Revice Lion) (Version 2) (Step 3: Impact) |
Lion Stamping Finish Remix Vers 2 Step 3.png|Lion Stamping Finish (Revice Lion) (Version 2) (Step 3: Impact) |
||
Lion Stamping Finish Remix Vers 2 Step 4.png|Lion Stamping Finish (Revice Lion) (Version 2) (Step 4: Lion Vistamp seal) |
Lion Stamping Finish Remix Vers 2 Step 4.png|Lion Stamping Finish (Revice Lion) (Version 2) (Step 4: Lion Vistamp seal) |
||
| − | Lion Stamping Finish (Revice Lion).gif|Lion Stamping Finish (Revice Lion) |
||
Lion Stamping Finish (Revice Lion) 2.gif|Lion Stamping Finish (Revice Lion) (Version 2) |
Lion Stamping Finish (Revice Lion) 2.gif|Lion Stamping Finish (Revice Lion) (Version 2) |
||
</gallery> |
</gallery> |
||
}} |
}} |
||
| + | |||
| − | {{!}}-{{!}} |
||
| + | | |
||
| − | Jackal= |
||
| + | Jackal| |
||
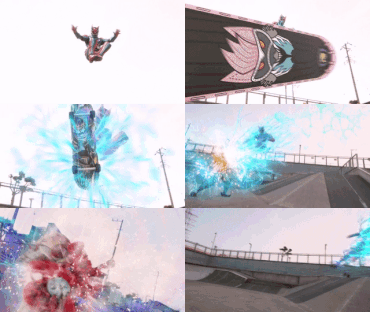
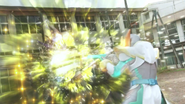
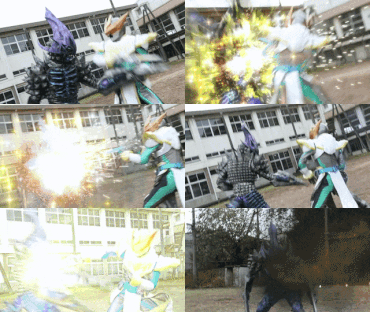
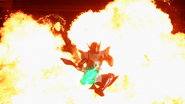
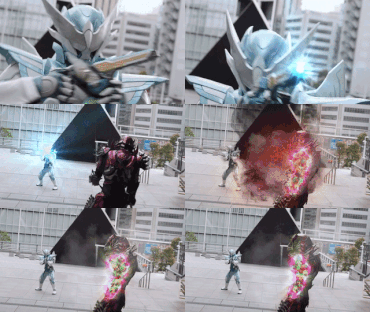
{{nihongo|'''[[Rider Kick|Jackal Stamping Finish]]'''|ジャッカルピングフィニッシュ|Jakkaru Sutanpingu Finisshu}}: Revi jumps into the air and performs a flying kick covered in blue and purple energy. Vice then appears and attaches to Revi's foot, substantially increasing the amount of energy surrounding it. After the kick strikes the opponent, the energy forms into a spiral before Revi breaks past the enemy. |
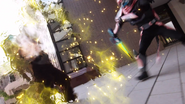
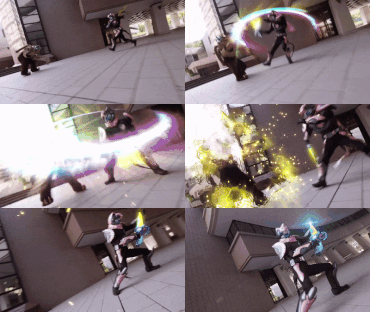
{{nihongo|'''[[Rider Kick|Jackal Stamping Finish]]'''|ジャッカルピングフィニッシュ|Jakkaru Sutanpingu Finisshu}}: Revi jumps into the air and performs a flying kick covered in blue and purple energy. Vice then appears and attaches to Revi's foot, substantially increasing the amount of energy surrounding it. After the kick strikes the opponent, the energy forms into a spiral before Revi breaks past the enemy. |
||
<gallery> |
<gallery> |
||
| Line 279: | Line 384: | ||
Jackal Stamping Finish.gif|Jackal Stamping Finish |
Jackal Stamping Finish.gif|Jackal Stamping Finish |
||
</gallery> |
</gallery> |
||
| + | |||
| − | {{!}}-{{!}} |
||
| + | | |
||
| − | Kong= |
||
| + | Kong| |
||
| − | {{#tag:tabber| |
||
| + | {{tabber| |
||
| − | Kong Genome= |
||
| + | Kong Genome| |
||
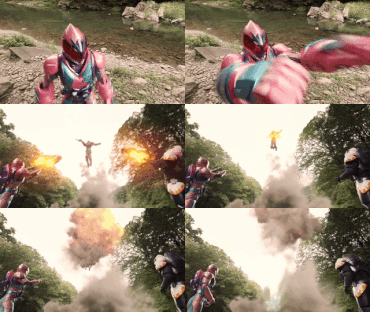
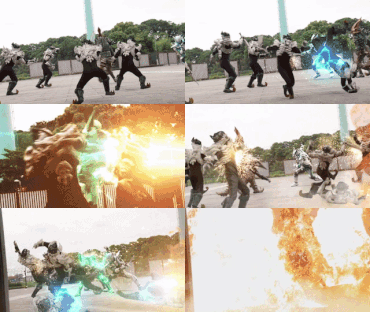
{{nihongo|'''Kong Stamping Finish'''|コングスタンピングフィニッシュ|Kongu Sutanpingu Finisshu}}: Revi and Vice aim their gauntlets at an enemy jumping into the air and fire them. The rocket-propelled gauntlets collide with the opponent before detonating, creating a large explosion and causing the enemy to fall out of the air. |
{{nihongo|'''Kong Stamping Finish'''|コングスタンピングフィニッシュ|Kongu Sutanpingu Finisshu}}: Revi and Vice aim their gauntlets at an enemy jumping into the air and fire them. The rocket-propelled gauntlets collide with the opponent before detonating, creating a large explosion and causing the enemy to fall out of the air. |
||
<gallery> |
<gallery> |
||
| Line 292: | Line 398: | ||
Kong Stamping Finish.gif|Kong Stamping Finish |
Kong Stamping Finish.gif|Kong Stamping Finish |
||
</gallery> |
</gallery> |
||
| + | |||
| − | {{!}}-{{!}} |
||
| + | | |
||
| − | Revice Kong= |
||
| + | Revice Kong| |
||
}} |
}} |
||
| + | |||
| − | {{!}}-{{!}} |
||
| + | | |
||
| − | Kamakiri= |
||
| + | Kamakiri| |
||
| − | {{#tag:tabber| |
||
| + | {{tabber| |
||
| − | Kamakiri Genome= |
||
| + | Kamakiri Genome| |
||
| − | {{!}}-{{!}} |
||
| + | |||
| − | Revice Kamakiri= |
||
| + | | |
||
| + | Revice Kamakiri| |
||
{{nihongo|'''Kamakiri Stamping Finish'''|カマキリスタンピングフィニッシュ|Kamakiri Sutanpingu Finisshu}}: Revice Kamakiri hops a short distance into into the air before delivering two simultaneous blue energy slashes to the target using both arm blades upon landing. Revice peforms two more double slashes, followed by an upward slash that launches the enemy into the air. Revice jumps into the air to meet the opponent and delivers a downward double slash, producing energy of the same color that radiates outward, then finally performs a X-shaped slash that results in an explosion with the Kamakiri Vistamp's seal. |
{{nihongo|'''Kamakiri Stamping Finish'''|カマキリスタンピングフィニッシュ|Kamakiri Sutanpingu Finisshu}}: Revice Kamakiri hops a short distance into into the air before delivering two simultaneous blue energy slashes to the target using both arm blades upon landing. Revice peforms two more double slashes, followed by an upward slash that launches the enemy into the air. Revice jumps into the air to meet the opponent and delivers a downward double slash, producing energy of the same color that radiates outward, then finally performs a X-shaped slash that results in an explosion with the Kamakiri Vistamp's seal. |
||
<gallery> |
<gallery> |
||
| Line 319: | Line 428: | ||
</gallery> |
</gallery> |
||
}} |
}} |
||
| + | |||
| − | {{!}}-{{!}} |
||
| + | | |
||
| − | Brachio= |
||
| + | Brachio| |
||
| − | {{#tag:tabber| |
||
| + | {{tabber| |
||
| − | Brachio Genome= |
||
| + | Brachio Genome| |
||
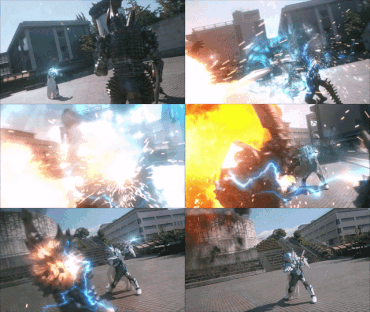
{{nihongo|'''Brachio Stamping Finish'''|ブラキオスタンピングフィニッシュ|Burakio Sutanpingu Finisshu}}: Revi and Vice each cover their right leg with magenta energy and run forward, creating energy shockwaves upon each step. They then both leap into the air and perform flying kicks, with a magenta number "5" on the sole of Revi's foot and a blue "0" on the sole of Vice's foot. A magenta energy construct of a numbering stamp with blue numbers then appears from Revi's foot. Initially displaying the number 48, it changes to 49 and then finally 50 when Revi and Vice pass through the construct, causing both of their flying kicks to be surrounded by additional magenta and blue energy before striking the enemy. |
{{nihongo|'''Brachio Stamping Finish'''|ブラキオスタンピングフィニッシュ|Burakio Sutanpingu Finisshu}}: Revi and Vice each cover their right leg with magenta energy and run forward, creating energy shockwaves upon each step. They then both leap into the air and perform flying kicks, with a magenta number "5" on the sole of Revi's foot and a blue "0" on the sole of Vice's foot. A magenta energy construct of a numbering stamp with blue numbers then appears from Revi's foot. Initially displaying the number 48, it changes to 49 and then finally 50 when Revi and Vice pass through the construct, causing both of their flying kicks to be surrounded by additional magenta and blue energy before striking the enemy. |
||
<gallery> |
<gallery> |
||
| Line 338: | Line 448: | ||
Brachio Stamping Finish.gif|Brachio Stamping Finish |
Brachio Stamping Finish.gif|Brachio Stamping Finish |
||
</gallery> |
</gallery> |
||
| + | |||
| − | {{!}}-{{!}} |
||
| + | | |
||
| − | Revice Brachio= |
||
| + | Revice Brachio| |
||
}} |
}} |
||
| + | |||
| + | | |
||
| + | Neo Batta| |
||
| + | {{tabber| |
||
| + | Neo Batta Genome| |
||
| + | {{nihongo|'''Neo Batta Stamping Finish'''|ネオバッタスタンピングフィニッシュ|Neo Batta Sutanpingu Finisshu}}: This finisher has two variations. |
||
| + | *Lines of magenta and light green energy flow from the legs of Revi and Vice before a magenta energy construct of a grasshopper's leg surrounds Revi's right leg while a light green version of the same energy construct surrounds Vice's right leg. Lines of energy with matching colors are produced from the grasshopper leg constructs while an energy circuitry pattern of the same color appears under each Rider. Revi and Vice then kick off of the ground to launch themselves forward, leaving behind a trail of the same energy lines. Upon reaching the enemy, Revi and Vice perform a series of kicks together while rebounding off of surrounding surfaces, with Revi's kicks producing magenta energy upon impact and Vice's kicks producing yellow energy. |
||
| + | *Revi and Vice leap towards separate enemies while producing lines of light green energy. They then each deliver a flying kick, with Revi's foot covered in magenta energy. |
||
| + | <gallery> |
||
| + | Neo Batta Stamping Finish Step 1.png|Neo Batta Stamping Finish (Version 1) (Step 1: Lines of energy) |
||
| + | Neo Batta Stamping Finish Step 2.png|Neo Batta Stamping Finish (Version 1) (Step 2: Grasshopper leg constructs) |
||
| + | Neo Batta Stamping Finish Step 3.png|Neo Batta Stamping Finish (Version 1) (Step 3: Revi and Vice with grasshopper leg constructs) |
||
| + | Neo Batta Stamping Finish Step 4.png|Neo Batta Stamping Finish (Version 1) (Step 4: Charging) |
||
| + | Neo Batta Stamping Finish Step 5.png|Neo Batta Stamping Finish (Version 1) (Step 5: Energy patterns spreading) |
||
| + | Neo Batta Stamping Finish Step 6.png|Neo Batta Stamping Finish (Version 1) (Step 6: Kicking off of the ground) |
||
| + | Neo Batta Stamping Finish Step 7.png|Neo Batta Stamping Finish (Version 1) (Step 7: Launched through the air) |
||
| + | Neo Batta Stamping Finish Step 8.png|Neo Batta Stamping Finish (Version 1) (Step 8: Revi kicking enemy) |
||
| + | Neo Batta Stamping Finish Step 9.png|Neo Batta Stamping Finish (Version 1) (Step 9: Vice kicking enemy) |
||
| + | Neo Batta Stamping Finish Step 10.png|Neo Batta Stamping Finish (Version 1) (Step 10: More platforms) |
||
| + | Neo Batta Stamping Finish Step 11.png|Neo Batta Stamping Finish (Version 1) (Step 11: Continued kicking) |
||
| + | Neo Batta Stamping Finish Step 12.png|Neo Batta Stamping Finish (Version 1) (Step 12: Combined kicks) |
||
| + | Neo Batta Stamping Finish.gif|Neo Batta Stamping Finish (Version 1) |
||
| + | Neo Batta Stamping Finish Ver 2 Step 1.png|Neo Batta Stamping Finish (Version 2) (Step 1: Leaping towards enemies) |
||
| + | Neo Batta Stamping Finish Ver 2 Step 2.png|Neo Batta Stamping Finish (Version 2) (Step 2: Revi's kick) |
||
| + | Neo Batta Stamping Finish Ver 2 Step 3.png|Neo Batta Stamping Finish (Version 2) (Step 3: Vice's kick) |
||
| + | Neo Batta Stamping Finish Ver 2 Step 4.png|Neo Batta Stamping Finish (Version 2) (Step 4: Impact and caption) |
||
| + | Neo Batta Stamping Finish Ver 2 Step 5.png|Neo Batta Stamping Finish (Version 2) (Step 5: Landing) |
||
| + | Neo Batta Stamping Finish 2.gif|Neo Batta Stamping Finish (Version 2) |
||
| + | </gallery> |
||
| + | |||
| + | | |
||
| + | Revice Neo Batta| |
||
}} |
}} |
||
| + | |||
| − | {{!}}-{{!}} |
||
| + | | |
||
| − | Super= |
||
| + | Kangaroo| |
||
| − | {{#tag:tabber| |
||
| + | {{nihongo|'''Kangaroo Stamping Finish'''|カンガルースタンピングフィニッシュ|Kangarū Sutanpingu Finisshu}}: Vice jumps into the air and delivers a flying kick to an opponent, resulting in a cartoon "Boom!" explosion effect. At the same time, Revi somersaults into the air before a large pink energy construct of the Kangaroo Vistamp appears. Revi performs a flying kick into the Vistamp energy construct, which is surrounded by pink, purple, and cyan energy, and strikes a second opponent. The Vistamp construct then dissipates into the enemy's body while a large red projection of the Kangaroo Vistamp's seal appears, followed by an explosion. After a brief moment, both enemies struck by the two Riders' attacks explode. |
||
| − | Barid Rex= |
||
| + | <gallery> |
||
| − | {{#tag:tabber| |
||
| + | Kangaroo Stamping Finish Step 1.png|Kangaroo Stamping Finish (Step 1: Vice jumping) |
||
| − | Finifini Finish= |
||
| + | Kangaroo Stamping Finish Step 2.png|Kangaroo Stamping Finish (Step 2: Flying kick) |
||
| − | {{nihongo|'''Finifini Finish'''|フィニフィニフィニッシュ|Finifini Finisshu}}: This finisher has two variations. |
||
| + | Kangaroo Stamping Finish Step 3.png|Kangaroo Stamping Finish (Step 3: Revi somersaulting) |
||
| + | Kangaroo Stamping Finish Step 4.png|Kangaroo Stamping Finish (Step 4: Kangaroo Vistamp construct) |
||
| + | Kangaroo Stamping Finish Step 5.png|Kangaroo Stamping Finish (Step 5: Flying kick into Vistamp construct) |
||
| + | Kangaroo Stamping Finish Step 6.png|Kangaroo Stamping Finish (Step 6: Vice's kick striking enemy) |
||
| + | Kangaroo Stamping Finish Step 7.png|Kangaroo Stamping Finish (Step 7: Cartoon explosion effect) |
||
| + | Kangaroo Stamping Finish Step 8.png|Kangaroo Stamping Finish (Step 8: Revi's kick striking enemy) |
||
| + | Kangaroo Stamping Finish Step 9.png|Kangaroo Stamping Finish (Step 9: Vistamp seal) |
||
| + | Kangaroo Stamping Finish Step 10.png|Kangaroo Stamping Finish (Step 10: Explosion) |
||
| + | Kangaroo Stamping Finish Step 11.png|Kangaroo Stamping Finish (Step 11: Damaged enemies) |
||
| + | Kangaroo Stamping Finish Step 12.png|Kangaroo Stamping Finish (Step 12: Enemies exploding) |
||
| + | Kangaroo Stamping Finish.gif|Kangaroo Stamping Finish |
||
| + | </gallery> |
||
| + | }} |
||
| + | |||
| + | | |
||
| + | Super| |
||
| + | {{tabber| |
||
| + | Barid Rex| |
||
| + | {{tabber| |
||
| + | Finifini Finish| |
||
| + | {{nihongo|'''Finifini Finish'''|フィニフィニフィニッシュ|Finifini Finisshu}}: This finisher has four variations. |
||
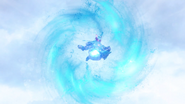
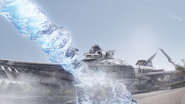
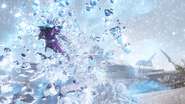
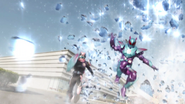
*Clouds gather overhead, blocking out the sun as the temperature rapidly drops before Revi somersaults into the air. A ring of cold blue energy destroys any enemy projectiles in its path while freezing the air behind it, creating a pillar of ice as it goes. When the pillar reaches the opponents, it encases them in a solid block of ice. Revi then performs a flying kick surrounded by swirling light blue energy with an number 5 on the sole of his foot. The kick breaks through the ice pillar, then shatters the ice encasing the opponents, causing the shards to scatter through the air. |
*Clouds gather overhead, blocking out the sun as the temperature rapidly drops before Revi somersaults into the air. A ring of cold blue energy destroys any enemy projectiles in its path while freezing the air behind it, creating a pillar of ice as it goes. When the pillar reaches the opponents, it encases them in a solid block of ice. Revi then performs a flying kick surrounded by swirling light blue energy with an number 5 on the sole of his foot. The kick breaks through the ice pillar, then shatters the ice encasing the opponents, causing the shards to scatter through the air. |
||
*Revi jumps toward the enemy as spinning light blue energy and cold wind surrounds his leg before performing a series four kicks that each create a sparkling blue energy slash. Revi then passes by the enemy and lands behind them. |
*Revi jumps toward the enemy as spinning light blue energy and cold wind surrounds his leg before performing a series four kicks that each create a sparkling blue energy slash. Revi then passes by the enemy and lands behind them. |
||
| + | *Revi produces a stream of cold air from both arms, freezing the target and encasing them in a solid block of ice that then shatters. |
||
| + | *Revi grabs the enemy and directly blasts them with cold air. When the rapidly cooling opponent drops to the ground, they are frozen in place. |
||
<gallery> |
<gallery> |
||
Finifini Finish Step 1.png|Finifini Finish (Version 1) (Step 1: Clouds gathering) |
Finifini Finish Step 1.png|Finifini Finish (Version 1) (Step 1: Clouds gathering) |
||
| Line 367: | Line 533: | ||
Finifini Finish Step 14.png|Finifini Finish (Version 1) (Step 14: Breaking ice around enemies) |
Finifini Finish Step 14.png|Finifini Finish (Version 1) (Step 14: Breaking ice around enemies) |
||
Finifini Finish Step 15.png|Finifini Finish (Version 1) (Step 15: Revi landing) |
Finifini Finish Step 15.png|Finifini Finish (Version 1) (Step 15: Revi landing) |
||
| + | Finifini Finish.gif|Finifini Finish (Version 1) |
||
Finifini Finish Ver 2 Step 1.png|Finifini Finish (Version 2) (Step 1: Jumping) |
Finifini Finish Ver 2 Step 1.png|Finifini Finish (Version 2) (Step 1: Jumping) |
||
Finifini Finish Ver 2 Step 2.png|Finifini Finish (Version 2) (Step 2: Energy surrounding leg) |
Finifini Finish Ver 2 Step 2.png|Finifini Finish (Version 2) (Step 2: Energy surrounding leg) |
||
| Line 375: | Line 542: | ||
Finifini Finish Ver 2 Step 7.png|Finifini Finish (Version 2) (Step 7: Passing by enemy) |
Finifini Finish Ver 2 Step 7.png|Finifini Finish (Version 2) (Step 7: Passing by enemy) |
||
Finifini Finish Ver 2 Step 8.png|Finifini Finish (Version 2) (Step 8: Revi landing) |
Finifini Finish Ver 2 Step 8.png|Finifini Finish (Version 2) (Step 8: Revi landing) |
||
| + | Finifini Finish 2.gif|Finifini Finish (Version 2) |
||
| + | Finifini Finish Ver 3 Step 1.png|Finifini Finish (Version 3) (Step 1: Producing cold air) |
||
| + | Finifini Finish Ver 3 Step 2.png|Finifini Finish (Version 3) (Step 2: Cold air freezing enemy) |
||
| + | Finifini Finish Ver 3 Step 3.png|Finifini Finish (Version 3) (Step 3: Enemy encased in ice) |
||
| + | Finifini Finish Ver 3 Step 4.png|Finifini Finish (Version 3) (Step 4: Ice shattering) |
||
| + | Finifini Finish 3.gif|Finifini Finish (Version 3) |
||
| + | Finifini Finish Ver 4 Step 1.png|Finifini Finish (Version 4) (Step 1: Grabbing enemy) |
||
| + | Finifini Finish Ver 4 Step 2.png|Finifini Finish (Version 4) (Step 2: Blasting with cold air) |
||
| + | Finifini Finish Ver 4 Step 3.png|Finifini Finish (Version 4) (Step 3: Cooling enemy) |
||
| + | Finifini Finish Ver 4 Step 4.png|Finifini Finish (Version 4) (Step 4: Enemy frozen to ground) |
||
| + | Finifini Finish 4.gif|Finifini Finish (Version 4) |
||
</gallery> |
</gallery> |
||
| + | |||
| − | {{!}}-{{!}} |
||
| + | | |
||
| − | Baribari Stamp Fever= |
||
| + | Baribari Stamp Fever| |
||
{{nihongo|'''Baribari Stamp Fever'''|バリバリスタンプフィーバー|Baribari Sutanpu Fībā}}: Revi scans up to ten Vistamps on the Barid Rex Vistamp and summons giant versions of the corresponding Remixes, which can attack individually or combine. |
{{nihongo|'''Baribari Stamp Fever'''|バリバリスタンプフィーバー|Baribari Sutanpu Fībā}}: Revi scans up to ten Vistamps on the Barid Rex Vistamp and summons giant versions of the corresponding Remixes, which can attack individually or combine. |
||
| − | {{ |
+ | {{tabber| |
| − | Brachio |
+ | Brachio| |
A light blue version of the Brachio Vistamp's seal appears from the Revice Driver and enlarges before becoming a block of ice. The ice shatters, revealing a giant version of Revice Brachio. The Remix swipes at enemies with its neck before rearing back and stomping the ground. |
A light blue version of the Brachio Vistamp's seal appears from the Revice Driver and enlarges before becoming a block of ice. The ice shatters, revealing a giant version of Revice Brachio. The Remix swipes at enemies with its neck before rearing back and stomping the ground. |
||
<gallery> |
<gallery> |
||
| Line 391: | Line 570: | ||
Baribari Stamp Fever (Brachio) Step 7.png|Baribari Stamp Fever (Brachio) (Step 7: Rearing back) |
Baribari Stamp Fever (Brachio) Step 7.png|Baribari Stamp Fever (Brachio) (Step 7: Rearing back) |
||
Baribari Stamp Fever (Brachio) Step 8.png|Baribari Stamp Fever (Brachio) (Step 8: Stomping the ground.) |
Baribari Stamp Fever (Brachio) Step 8.png|Baribari Stamp Fever (Brachio) (Step 8: Stomping the ground.) |
||
| + | Baribari Stamp Fever (Brachio).gif|Baribari Stamp Fever (Brachio) |
||
</gallery> |
</gallery> |
||
| + | |||
| − | {{!}}-{{!}} |
||
| + | | |
||
| − | Kong/Kamakiri/Jackal= |
||
| + | Kong/Kamakiri/Jackal| |
||
Light blue versions of the Kong, Kamakiri, and Jackal Vistamps' seals appear above Revi and enlarge before shattering, revealing giant versions of Revice Kong, Revice Kamakiri, and Revice Jackal. Revice Kong becomes a red energy version of itself while Revice Jackal becomes a yellow energy version. The energy Remixes overlap with Revice Kamakiri and the three combine. The combined Remix takes the form of a normal-sized Revice Kamakiri armed with red energy gauntlets resembling Revice Kong's fists and wielding larger energy versions of its own sickles while riding on a yellow energy version of Revice Jackal's skateboard. The Remix engages in several high-speed clashes with the opponent before breaking their guard and punching them, causing the enemy to collapse. As the opponent gets up, the Remix performs simultaneous blue energy slashes using both of its sickles, cutting through the enemy's weapons when they attempt to block the attack. |
Light blue versions of the Kong, Kamakiri, and Jackal Vistamps' seals appear above Revi and enlarge before shattering, revealing giant versions of Revice Kong, Revice Kamakiri, and Revice Jackal. Revice Kong becomes a red energy version of itself while Revice Jackal becomes a yellow energy version. The energy Remixes overlap with Revice Kamakiri and the three combine. The combined Remix takes the form of a normal-sized Revice Kamakiri armed with red energy gauntlets resembling Revice Kong's fists and wielding larger energy versions of its own sickles while riding on a yellow energy version of Revice Jackal's skateboard. The Remix engages in several high-speed clashes with the opponent before breaking their guard and punching them, causing the enemy to collapse. As the opponent gets up, the Remix performs simultaneous blue energy slashes using both of its sickles, cutting through the enemy's weapons when they attempt to block the attack. |
||
<gallery> |
<gallery> |
||
| Line 413: | Line 594: | ||
Baribari Stamp Fever (Kong, Kamakiri, Jackal) Step 16.png|Baribari Stamp Fever (Kong + Kamakiri + Jackal) (Step 16: Cutting enemy's weapons) |
Baribari Stamp Fever (Kong, Kamakiri, Jackal) Step 16.png|Baribari Stamp Fever (Kong + Kamakiri + Jackal) (Step 16: Cutting enemy's weapons) |
||
Baribari Stamp Fever (Kong, Kamakiri, Jackal) Step 17.png|Baribari Stamp Fever (Kong + Kamakiri + Jackal) (Step 17: Weapons cut) |
Baribari Stamp Fever (Kong, Kamakiri, Jackal) Step 17.png|Baribari Stamp Fever (Kong + Kamakiri + Jackal) (Step 17: Weapons cut) |
||
| + | Baribari Stamp Fever (Kong + Kamakiri + Jackal).gif|Baribari Stamp Fever (Kong + Kamakiri + Jackal) |
||
</gallery> |
</gallery> |
||
| + | |||
| − | {{!}}-{{!}} |
||
| + | | |
||
| − | Rex/Ptera/Brachio= |
||
| + | Rex/Ptera/Brachio| |
||
Light blue versions of the Rex, Ptera, and Brachio Vistamps' seals appear from the Revice Driver, protecting Revi from the enemy's attack. The seals enlarge before shattering, revealing giant projections of Revice Rex, Revice Ptera, and Revice Brachio. The Revice Ptera projection turns blue while Revice Brachio becomes orange as the two overlap with Revice Rex. The three Remixes combine, producing Revice Rex with Revice Ptera's photon wings. The combined Remix generates a projection of Revice Brachio's head and neck and uses it to smash the enemy. The Revice Brachio head then hits the enemy upward to launch them into the air. The combined Remix flies up to the enemy and slashes them twice with its wings. With the enemy still in the air, Revi somersaults into the sky and performs a flying kick alongside the Remix. After impact, the kick travels down toward the ground along with the enemy. Eventually the Remix disappears, leaving only Revi as the kick leaves behind a trail of ice. When the enemy strikes the ground underneath Revi, the ground freezes within them before the enemy is encased in a spiked mass of ice. An explosion is produced inside and expands until it shatters the ice. |
Light blue versions of the Rex, Ptera, and Brachio Vistamps' seals appear from the Revice Driver, protecting Revi from the enemy's attack. The seals enlarge before shattering, revealing giant projections of Revice Rex, Revice Ptera, and Revice Brachio. The Revice Ptera projection turns blue while Revice Brachio becomes orange as the two overlap with Revice Rex. The three Remixes combine, producing Revice Rex with Revice Ptera's photon wings. The combined Remix generates a projection of Revice Brachio's head and neck and uses it to smash the enemy. The Revice Brachio head then hits the enemy upward to launch them into the air. The combined Remix flies up to the enemy and slashes them twice with its wings. With the enemy still in the air, Revi somersaults into the sky and performs a flying kick alongside the Remix. After impact, the kick travels down toward the ground along with the enemy. Eventually the Remix disappears, leaving only Revi as the kick leaves behind a trail of ice. When the enemy strikes the ground underneath Revi, the ground freezes within them before the enemy is encased in a spiked mass of ice. An explosion is produced inside and expands until it shatters the ice. |
||
<gallery> |
<gallery> |
||
| Line 441: | Line 624: | ||
Baribari Stamp Fever (Rex, Ptera, Brachio) Step 22.png|Baribari Stamp Fever (Rex + Ptera + Brachio) (Step 22: Explosion forming inside ice) |
Baribari Stamp Fever (Rex, Ptera, Brachio) Step 22.png|Baribari Stamp Fever (Rex + Ptera + Brachio) (Step 22: Explosion forming inside ice) |
||
Baribari Stamp Fever (Rex, Ptera, Brachio) Step 23.png|Baribari Stamp Fever (Rex + Ptera + Brachio) (Step 23: Explosion shattering ice) |
Baribari Stamp Fever (Rex, Ptera, Brachio) Step 23.png|Baribari Stamp Fever (Rex + Ptera + Brachio) (Step 23: Explosion shattering ice) |
||
| + | Baribari Stamp Fever (Rex + Ptera + Brachio).gif|Baribari Stamp Fever (Rex + Ptera + Brachio) |
||
</gallery> |
</gallery> |
||
}} |
}} |
||
| + | |||
| − | {{!}}-{{!}} |
||
| + | | |
||
| − | Max Baribari Stamp Fever= |
||
| + | Max Baribari Stamp Fever| |
||
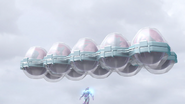
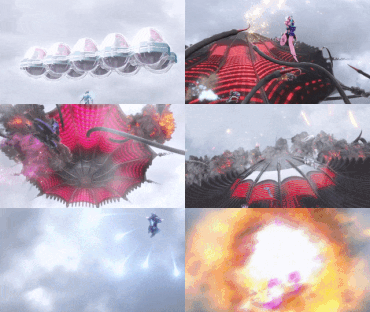
{{nihongo|'''Max Baribari Stamp Fever'''|マックスバリバリスタンプフィーバー|Makkusu Baribari Sutanpu Fībā}}: As Revi hovers in the air, a giant egg carton appears behind him. The carton contains ten pink eggs, with each of them featuring the seal of one of Revice's ten main Vistamps. The carton opens and three eggs fly out before opening to release Revice Rex, Revice Mammoth, and Revice Brachio. Revi lands on Revice Rex and rides it as the three Remixes attack the target. Revice Rex breathes fire, Revice Mammoth breathes ice from its nose, and Revice Brachio attacks with its neck. |
{{nihongo|'''Max Baribari Stamp Fever'''|マックスバリバリスタンプフィーバー|Makkusu Baribari Sutanpu Fībā}}: As Revi hovers in the air, a giant egg carton appears behind him. The carton contains ten pink eggs, with each of them featuring the seal of one of Revice's ten main Vistamps. The carton opens and three eggs fly out before opening to release Revice Rex, Revice Mammoth, and Revice Brachio. Revi lands on Revice Rex and rides it as the three Remixes attack the target. Revice Rex breathes fire, Revice Mammoth breathes ice from its nose, and Revice Brachio attacks with its neck. |
||
| Line 487: | Line 672: | ||
Max Baribari Stamp Fever Step 33.png|Max Baribari Stamp Fever (Step 33: Initial explosion) |
Max Baribari Stamp Fever Step 33.png|Max Baribari Stamp Fever (Step 33: Initial explosion) |
||
Max Baribari Stamp Fever Step 34.png|Max Baribari Stamp Fever (Step 34: Larger explosion) |
Max Baribari Stamp Fever Step 34.png|Max Baribari Stamp Fever (Step 34: Larger explosion) |
||
| + | Max Baribari Stamp Fever.gif|Max Baribari Stamp Fever |
||
</gallery> |
</gallery> |
||
}} |
}} |
||
| + | |||
| − | {{!}}-{{!}} |
||
| + | | |
||
| − | Volcano Rex= |
||
| + | Volcano| |
||
| − | {{#tag:tabber| |
||
| + | {{tabber| |
||
| − | Volcano Festival= |
||
| + | Volcano Festival| |
||
| + | {{nihongo|'''Volcano Festival'''|ボルケーノフェスティバル|Borukēno Fuesutibaru}}: This finisher has three variations. |
||
| + | *Revi and Vice fly into the air, avoiding an enemy's attack in the process. As they fly, Vice uses the Barid Shield to defend Revi from more attacks and separates the shield into flying pieces to provide wider protection. A red projection of the Volcano Vistamp's seal and a light blue projection of the Barid Rex Vistamp's seal appear behind the two Riders before they both deliver flying kicks covered in purple and blue energy. The kicks produce orange and blue energy upon coming into contact with a ranged attack from the enemy. The two Riders then empower themselves, with Revi first covering his body in fire before Vice is surrounded by cold air and shards of ice. Their elemental powers combine to strengthen the kicks, with the surrounding energy becoming multicolored in the process, before breaking through the enemy's projectile. The kicks break through the opponent's body upon impact, producing more multicolored energy before the two Riders land behind the enemy. |
||
| + | *Revi delivers several punches covered in fire, creating a burst of orange energy upon each impact. At the same time, Vice bashes the enemy with the Barid Shield before punching them, with each attack covered in cold air and creating a burst of blue energy upon each impact. For their final attack, Revi and Vice both punch the enemy at each time. |
||
| + | *Revi and Vice jump into the air, with Revi covered in fire while Vice is surrounded by cold air and snowflakes. A red projection of the Volcano Vistamp's seal and a light blue projection of the Barid Rex Vistamp's seal appear behind the two Riders before they both deliver flying kicks covered in purple and blue energy. Their elemental powers combine, resulting in the Riders being surrounded by multicolored energy. The kicks produce blue energy upon impact, and continue creating light blue shockwaves as remain in contact with the enemy. Both Riders then kick the enemy again, creating a ray of of multicolored light that pierces through the opponent's body before the latter explodes. |
||
| + | <gallery> |
||
| + | Volcano Festival Step 1.png|Volcano Festival (Version 1) (Step 1: Avoiding attack) |
||
| + | Volcano Festival Step 2.png|Volcano Festival (Version 1) (Step 2: Flying) |
||
| + | Volcano Festival Step 3.png|Volcano Festival (Version 1) (Step 3: Vice defending Revi) |
||
| + | Volcano Festival Step 4.png|Volcano Festival (Version 1) (Step 4: Barid Shield glowing) |
||
| + | Volcano Festival Step 5.png|Volcano Festival (Version 1) (Step 5: Barid Shield separating) |
||
| + | Volcano Festival Step 6.png|Volcano Festival (Version 1) (Step 6: Separated pieces defending from attacks) |
||
| + | Volcano Festival Step 7.png|Volcano Festival (Version 1) (Step 7: Preparing to kick) |
||
| + | Volcano Festival Step 8.png|Volcano Festival (Version 1) (Step 8: Vistamp seals) |
||
| + | Volcano Festival Step 9.png|Volcano Festival (Version 1) (Step 9: Flying kicks) |
||
| + | Volcano Festival Step 10.png|Volcano Festival (Version 1) (Step 10: Striking enemy ranged attack) |
||
| + | Volcano Festival Step 11.png|Volcano Festival (Version 1) (Step 11: Revi empowering himself) |
||
| + | Volcano Festival Step 12.png|Volcano Festival (Version 1) (Step 12: Vice empowering himself) |
||
| + | Volcano Festival Step 13.png|Volcano Festival (Version 1) (Step 13: Riders surrounded by energy) |
||
| + | Volcano Festival Step 14.png|Volcano Festival (Version 1) (Step 14: Multicolored energy surrounding kicks) |
||
| + | Volcano Festival Step 15.png|Volcano Festival (Version 1) (Step 15: Dispelling enemy attack) |
||
| + | Volcano Festival Step 16.png|Volcano Festival (Version 1) (Step 16: Strengthened kick) |
||
| + | Volcano Festival Step 17.png|Volcano Festival (Version 1) (Step 17: Impact) |
||
| + | Volcano Festival Step 18.png|Volcano Festival (Version 1) (Step 18: Revi and Vice landing) |
||
| + | Volcano Festival Ver 2 Step 1.png|Volcano Festival (Version 2) (Step 1: Barid Shield strike) |
||
| + | Volcano Festival Ver 2 Step 2.png|Volcano Festival (Version 2) (Step 2: Revi's punch) |
||
| + | Volcano Festival Ver 2 Step 3.png|Volcano Festival (Version 2) (Step 3: Preparing for second punch) |
||
| + | Volcano Festival Ver 2 Step 4.png|Volcano Festival (Version 2) (Step 4: Backhand blow) |
||
| + | Volcano Festival Ver 2 Step 5.png|Volcano Festival (Version 2) (Step 5: Vice's punch) |
||
| + | Volcano Festival Ver 2 Step 6.png|Volcano Festival (Version 2) (Step 6: Simultaneous punch) |
||
| + | Volcano Festival 2.gif|Volcano Festival (Version 2) |
||
| + | Volcano Festival Ver 3 Step 1.png|Volcano Festival (Version 3) (Step 1: Jump) |
||
| + | Volcano Festival Ver 3 Step 2.png|Volcano Festival (Version 3) (Step 2: Vistamp seals) |
||
| + | Volcano Festival Ver 3 Step 3.png|Volcano Festival (Version 3) (Step 3: Flying kicks) |
||
| + | Volcano Festival Ver 3 Step 4.png|Volcano Festival (Version 3) (Step 4: Multicolored energy) |
||
| + | Volcano Festival Ver 3 Step 5.png|Volcano Festival (Version 3) (Step 5: Impact) |
||
| + | Volcano Festival Ver 3 Step 6.png|Volcano Festival (Version 3) (Step 6: Continued shockwaves) |
||
| + | Volcano Festival Ver 3 Step 7.png|Volcano Festival (Version 3) (Step 7: Preparing for second kick) |
||
| + | Volcano Festival Ver 3 Step 8.png|Volcano Festival (Version 3) (Step 8: Second kick) |
||
| + | Volcano Festival Ver 3 Step 9.png|Volcano Festival (Version 3) (Step 9: Explosion) |
||
| + | Volcano Festival 3.gif|Volcano Festival (Version 3) |
||
| + | </gallery> |
||
| + | |||
| + | | |
||
| + | Burst Remix| |
||
| + | {{nihongo|'''Burst Remix'''|バーストリミックス|Basuto Rimikkusu}}: A giant purple and yellow egg with a blue version of the Rex Vistamp's seal on it appears from above and crashes into the ground. The egg heats up until it becomes red hot while a red projection of the Volcano Vistamp's seal appears in front of Revi and a cyan projection of the Barid Rex Vistamp's seal appears in front of Vice. The two Riders punch the egg, shattering it to reveal a version of Revice Rex with its head covered in fire and body covered in cold energy. The Remix runs up to an enemy and bites them before flinging them away, creating a large red projection of the Rex Vistamp's seal. |
||
| + | <gallery> |
||
| + | Burst Remix Step 1.png|Burst Remix (Step 1: Egg landing) |
||
| + | Burst Remix Step 2.png|Burst Remix (Step 2: Heating and Vistamp seals) |
||
| + | Burst Remix Step 3.png|Burst Remix (Step 3: Breaking egg) |
||
| + | Burst Remix Step 4.png|Burst Remix (Step 4: Running up to enemy) |
||
| + | Burst Remix Step 5.png|Burst Remix (Step 5: Bit) |
||
| + | Burst Remix Step 6.png|Burst Remix (Step 6: Rex Vistamp seal) |
||
| + | Burst Remix Step 7.png|Burst Remix (Step 7: Enemy falling) |
||
| + | Burst Remix.gif|Burst Remix |
||
| + | </gallery> |
||
}} |
}} |
||
| + | |||
| + | | |
||
| + | Rolling| |
||
| + | {{tabber| |
||
| + | Rolling Stamping Finish| |
||
| + | {{nihongo|'''Rolling Stamping Finish'''|ローリングスタンピングフィニッシュ|Rōringu Sutanpingu Finisshu}}: This finisher has two variations. |
||
| + | {{tabber| |
||
| + | Version 1| |
||
| + | Jack Revice glows blue and produces black paint from under his feet before turning into paint himself and sinking into the liquid. The paint flows forward and surrounds two enemies. Revice resurfaces behind the enemies and delivers a kick covered in blue energy, launching them into the air. He then flies around the opponents by riding on a mass of black and purple paint, forming a vortex of paint that covers the enemies before dispersing. Two energy constructs of the Rolling Vistamp with their rollers adjacent to each other appear in the air and fly into the airborne enemies, crushing them between the rollers and releasing them from the other end. The constructs continue flying forward until they reach Revice, who performs a flying kick surrounded in black paint with purple energy on the sole of his foot. Revice passes through the rollers, launching him at high speeds back toward the enemies. The kick produces light blue shockwaves and dark purple energy upon impact, followed by a red projection of the Rolling Vistamp's seal. Revice then flies past the enemies as they explode. |
||
| + | <gallery> |
||
| + | Rolling Stamping Finish Step 1.png|Rolling Stamping Finish (Version 1) (Step 1: Glowing) |
||
| + | Rolling Stamping Finish Step 2.png|Rolling Stamping Finish (Version 1) (Step 2: Turning into paint) |
||
| + | Rolling Stamping Finish Step 3.png|Rolling Stamping Finish (Version 1) (Step 3: Submerging) |
||
| + | Rolling Stamping Finish Step 4.png|Rolling Stamping Finish (Version 1) (Step 4: Paint surrounding enemies) |
||
| + | Rolling Stamping Finish Step 5.png|Rolling Stamping Finish (Version 1) (Step 5: Resurfacing) |
||
| + | Rolling Stamping Finish Step 6.png|Rolling Stamping Finish (Version 1) (Step 6: Behind enemies) |
||
| + | Rolling Stamping Finish Step 7.png|Rolling Stamping Finish (Version 1) (Step 7: Kick) |
||
| + | Rolling Stamping Finish Step 8.png|Rolling Stamping Finish (Version 1) (Step 8: Enemies launched) |
||
| + | Rolling Stamping Finish Step 9.png|Rolling Stamping Finish (Version 1) (Step 9: Jack Revice riding on paint) |
||
| + | Rolling Stamping Finish Step 10.png|Rolling Stamping Finish (Version 1) (Step 10: Paint vortex) |
||
| + | Rolling Stamping Finish Step 11.png|Rolling Stamping Finish (Version 1) (Step 11: Paint dispersing) |
||
| + | Rolling Stamping Finish Step 12.png|Rolling Stamping Finish (Version 1) (Step 12: Rolling Vistamp constructs) |
||
| + | Rolling Stamping Finish Step 13.png|Rolling Stamping Finish (Version 1) (Step 13: Crushing enemies) |
||
| + | Rolling Stamping Finish Step 14.png|Rolling Stamping Finish (Version 1) (Step 14: Enemies coming out other end) |
||
| + | Rolling Stamping Finish Step 15.png|Rolling Stamping Finish (Version 1) (Step 15: Reaching Jack Revice) |
||
| + | Rolling Stamping Finish Step 16.png|Rolling Stamping Finish (Version 1) (Step 16: Flying kick) |
||
| + | Rolling Stamping Finish Step 17.png|Rolling Stamping Finish (Version 1) (Step 17: Kick approaching rollers) |
||
| + | Rolling Stamping Finish Step 18.png|Rolling Stamping Finish (Version 1) (Step 18: Passing through rollers) |
||
| + | Rolling Stamping Finish Step 19.png|Rolling Stamping Finish (Version 1) (Step 19: Launched) |
||
| + | Rolling Stamping Finish Step 20.png|Rolling Stamping Finish (Version 1) (Step 20: Impact) |
||
| + | Rolling Stamping Finish Step 21.png|Rolling Stamping Finish (Version 1) (Step 21: Shockwaves) |
||
| + | Rolling Stamping Finish Step 22.png|Rolling Stamping Finish (Version 1) (Step 22: Rolling Vistamp seal) |
||
| + | Rolling Stamping Finish Step 23.png|Rolling Stamping Finish (Version 1) (Step 23: Flying past enemies) |
||
| + | Rolling Stamping Finish Step 24.png|Rolling Stamping Finish (Version 1) (Step 24: Explosion) |
||
| + | Rolling Stamping Finish.gif|Rolling Stamping Finish |
||
| + | </gallery> |
||
| + | |||
| + | | |
||
| + | Version 2| |
||
| + | Two energy constructs of the Rolling Vistamp with their rollers adjacent to each other appear in the air before the enemy is enclosed in a spherical cage of purple energy surrounded by black energy. Jack Revice jumps up to the Rolling Vistamp constructs while the enemy is raised into the air. The Vistamp constructs pin Revice between their rollers, launching him toward the enemy at high speeds as he performs a flying kick with his foot covered in purple energy. The kick produces purple and black energy upon striking the enemy and disperses the surrounding energy cage. Revice remains in contact with the enemy as the point of impact glows purple and is surrounded by dark purple energy. He then launches the enemy away with his legs, producing large cyan shockwave with a purple version of the Rolling Vistamp's seal. |
||
| + | <gallery> |
||
| + | Rolling Stamping Finish Ver 2 Step 1.png|Rolling Stamping Finish (Version 2) (Step 1: Rolling Vistamp constructs) |
||
| + | Rolling Stamping Finish Ver 2 Step 2.png|Rolling Stamping Finish (Version 2) (Step 2: Enemy imprisoned and Revice jumping) |
||
| + | Rolling Stamping Finish Ver 2 Step 3.png|Rolling Stamping Finish (Version 2) (Step 3: Enemy raised) |
||
| + | Rolling Stamping Finish Ver 2 Step 4.png|Rolling Stamping Finish (Version 2) (Step 4: Flying kick) |
||
| + | Rolling Stamping Finish Ver 2 Step 5.png|Rolling Stamping Finish (Version 2) (Step 5: Impact) |
||
| + | Rolling Stamping Finish Ver 2 Step 6.png|Rolling Stamping Finish (Version 2) (Step 6: Point of impact glowing) |
||
| + | Rolling Stamping Finish Ver 2 Step 7.png|Rolling Stamping Finish (Version 2) (Step 7: Launching enemy away) |
||
| + | Rolling Stamping Finish 2.gif|Rolling Stamping Finish (Version 2) |
||
| + | </gallery> |
||
}} |
}} |
||
}} |
}} |
||
| + | |||
| − | {{!}}-{{!}} |
||
| + | | |
||
| − | Two Sidriver= |
||
| + | Thunder Gale| |
||
| − | {{#tag:tabber| |
||
| + | {{tabber| |
||
| − | Evil= |
||
| + | Bakubaku Revicetrike| |
||
| − | {{#tag:tabber| |
||
| + | {{nihongo|'''Bakubaku Revicetrike'''|爆爆リバイストライク|Bakubaku Ribaisutoraiku}}: This finisher has five variations. |
||
| − | Bat Genome= |
||
| + | *Revice jumps into the air with their right foot covered in cyan energy before performing a flying kick covered in electricity. While doing so, Revice is surrounded by alternating bands of red and yellow energy, followed by cyan and blue energy. The energy surrounding Revice then transitions into only cyan and purple. The kick creates a blue shockwave while travelling through the air as the energy lines surrounding Revice becomes red, green, and yellow. A lightning bolt then forms in a line between an airborne opponent and Revice, who travels along the lightning's path before striking the target, creating another blue shockwave. Revice continues moving downward along with the enemy until the two crash into the ground in a large lightning strike. |
||
| + | *Revice covers their leg in electricity before performing a side kick that creates a blue shockwave along with lines of purple, red, and green energy upon striking the opponent. The enemy is then covered in electricity before exploding. |
||
| + | *Revice jumps into the air with their right foot covered in cyan energy before performing a flying kick covered in electricity. While doing so, Revice is surrounded by alternating bands of red and yellow energy, followed by cyan and blue energy. The energy surrounding Revice then transitions into only cyan and purple. The kick creates an explosion with blue and yellow electricity upon impact. Revice then reappears behind the enemy, with the Rider's body glowing and covered in electricity. Revice delivers a roundhouse kick covered in electricity to the opponent, pushing them away. As a result, the enemy drags across the ground and leaves tracks in it. |
||
| + | *Revice glows while their foot is covered in cyan energy as well as cyan and yellow electricity. The Rider parries the enemy's attack with a kick, producing bands of red, purple, and cyan energy. Revice then delivers a side kick to the enemy, producing the same energy bands upon impact and shocking the opponent. |
||
| + | *Revice rapidly moves toward the enemy, appearing only as a trail of lightning. They then reappear in front of the opponent while still surrounded by lightning and deliver a punch that generates a shockwave. |
||
| + | <gallery> |
||
| + | Bakubaku Revicetrike Step 1.png|Bakubaku Revicetrike (Version 1) (Step 1: Foot covered in energy) |
||
| + | Bakubaku Revicetrike Step 2.png|Bakubaku Revicetrike (Version 1) (Step 2: Flying kick) |
||
| + | Bakubaku Revicetrike Step 3.png|Bakubaku Revicetrike (Version 1) (Step 3: Cyan and purple energy) |
||
| + | Bakubaku Revicetrike Step 4.png|Bakubaku Revicetrike (Version 1) (Step 4: Shockwave) |
||
| + | Bakubaku Revicetrike Step 5.png|Bakubaku Revicetrike (Version 1) (Step 5: Lightning bolt) |
||
| + | Bakubaku Revicetrike Step 6.png|Bakubaku Revicetrike (Version 1) (Step 6: Travelling along lightning) |
||
| + | Bakubaku Revicetrike Step 7.png|Bakubaku Revicetrike (Version 1) (Step 7: Striking enemy) |
||
| + | Bakubaku Revicetrike Step 8.png|Bakubaku Revicetrike (Version 1) (Step 8: Dropping towards ground) |
||
| + | Bakubaku Revicetrike Step 9.png|Bakubaku Revicetrike (Version 1) (Step 9: Crashing into ground) |
||
| + | Bakubaku Revicetrike.gif|Bakubaku Revicetrike (Version 1) |
||
| + | Bakubaku Revicetrike Ver 2 Step 1.png|Bakubaku Revicetrike (Version 2) (Step 1: Leg covered in electricity) |
||
| + | Bakubaku Revicetrike Ver 2 Step 2.png|Bakubaku Revicetrike (Version 2) (Step 2: Kick impact) |
||
| + | Bakubaku Revicetrike Ver 2 Step 3.png|Bakubaku Revicetrike (Version 2) (Step 3: Lines of energy) |
||
| + | Bakubaku Revicetrike Ver 2 Step 4.png|Bakubaku Revicetrike (Version 2) (Step 4: Enemy covered in electricity) |
||
| + | Bakubaku Revicetrike Ver 2 Step 5.png|Bakubaku Revicetrike (Version 2) (Step 5: Explosion) |
||
| + | Bakubaku Revicetrike 2.gif|Bakubaku Revicetrike (Version 2) |
||
| + | Bakubaku Revicetrike Ver 3 Step 1.png|Bakubaku Revicetrike (Version 3) (Step 1: Foot covered in energy) |
||
| + | Bakubaku Revicetrike Ver 3 Step 2.png|Bakubaku Revicetrike (Version 3) (Step 2: Flying kick) |
||
| + | Bakubaku Revicetrike Ver 3 Step 3.png|Bakubaku Revicetrike (Version 3) (Step 3: Cyan and purple energy) |
||
| + | Bakubaku Revicetrike Ver 3 Step 4.png|Bakubaku Revicetrike (Version 3) (Step 4: Approaching enemy) |
||
| + | Bakubaku Revicetrike Ver 3 Step 5.png|Bakubaku Revicetrike (Version 3) (Step 5: Explosion upon impact) |
||
| + | Bakubaku Revicetrike Ver 3 Step 6.png|Bakubaku Revicetrike (Version 3) (Step 6: Damaged enemy) |
||
| + | Bakubaku Revicetrike Ver 3 Step 7.png|Bakubaku Revicetrike (Version 3) (Step 7: Glowing Revice behind enemy) |
||
| + | Bakubaku Revicetrike Ver 3 Step 8.png|Bakubaku Revicetrike (Version 3) (Step 8: Roundhouse kick) |
||
| + | Bakubaku Revicetrike Ver 3 Step 9.png|Bakubaku Revicetrike (Version 3) (Step 9: Kick striking enemy) |
||
| + | Bakubaku Revicetrike Ver 3 Step 10.png|Bakubaku Revicetrike (Version 3) (Step 10: Enemy pushed back) |
||
| + | Bakubaku Revicetrike Ver 3 Step 11.png|Bakubaku Revicetrike (Version 3) (Step 11: Tracks in ground) |
||
| + | Bakubaku Revicetrike 3.gif|Bakubaku Revicetrike (Version 3) |
||
| + | Bakubaku Revicetrike Ver 4 Step 1.png|Bakubaku Revicetrike (Version 4) (Step 1: Revice glowing and foot covered in energy) |
||
| + | Bakubaku Revicetrike Ver 4 Step 2.png|Bakubaku Revicetrike (Version 4) (Step 2: Foot covered in electricity) |
||
| + | Bakubaku Revicetrike Ver 4 Step 3.png|Bakubaku Revicetrike (Version 4) (Step 3: Parrying attack with kick) |
||
| + | Bakubaku Revicetrike Ver 4 Step 4.png|Bakubaku Revicetrike (Version 4) (Step 4: Preparing for kick) |
||
| + | Bakubaku Revicetrike Ver 4 Step 5.png|Bakubaku Revicetrike (Version 4) (Step 5: Side kick) |
||
| + | Bakubaku Revicetrike Ver 4 Step 6.png|Bakubaku Revicetrike (Version 4) (Step 6: Enemy electrocuted) |
||
| + | Bakubaku Revicetrike 4.gif|Bakubaku Revicetrike (Version 4) |
||
| + | Bakubaku Revicetrike Ver 5 Step 1.png|Bakubaku Revicetrike (Version 5) (Step 1: Approaching enemy as lightning) |
||
| + | Bakubaku Revicetrike Ver 5 Step 2.png|Bakubaku Revicetrike (Version 5) (Step 2: Reappearing) |
||
| + | Bakubaku Revicetrike Ver 5 Step 3.png|Bakubaku Revicetrike (Version 5) (Step 3: Punch impact) |
||
| + | </gallery> |
||
| + | |||
| + | | |
||
| + | Hissatsu Bakufuu Bakurai Stamping Finish| |
||
| + | {{nihongo|'''Hissatsu Bakufuu Bakurai Stamping Finish'''|必殺爆風爆雷スタンピングフィニッシュ|Hissatsu Bakufū Bakurai Sutanpingu Finisshu}}: Revice briefly disappears before reappearing above the enemy while surrounded by yellow electricity and red wind. With the Revicelasher covered in electricity, Revice disappears again while dropping to the ground before delivering a downward slash of yellow electricity to the enemy. The slash causes blue electricity too appear on the opponent while pushing them back. Revice then disappears a third time and dashes forward while delivering a slash of yellow electricity surrounded by red wind, causing blue electricity to appear on the enemy again. |
||
| + | <gallery> |
||
| + | Hissatsu Bakufuu Bakurai Stamping Finish Step 1.png|Hissatsu Bakufuu Bakurai Stamping Finish (Step 1: Appearing above enemy) |
||
| + | Hissatsu Bakufuu Bakurai Stamping Finish Step 2.png|Hissatsu Bakufuu Bakurai Stamping Finish (Step 2: Revicelasher covered in electricity) |
||
| + | Hissatsu Bakufuu Bakurai Stamping Finish Step 3.png|Hissatsu Bakufuu Bakurai Stamping Finish (Step 3: Moving tp the ground) |
||
| + | Hissatsu Bakufuu Bakurai Stamping Finish Step 4.png|Hissatsu Bakufuu Bakurai Stamping Finish (Step 4: Downward slash of electricity) |
||
| + | Hissatsu Bakufuu Bakurai Stamping Finish Step 5.png|Hissatsu Bakufuu Bakurai Stamping Finish (Step 5: Blue electricity on enemy) |
||
| + | Hissatsu Bakufuu Bakurai Stamping Finish Step 6.png|Hissatsu Bakufuu Bakurai Stamping Finish (Step 6: Preparing for second slash) |
||
| + | Hissatsu Bakufuu Bakurai Stamping Finish Step 7.png|Hissatsu Bakufuu Bakurai Stamping Finish (Step 7: Second slash) |
||
| + | Hissatsu Bakufuu Bakurai Stamping Finish Step 8.png|Hissatsu Bakufuu Bakurai Stamping Finish (Step 8: Revice reappearing) |
||
| + | Hissatsu Bakufuu Bakurai Stamping Finish.gif|Hissatsu Bakufuu Bakurai Stamping Finish |
||
| + | </gallery> |
||
| + | }} |
||
| + | |||
| + | | |
||
| + | Giffard Rex| |
||
| + | {{tabber| |
||
| + | Giffard Finish| |
||
| + | {{tabber| |
||
| + | Revi| |
||
| + | {{nihongo|'''Revi Giffard Finish'''|リバイギファードフィニッシュ|Ribai Gifādo Finisshu}}: This finisher has eight variations. |
||
| + | *Revi performs a flying kick with his leg covered in red energy, creating a path of red lightning between him and the enemy. The kick slams the enemy into the ground upon striking them and generates a red magnetic field before the opponent explodes. |
||
| + | *Revi punches the enemy with his fist surrounded by magenta and blue magnetism, producing a magenta magnetic field as well as a magenta and blue shockwave upon impact. |
||
| + | *Revi covers his lower arms in red energy and places his hands on two enemies. This gives a positive magnetic charge before they are additionally surrounded by spiraling red energy. Revi's foot then glows before he delivers a roundhouse kick to both opponents, producing a trail of red energy. After a brief moment, both enemies explode. |
||
| + | *Revi forms a sphere of magenta and blue energy in his hand and throws it, producing a red shockwave. A double helix of magenta and blue energy resembling DNA trails behind the sphere as it flies through the air. The energy sphere strikes an enemy, destroying them and resulting in an explosion. It then continues flying forward and is surrounded by several rings of red and blue energy before striking a second enemy, producing another explosion. |
||
| + | *Revi performs a flying kick with his entire body covered in magenta energy. After striking the enemy, the kick produces a red magnetic field that transitions from horizontal to vertical. Revi is then surrounded by an additional red magnetic field, strengthening the kick and resulting in an explosion. |
||
| + | *Revi performs a series of punches with his forearms covered in magenta energy. Each punch creates half of a red magnetic field upon impact. Revi then performs a final punch that creates a complete magnetic field. |
||
| + | *Revi's body is covered in magenta energy as he is surrounded by a magenta and blue magnetic field. All of the energy transfers to his lower leg before he delivers a roundhouse kick to the enemy, producing several magenta shockwaves upon impact and resulting in an explosion. |
||
| + | *Revi jumps into the air before his lower leg is covered in magenta energy as waves of red energy flow around it. He then performs a flying kick while surrounded by two red rings, producing a red shockwave upon striking the enemy. |
||
| + | <gallery> |
||
| + | Revi Giffard Finish Step 1.png|Revi Giffard Finish (Version 1) (Step 1: Flying kick) |
||
| + | Revi Giffard Finish Step 2.png|Revi Giffard Finish (Version 1) (Step 2: Impact) |
||
| + | Revi Giffard Finish Step 3.png|Revi Giffard Finish (Version 1) (Step 3: Magnetic field and explosion) |
||
| + | Revi Giffard Finish Step 4.png|Revi Giffard Finish (Version 1) (Step 4: Continued explosion) |
||
| + | Revi Giffard Finish.gif|Revi Giffard Finish (Version 1) |
||
| + | Revi Giffard Finish Ver 2 Step 1.png|Revi Giffard Finish (Version 2) (Step 1: Punch) |
||
| + | Revi Giffard Finish Ver 2 Step 2.png|Revi Giffard Finish (Version 2) (Step 2: Impact) |
||
| + | Revi Giffard Finish Ver 3 Step 1.png|Revi Giffard Finish (Version 3) (Step 1: Placing hands on enemy) |
||
| + | Revi Giffard Finish Ver 3 Step 2.png|Revi Giffard Finish (Version 3) (Step 2: Enemies charged with magnetism) |
||
| + | Revi Giffard Finish Ver 3 Step 3.png|Revi Giffard Finish (Version 3) (Step 3: Enemies surrounded by energy) |
||
| + | Revi Giffard Finish Ver 3 Step 4.png|Revi Giffard Finish (Version 3) (Step 4: Revi's foot glowing) |
||
| + | Revi Giffard Finish Ver 3 Step 5.png|Revi Giffard Finish (Version 3) (Step 5: Roundhouse kick) |
||
| + | Revi Giffard Finish Ver 3 Step 6.png|Revi Giffard Finish (Version 3) (Step 6: Enemies damaged) |
||
| + | Revi Giffard Finish Ver 3 Step 7.png|Revi Giffard Finish (Version 3) (Step 7: Explosion) |
||
| + | Revi Giffard Finish 3.gif|Revi Giffard Finish (Version 3) |
||
| + | Revi Giffard Finish Ver 4 Step 1.png|Revi Giffard Finish (Version 4) (Step 1: Forming sphere) |
||
| + | Revi Giffard Finish Ver 4 Step 2.png|Revi Giffard Finish (Version 4) (Step 2: Preparing to throw) |
||
| + | Revi Giffard Finish Ver 4 Step 3.png|Revi Giffard Finish (Version 4) (Step 3: Throwing) |
||
| + | Revi Giffard Finish Ver 4 Step 4.png|Revi Giffard Finish (Version 4) (Step 4: Flying toward enemy) |
||
| + | Revi Giffard Finish Ver 4 Step 5.png|Revi Giffard Finish (Version 4) (Step 5: Impact) |
||
| + | Revi Giffard Finish Ver 4 Step 6.png|Revi Giffard Finish (Version 4) (Step 6: Explosion) |
||
| + | Revi Giffard Finish Ver 4 Step 7.png|Revi Giffard Finish (Version 4) (Step 7: Continuing to fly) |
||
| + | Revi Giffard Finish Ver 4 Step 8.png|Revi Giffard Finish (Version 4) (Step 8: Striking second enemy) |
||
| + | Revi Giffard Finish Ver 4 Step 9.png|Revi Giffard Finish (Version 4) (Step 9: Second explosion) |
||
| + | Revi Giffard Finish 4.gif|Revi Giffard Finish (Version 4) |
||
| + | Revi Giffard Finish Ver 5 Step 1.png|Revi Giffard Finish (Version 5) (Step 1: Flying kick with body covered in energy) |
||
| + | Revi Giffard Finish Ver 5 Step 2.png|Revi Giffard Finish (Version 5) (Step 2: Magnetic field) |
||
| + | Revi Giffard Finish Ver 5 Step 3.png|Revi Giffard Finish (Version 5) (Step 3: Vertical magnetic field) |
||
| + | Revi Giffard Finish Ver 5 Step 4.png|Revi Giffard Finish (Version 5) (Step 4: Revi surrounded by magnetic field) |
||
| + | Revi Giffard Finish Ver 5 Step 5.png|Revi Giffard Finish (Version 5) (Step 5: Explosion) |
||
| + | Revi Giffard Finish Ver 6 Step 1.png|Revi Giffard Finish (Version 6) (Step 1: Forearm covered in energy) |
||
| + | Revi Giffard Finish Ver 6 Step 2.png|Revi Giffard Finish (Version 6) (Step 2: Punch) |
||
| + | Revi Giffard Finish Ver 6 Step 3.png|Revi Giffard Finish (Version 6) (Step 3: Continued punching) |
||
| + | Revi Giffard Finish Ver 6 Step 4.png|Revi Giffard Finish (Version 6) (Step 4: Preparing to perform final punch) |
||
| + | Revi Giffard Finish Ver 6 Step 5.png|Revi Giffard Finish (Version 6) (Step 5: Final punch) |
||
| + | Revi Giffard Finish Ver 7 Step 1.png|Revi Giffard Finish (Version 7) (Step 1: Magnetic field) |
||
| + | Revi Giffard Finish Ver 7 Step 2.png|Revi Giffard Finish (Version 7) (Step 2: Body covered in energy) |
||
| + | Revi Giffard Finish Ver 7 Step 3.png|Revi Giffard Finish (Version 7) (Step 3: Energy flowing to leg) |
||
| + | Revi Giffard Finish Ver 7 Step 4.png|Revi Giffard Finish (Version 7) (Step 4: Leg covered in energy) |
||
| + | Revi Giffard Finish Ver 7 Step 5.png|Revi Giffard Finish (Version 7) (Step 5: Roundhouse kick) |
||
| + | Revi Giffard Finish Ver 7 Step 6.png|Revi Giffard Finish (Version 7) (Step 6: Impact) |
||
| + | Revi Giffard Finish Ver 7 Step 7.png|Revi Giffard Finish (Version 7) (Step 7: Explosion) |
||
| + | Revi Giffard Finish Ver 8 Step 1.png|Revi Giffard Finish (Version 8) (Step 1: Jumping into air) |
||
| + | Revi Giffard Finish Ver 8 Step 2.png|Revi Giffard Finish (Version 8) (Step 2: Leg covered in energy) |
||
| + | Revi Giffard Finish Ver 8 Step 3.png|Revi Giffard Finish (Version 8) (Step 3: Flying kick) |
||
| + | Revi Giffard Finish Ver 8 Step 4.png|Revi Giffard Finish (Version 8) (Step 4: Impact) |
||
| + | </gallery> |
||
| + | |||
| + | | |
||
| + | Vice| |
||
| + | {{nihongo|'''Vice Giffard Finish'''|バイスギファードフィニッシュ|Baisu Gifādo Finisshu}}: This finisher has three variations. |
||
| + | *Vice performs a flying kick with his entire body covered in blue energy, producing a blue shockwave upon impact. After striking the enemy, the kick produces a blue magnetic field that transitions from horizontal to vertical. Vice is then surrounded by an additional blue magnetic field, strengthening the kick and resulting in an explosion. |
||
| + | *Vice's body is covered in cyan energy as he is surrounded by a magenta and blue magnetic field. All of the energy transfers to his lower leg before he delivers a roundhouse kick to the enemy, producing several blue shockwaves upon impact and resulting in an explosion. |
||
| + | *Vice jumps into the air before his lower leg is covered in cyan energy as waves of light blue energy flow around it. He then performs a flying kick while surrounded by two cyan rings, producing a blue shockwave upon striking the enemy. |
||
| + | <gallery> |
||
| + | Vice Giffard Finish Step 1.png|Vice Giffard Finish (Step 1: Flying kick with body covered in energy) |
||
| + | Vice Giffard Finish Step 2.png|Vice Giffard Finish (Step 2: Impact) |
||
| + | Vice Giffard Finish Step 3.png|Vice Giffard Finish (Step 3: Magnetic field) |
||
| + | Vice Giffard Finish Step 4.png|Vice Giffard Finish (Step 4: Vertical magnetic field) |
||
| + | Vice Giffard Finish Step 5.png|Vice Giffard Finish (Step 5: Vice surrounded by magnetic field) |
||
| + | Vice Giffard Finish Step 6.png|Vice Giffard Finish (Step 6: Explosion) |
||
| + | Vice Giffard Finish Ver 2 Step 1.png|Vice Giffard Finish (Version 2) (Step 1: Magnetic field) |
||
| + | Vice Giffard Finish Ver 2 Step 2.png|Vice Giffard Finish (Version 2) (Step 2: Body covered in energy) |
||
| + | Vice Giffard Finish Ver 2 Step 3.png|Vice Giffard Finish (Version 2) (Step 3: Energy flowing to leg) |
||
| + | Vice Giffard Finish Ver 2 Step 4.png|Vice Giffard Finish (Version 2) (Step 4: Leg covered in energy) |
||
| + | Vice Giffard Finish Ver 2 Step 5.png|Vice Giffard Finish (Version 2) (Step 5: Roundhouse kick) |
||
| + | Vice Giffard Finish Ver 2 Step 6.png|Vice Giffard Finish (Version 2) (Step 6: Impact) |
||
| + | Vice Giffard Finish Ver 2 Step 7.png|Vice Giffard Finish (Version 2) (Step 7: Explosion) |
||
| + | Vice Giffard Finish Ver 3 Step 1.png|Vice Giffard Finish (Version 3) (Step 1: Jumping into air) |
||
| + | Vice Giffard Finish Ver 3 Step 2.png|Vice Giffard Finish (Version 3) (Step 2: Leg covered in energy) |
||
| + | Vice Giffard Finish Ver 3 Step 3.png|Vice Giffard Finish (Version 3) (Step 3: Flying kick) |
||
| + | Vice Giffard Finish Ver 3 Step 4.png|Vice Giffard Finish (Version 3) (Step 4: Impact) |
||
| + | </gallery> |
||
| + | |||
| + | | |
||
| + | Revi + Vice| |
||
| + | '''Revi Giffard Finish + Vice Giffard Finish''': This finisher has ten variations. |
||
| + | {{tabber| |
||
| + | Version 1| |
||
| + | Revi's body is covered in red, positively charged energy while Vice is covered in blue, negatively charged energy. The two Riders jump toward the enemy before Vice switches his polarity, causing them to be repelled from each other in opposite directions. Vice then returns to his initial polarity so that they are pulled back toward each other and crash into the enemy, creating a red and blue magnetic field. After landing, the Riders put their hands together as Revi changes his polarity, causing them to be repelled from each other again. Revi then returns to his initial polarity, bringing them back to together. Revi and Vice simultaneously kick the opponent, creating another magnetic field. |
||
| + | <gallery> |
||
| + | Revi Giffard Finish + Vice Giffard Finish Step 1.png|Revi Giffard Finish + Vice Giffard Finish (Version 1) (Step 1: Revi and Vice covered in magnetic energy) |
||
| + | Revi Giffard Finish + Vice Giffard Finish Step 2.png|Revi Giffard Finish + Vice Giffard Finish (Version 1) (Step 2: Jumping toward enemy) |
||
| + | Revi Giffard Finish + Vice Giffard Finish Step 3.png|Revi Giffard Finish + Vice Giffard Finish (Version 1) (Step 3: Vice changing polarity) |
||
| + | Revi Giffard Finish + Vice Giffard Finish Step 4.png|Revi Giffard Finish + Vice Giffard Finish (Version 1) (Step 4: Repelling from each other) |
||
| + | Revi Giffard Finish + Vice Giffard Finish Step 5.png|Revi Giffard Finish + Vice Giffard Finish (Version 1) (Step 5: Magnetic lines) |
||
| + | Revi Giffard Finish + Vice Giffard Finish Step 6.png|Revi Giffard Finish + Vice Giffard Finish (Version 1) (Step 6: Revi pulled back) |
||
| + | Revi Giffard Finish + Vice Giffard Finish Step 7.png|Revi Giffard Finish + Vice Giffard Finish (Version 1) (Step 7: Vice pulled back) |
||
| + | Revi Giffard Finish + Vice Giffard Finish Step 8.png|Revi Giffard Finish + Vice Giffard Finish (Version 1) (Step 8: Riders pulled toward enemy) |
||
| + | Revi Giffard Finish + Vice Giffard Finish Step 9.png|Revi Giffard Finish + Vice Giffard Finish (Version 1) (Step 9: Impact) |
||
| + | Revi Giffard Finish + Vice Giffard Finish Step 10.png|Revi Giffard Finish + Vice Giffard Finish (Version 1) (Step 10: Riders landing) |
||
| + | Revi Giffard Finish + Vice Giffard Finish Step 11.png|Revi Giffard Finish + Vice Giffard Finish (Version 1) (Step 11: Putting hands together) |
||
| + | Revi Giffard Finish + Vice Giffard Finish Step 12.png|Revi Giffard Finish + Vice Giffard Finish (Version 1) (Step 12: Revi changing polarity) |
||
| + | Revi Giffard Finish + Vice Giffard Finish Step 13.png|Revi Giffard Finish + Vice Giffard Finish (Version 1) (Step 13: Repelling from each other) |
||
| + | Revi Giffard Finish + Vice Giffard Finish Step 14.png|Revi Giffard Finish + Vice Giffard Finish (Version 1) (Step 14: Revi returning to positive polarity) |
||
| + | Revi Giffard Finish + Vice Giffard Finish Step 15.png|Revi Giffard Finish + Vice Giffard Finish (Version 1) (Step 15: Pulled toward each other) |
||
| + | Revi Giffard Finish + Vice Giffard Finish Step 16.png|Revi Giffard Finish + Vice Giffard Finish (Version 1) (Step 16: Revi and Vice preparing to kick) |
||
| + | Revi Giffard Finish + Vice Giffard Finish Step 17.png|Revi Giffard Finish + Vice Giffard Finish (Version 1) (Step 17: Impact of kicks) |
||
| + | Revi Giffard Finish + Vice Giffard Finish Step 18.png|Revi Giffard Finish + Vice Giffard Finish (Version 1) (Step 18: Explosion) |
||
| + | Revi Giffard Finish + Vice Giffard Finish.gif|Revi Giffard Finish + Vice Giffard Finish (Version 1) |
||
| + | </gallery> |
||
| + | |||
| + | | |
||
| + | Version 2| |
||
| + | Revi's body is covered in red, positively charged energy while Vice is covered in blue, negatively charged energy. The two Riders jump into the air and spin while covered in their respective energies. They then fly in opposite directions before forming a magnetic pole between them. With Revi and Vice at either end, the pole spins around its center point. This generates strong purple winds that lift the enemy into the air until they are at the center of the pole. The two Riders are then pulled back towards each other as they each perform a flying kick, with Revi's kick covered in red energy and Vice's kick covered in blue energy. The two kicks strike the enemy simultaneously, producing more red and blue energy and causing the opponent to explode. |
||
| + | <gallery> |
||
| + | Revi Giffard Finish + Vice Giffard Finish Ver 2 Step 1.png|Revi Giffard Finish + Vice Giffard Finish (Version 2) (Step 1: Opposite magnetic field) |
||
| + | Revi Giffard Finish + Vice Giffard Finish Ver 2 Step 2.png|Revi Giffard Finish + Vice Giffard Finish (Version 2) (Step 2: Jumping into the air) |
||
| + | Revi Giffard Finish + Vice Giffard Finish Ver 2 Step 3.png|Revi Giffard Finish + Vice Giffard Finish (Version 2) (Step 3: Spinning) |
||
| + | Revi Giffard Finish + Vice Giffard Finish Ver 2 Step 4.png|Revi Giffard Finish + Vice Giffard Finish (Version 2) (Step 4: Flying in opposite directions) |
||
| + | Revi Giffard Finish + Vice Giffard Finish Ver 2 Step 5.png|Revi Giffard Finish + Vice Giffard Finish (Version 2) (Step 5: Magnetic pole between Riders) |
||
| + | Revi Giffard Finish + Vice Giffard Finish Ver 2 Step 6.png|Revi Giffard Finish + Vice Giffard Finish (Version 2) (Step 6: Rotating) |
||
| + | Revi Giffard Finish + Vice Giffard Finish Ver 2 Step 7.png|Revi Giffard Finish + Vice Giffard Finish (Version 2) (Step 7: Revi's foot emanating energy) |
||
| + | Revi Giffard Finish + Vice Giffard Finish Ver 2 Step 8.png|Revi Giffard Finish + Vice Giffard Finish (Version 2) (Step 8: Vice's foot emanating energy) |
||
| + | Revi Giffard Finish + Vice Giffard Finish Ver 2 Step 9.png|Revi Giffard Finish + Vice Giffard Finish (Version 2) (Step 9: On either side of enemy) |
||
| + | Revi Giffard Finish + Vice Giffard Finish Ver 2 Step 10.png|Revi Giffard Finish + Vice Giffard Finish (Version 2) (Step 10: Flying kicks) |
||
| + | Revi Giffard Finish + Vice Giffard Finish Ver 2 Step 11.png|Revi Giffard Finish + Vice Giffard Finish (Version 2) (Step 11: Impact) |
||
| + | Revi Giffard Finish + Vice Giffard Finish Ver 2 Step 12.png|Revi Giffard Finish + Vice Giffard Finish (Version 2) (Step 12: Landing) |
||
| + | Revi Giffard Finish + Vice Giffard Finish 2.gif|Revi Giffard Finish + Vice Giffard Finish (Version 2) |
||
| + | </gallery> |
||
| + | |||
| + | | |
||
| + | Version 3| |
||
| + | Revi and Vice jump into the air and perform flying kicks, with Revi's body covered in red energy and Vice's body covered in blue energy. The Riders leave trails of their respective energies as they cross each other's path to attack separate opponents, creating an X-shaped pattern. The kicks then strike the enemies, producing red and blue shockwaves. |
||
| + | <gallery> |
||
| + | Revi Giffard Finish + Vice Giffard Finish Ver 3 Step 1.png|Revi Giffard Finish + Vice Giffard Finish (Version 3) (Step 1: Jumping into the air) |
||
| + | Revi Giffard Finish + Vice Giffard Finish Ver 3 Step 2.png|Revi Giffard Finish + Vice Giffard Finish (Version 3) (Step 2: Covered in energy) |
||
| + | Revi Giffard Finish + Vice Giffard Finish Ver 3 Step 3.png|Revi Giffard Finish + Vice Giffard Finish (Version 3) (Step 3: Flying kicks) |
||
| + | Revi Giffard Finish + Vice Giffard Finish Ver 3 Step 4.png|Revi Giffard Finish + Vice Giffard Finish (Version 3) (Step 4: Impact) |
||
| + | Revi Giffard Finish + Vice Giffard Finish 3.gif|Revi Giffard Finish + Vice Giffard Finish (Version 3) |
||
| + | </gallery> |
||
| + | |||
| + | | |
||
| + | Version 4| |
||
| + | Revi and Vice somersault into the air while surrounded by energy and electricity, with Revi's colored magenta and Vice's colored blue. They are additionally surrounded by an energy field while somersaulting before both perform flying kicks, with Revi's foot covered in red energy and Vice's foot covered in blue energy. The Riders leave trails of their respective energies as they cross each other's path just before striking the opponent, creating an X-shaped pattern. The kick produce a magenta and blue shockwave upon impact before the enemy explodes. |
||
| + | <gallery> |
||
| + | Revi Giffard Finish + Vice Giffard Finish Ver 4 Step 1.png|Revi Giffard Finish + Vice Giffard Finish (Version 4) (Step 1: Somersaulting) |
||
| + | Revi Giffard Finish + Vice Giffard Finish Ver 4 Step 2.png|Revi Giffard Finish + Vice Giffard Finish (Version 4) (Step 2: Energy field) |
||
| + | Revi Giffard Finish + Vice Giffard Finish Ver 4 Step 3.png|Revi Giffard Finish + Vice Giffard Finish (Version 4) (Step 3: Flying kicks) |
||
| + | Revi Giffard Finish + Vice Giffard Finish Ver 4 Step 4.png|Revi Giffard Finish + Vice Giffard Finish (Version 4) (Step 4: Impact) |
||
| + | Revi Giffard Finish + Vice Giffard Finish Ver 4 Step 5.png|Revi Giffard Finish + Vice Giffard Finish (Version 4) (Step 5: Explosion) |
||
| + | Revi Giffard Finish + Vice Giffard Finish 4.gif|Revi Giffard Finish + Vice Giffard Finish (Version 4) |
||
| + | </gallery> |
||
| + | |||
| + | | |
||
| + | Version 5| |
||
| + | Revi and Vice put their hands together, creating oppositely charged magnetic fields. Revi's body is then covered in red energy while Vice is covered in blue energy. The respective energies flow into the Riders' arms before they each perform a punching maneuver, creating a large, combined magnetic field, with one half colored red and the other half colored blue. Surrounding enemies are then lifted into the air by blue, negatively charged energy as a sphere of red, positively charged sphere energy appears in the middle of the crowd. As a result, the enemies are attracted to the red sphere and are gathered together around it. The sphere of enemies is then contained by a positively charged field. Revi and Vice together create a negatively charged magnetic field, pulling the sphere towards them. The energy surrounding the Rider's arms then switches polarity just as they simultaneously punch the sphere, repelling it and launching it away. The sphere then crashes into the ground and explodes, destroying all of the enemies within |
||
| + | <gallery> |
||
| + | Revi Giffard Finish + Vice Giffard Finish Ver 5 Step 1.png|Revi Giffard Finish + Vice Giffard Finish (Version 5) (Step 1: Putting hands together) |
||
| + | Revi Giffard Finish + Vice Giffard Finish Ver 5 Step 2.png|Revi Giffard Finish + Vice Giffard Finish (Version 5) (Step 2: Riders covered in energy) |
||
| + | Revi Giffard Finish + Vice Giffard Finish Ver 5 Step 3.png|Revi Giffard Finish + Vice Giffard Finish (Version 5) (Step 3: Energy transferring to arms) |
||
| + | Revi Giffard Finish + Vice Giffard Finish Ver 5 Step 4.png|Revi Giffard Finish + Vice Giffard Finish (Version 5) (Step 4: Arms covered in energy) |
||
| + | Revi Giffard Finish + Vice Giffard Finish Ver 5 Step 5.png|Revi Giffard Finish + Vice Giffard Finish (Version 5) (Step 5: Punching maneuver) |
||
| + | Revi Giffard Finish + Vice Giffard Finish Ver 5 Step 6.png|Revi Giffard Finish + Vice Giffard Finish (Version 5) (Step 6: Magnetic field) |
||
| + | Revi Giffard Finish + Vice Giffard Finish Ver 5 Step 7.png|Revi Giffard Finish + Vice Giffard Finish (Version 5) (Step 7: Enemies lifted into the air) |
||
| + | Revi Giffard Finish + Vice Giffard Finish Ver 5 Step 8.png|Revi Giffard Finish + Vice Giffard Finish (Version 5) (Step 8: Enemies pulled towards center) |
||
| + | Revi Giffard Finish + Vice Giffard Finish Ver 5 Step 9.png|Revi Giffard Finish + Vice Giffard Finish (Version 5) (Step 9: Sphere of enemies) |
||
| + | Revi Giffard Finish + Vice Giffard Finish Ver 5 Step 10.png|Revi Giffard Finish + Vice Giffard Finish (Version 5) (Step 10: Positive magentic field forming) |
||
| + | Revi Giffard Finish + Vice Giffard Finish Ver 5 Step 11.png|Revi Giffard Finish + Vice Giffard Finish (Version 5) (Step 11: Magnetic field covering enemies) |
||
| + | Revi Giffard Finish + Vice Giffard Finish Ver 5 Step 12.png|Revi Giffard Finish + Vice Giffard Finish (Version 5) (Step 12: Creating negative magnetic field) |
||
| + | Revi Giffard Finish + Vice Giffard Finish Ver 5 Step 13.png|Revi Giffard Finish + Vice Giffard Finish (Version 5) (Step 13: Sphere pulled toward Riders) |
||
| + | Revi Giffard Finish + Vice Giffard Finish Ver 5 Step 14.png|Revi Giffard Finish + Vice Giffard Finish (Version 5) (Step 14: Punching with same polarity) |
||
| + | Revi Giffard Finish + Vice Giffard Finish Ver 5 Step 15.png|Revi Giffard Finish + Vice Giffard Finish (Version 5) (Step 15: Sphere crashing) |
||
| + | Revi Giffard Finish + Vice Giffard Finish Ver 5 Step 16.png|Revi Giffard Finish + Vice Giffard Finish (Version 5) (Step 16: Explosion) |
||
| + | Revi Giffard Finish + Vice Giffard Finish 5.gif|Revi Giffard Finish + Vice Giffard Finish (Version 5) |
||
| + | </gallery> |
||
| + | |||
| + | | |
||
| + | Version 6| |
||
| + | Revi and Vice somersault into the air. Revi is covered in red energy and Vice is covered in blue energy as magnetic fields of the same colors surround the Riders. The respective energies flow into the Riders' feet before they both perform flying kicks. The Riders' kicks are surrounded by additional energy as each of the two opponents are surrounded by energy with the opposite polarity as the Rider targeting them. The kicks strike the opponents, creating the corresponding magnetic fields upon impact. Each enemy is then covered in more and more energy with the polarity of the kick that struck them. A combined magnetic field forms between the two enemies as a result before both explode. |
||
| + | <gallery> |
||
| + | Revi Giffard Finish + Vice Giffard Finish Ver 6 Step 1.png|Revi Giffard Finish + Vice Giffard Finish (Version 6) (Step 1: Somersaulting) |
||
| + | Revi Giffard Finish + Vice Giffard Finish Ver 6 Step 2.png|Revi Giffard Finish + Vice Giffard Finish (Version 6) (Step 2: Riders covered in energy) |
||
| + | Revi Giffard Finish + Vice Giffard Finish Ver 6 Step 3.png|Revi Giffard Finish + Vice Giffard Finish (Version 6) (Step 3: Magnetic fields) |
||
| + | Revi Giffard Finish + Vice Giffard Finish Ver 6 Step 4.png|Revi Giffard Finish + Vice Giffard Finish (Version 6) (Step 4: Energy transferring to feet) |
||
| + | Revi Giffard Finish + Vice Giffard Finish Ver 6 Step 5.png|Revi Giffard Finish + Vice Giffard Finish (Version 6) (Step 5: Flying kicks) |
||
| + | Revi Giffard Finish + Vice Giffard Finish Ver 6 Step 6.png|Revi Giffard Finish + Vice Giffard Finish (Version 6) (Step 6: Impact) |
||
| + | Revi Giffard Finish + Vice Giffard Finish Ver 6 Step 7.png|Revi Giffard Finish + Vice Giffard Finish (Version 6) (Step 7: Aftermath of kicks) |
||
| + | Revi Giffard Finish + Vice Giffard Finish Ver 6 Step 8.png|Revi Giffard Finish + Vice Giffard Finish (Version 6) (Step 8: Enemies covered in magnetic energy) |
||
| + | Revi Giffard Finish + Vice Giffard Finish Ver 6 Step 9.png|Revi Giffard Finish + Vice Giffard Finish (Version 6) (Step 9: Magnetic field between enemies) |
||
| + | Revi Giffard Finish + Vice Giffard Finish Ver 6 Step 10.png|Revi Giffard Finish + Vice Giffard Finish (Version 6) (Step 10: Explosion) |
||
| + | Revi Giffard Finish + Vice Giffard Finish 6.gif|Revi Giffard Finish + Vice Giffard Finish (Version 6) |
||
| + | </gallery> |
||
| + | |||
| + | | |
||
| + | Version 7| |
||
| + | Revi's arm is covered in red energy while Vice's arm is covered with blue energy. The Riders simultaneously perform punches, creating oppositely charged magnetic fields. Revi and Vice fly forward through the air as they punch, creating a sonic boom in front of them as they are surrounded by additional magenta, purple, cyan, and blue energy. |
||
| + | <gallery> |
||
| + | Revi Giffard Finish + Vice Giffard Finish Ver 7 Step 1.png|Revi Giffard Finish + Vice Giffard Finish (Version 7) (Step 1: Arms covered in energy) |
||
| + | Revi Giffard Finish + Vice Giffard Finish Ver 7 Step 2.png|Revi Giffard Finish + Vice Giffard Finish (Version 7) (Step 2: Punches) |
||
| + | Revi Giffard Finish + Vice Giffard Finish Ver 7 Step 3.png|Revi Giffard Finish + Vice Giffard Finish (Version 7) (Step 3: Flying through air) |
||
| + | Revi Giffard Finish + Vice Giffard Finish Ver 7 Step 4.png|Revi Giffard Finish + Vice Giffard Finish (Version 7) (Step 4: Sonic boom dissipating) |
||
| + | Revi Giffard Finish + Vice Giffard Finish 7.gif|Revi Giffard Finish + Vice Giffard Finish (Version 7) |
||
| + | </gallery> |
||
| + | |||
| + | | |
||
| + | Version 8| |
||
| + | Revi and Vice jump into the air, with Revi's lower leg covered in red energy and Vice's lower leg covered in blue energy. They each perform a flying kick and together pass through a large energy projectile while remaining unharmed. While doing so, several rings of alternating red and blue energy appear in a line in front of them. The opponent is surrounded by the rings as well as cyan lightning. After the projectile dissipates, the Riders pass through the rings of energy before kicking the enemy and flying past them. |
||
| + | <gallery> |
||
| + | Revi Giffard Finish + Vice Giffard Finish Ver 8 Step 1.png|Revi Giffard Finish + Vice Giffard Finish (Version 8) (Step 1: Jumping with legs covered in energy) |
||
| + | Revi Giffard Finish + Vice Giffard Finish Ver 8 Step 2.png|Revi Giffard Finish + Vice Giffard Finish (Version 8) (Step 2: Approaching projectile) |
||
| + | Revi Giffard Finish + Vice Giffard Finish Ver 8 Step 3.png|Revi Giffard Finish + Vice Giffard Finish (Version 8) (Step 3: Passing through projectile) |
||
| + | Revi Giffard Finish + Vice Giffard Finish Ver 8 Step 4.png|Revi Giffard Finish + Vice Giffard Finish (Version 8) (Step 4: Rings of energy) |
||
| + | Revi Giffard Finish + Vice Giffard Finish Ver 8 Step 5.png|Revi Giffard Finish + Vice Giffard Finish (Version 8) (Step 5: Rings and lightning surrounding enemy) |
||
| + | Revi Giffard Finish + Vice Giffard Finish Ver 8 Step 6.png|Revi Giffard Finish + Vice Giffard Finish (Version 8) (Step 6: About to kick enemy) |
||
| + | Revi Giffard Finish + Vice Giffard Finish Ver 8 Step 7.png|Revi Giffard Finish + Vice Giffard Finish (Version 8) (Step 7: Kicking and flying past enemy) |
||
| + | Revi Giffard Finish + Vice Giffard Finish Ver 8 Step 8.png|Revi Giffard Finish + Vice Giffard Finish (Version 8) (Step 8: Aftermath of kicks) |
||
| + | Revi Giffard Finish + Vice Giffard Finish 8.gif|Revi Giffard Finish + Vice Giffard Finish (Version 8) |
||
| + | </gallery> |
||
| + | |||
| + | | |
||
| + | Version 9| |
||
| + | Red energy constructs of the Rex, Megalodon, Lion, Kong, and Brachio Vistamps appear from Revi's Revice Driver and line up on the underside of his forearm before transforming into five T-Rex fangs. Meanwhile, blue energy cosntructs of the Eagle, Mammoth, Ptera, Jackal, Kamakiri appear from Vice's Revice Driver and do the same, forming five blue energy fangs. The fangs on Revi's arm then transform into a red energy construct of the Giffard Rex Vistamp's Side N as the fangs on Vice's arm transform into a blue energy construct of Side S, followed by both constructs flying away. In their place, Revi's arm produces a red magentic field and Vice's arm produces a blue magnetic field, with the fields overlapping and trapping a group of enemies within. Both sides of the Giffard Rex Vistamp construct then enlarge before crushing the enemies between them, resulting in an explosion. |
||
| + | <gallery> |
||
| + | Revi Giffard Finish + Vice Giffard Finish Ver 9 Step 1.png|Revi Giffard Finish + Vice Giffard Finish (Version 9) (Step 1: Red energy Vistamp constructs) |
||
| + | Revi Giffard Finish + Vice Giffard Finish Ver 9 Step 2.png|Revi Giffard Finish + Vice Giffard Finish (Version 9) (Step 2: Lining up on Revi's arm) |
||
| + | Revi Giffard Finish + Vice Giffard Finish Ver 9 Step 3.png|Revi Giffard Finish + Vice Giffard Finish (Version 9) (Step 3: Transforming into fangs) |
||
| + | Revi Giffard Finish + Vice Giffard Finish Ver 9 Step 4.png|Revi Giffard Finish + Vice Giffard Finish (Version 9) (Step 4: Vistamp constructs appearing from Vice's Revice Driver) |
||
| + | Revi Giffard Finish + Vice Giffard Finish Ver 9 Step 5.png|Revi Giffard Finish + Vice Giffard Finish (Version 9) (Step 5: Blue energy Vistamp constructs) |
||
| + | Revi Giffard Finish + Vice Giffard Finish Ver 9 Step 6.png|Revi Giffard Finish + Vice Giffard Finish (Version 9) (Step 6: Lining up on Vice's arm) |
||
| + | Revi Giffard Finish + Vice Giffard Finish Ver 9 Step 7.png|Revi Giffard Finish + Vice Giffard Finish (Version 9) (Step 7: Transforming into fangs) |
||
| + | Revi Giffard Finish + Vice Giffard Finish Ver 9 Step 8.png|Revi Giffard Finish + Vice Giffard Finish (Version 9) (Step 8: Both Riders with fangs on arms) |
||
| + | Revi Giffard Finish + Vice Giffard Finish Ver 9 Step 9.png|Revi Giffard Finish + Vice Giffard Finish (Version 9) (Step 9: Fangs transforming into sides of Giffard Rex Vistamp) |
||
| + | Revi Giffard Finish + Vice Giffard Finish Ver 9 Step 10.png|Revi Giffard Finish + Vice Giffard Finish (Version 9) (Step 10: Magnetic fields) |
||
| + | Revi Giffard Finish + Vice Giffard Finish Ver 9 Step 11.png|Revi Giffard Finish + Vice Giffard Finish (Version 9) (Step 11: Sides enlarging) |
||
| + | Revi Giffard Finish + Vice Giffard Finish Ver 9 Step 12.png|Revi Giffard Finish + Vice Giffard Finish (Version 9) (Step 12: Crushing enemies) |
||
| + | Revi Giffard Finish + Vice Giffard Finish Ver 9 Step 13.png|Revi Giffard Finish + Vice Giffard Finish (Version 9) (Step 13: Explosion) |
||
| + | Revi Giffard Finish + Vice Giffard Finish 9.gif|Revi Giffard Finish + Vice Giffard Finish (Version 9) |
||
| + | </gallery> |
||
| + | |||
| + | | |
||
| + | Version 10| |
||
| + | Revi and Vice jump into the air, with Revi's lower leg covered in magenta energy and Vice's leg covered in cyan energy, before each Rider performs a flying kick. Revi's kick produces red energy rings while Vice's kick produces blue rings. The two Riders are then surrounded by alternating waves of red and blue energy before striking opponent. More waves of red and blue energy as well as cyan lightning are created upon impact until Revi and Vice kick the opponent a second time, breaking past them. |
||
| + | <gallery> |
||
| + | Revi Giffard Finish + Vice Giffard Finish Ver 10 Step 1.png|Revi Giffard Finish + Vice Giffard Finish (Version 10) (Step 1: Legs covered in energy) |
||
| + | Revi Giffard Finish + Vice Giffard Finish Ver 10 Step 2.png|Revi Giffard Finish + Vice Giffard Finish (Version 10) (Step 2: Flying kicks) |
||
| + | Revi Giffard Finish + Vice Giffard Finish Ver 10 Step 3.png|Revi Giffard Finish + Vice Giffard Finish (Version 10) (Step 3: Surrounded by waves of red and blue energy) |
||
| + | Revi Giffard Finish + Vice Giffard Finish Ver 10 Step 4.png|Revi Giffard Finish + Vice Giffard Finish (Version 10) (Step 4: Impact) |
||
| + | Revi Giffard Finish + Vice Giffard Finish Ver 10 Step 5.png|Revi Giffard Finish + Vice Giffard Finish (Version 10) (Step 5: Continued contact) |
||
| + | Revi Giffard Finish + Vice Giffard Finish Ver 10 Step 6.png|Revi Giffard Finish + Vice Giffard Finish (Version 10) (Step 6: Preparing to perform second kick) |
||
| + | Revi Giffard Finish + Vice Giffard Finish Ver 10 Step 7.png|Revi Giffard Finish + Vice Giffard Finish (Version 10) (Step 7: Second kick breaking past enemy) |
||
| + | Revi Giffard Finish + Vice Giffard Finish 10.gif|Revi Giffard Finish + Vice Giffard Finish (Version 10) |
||
| + | </gallery> |
||
| + | |||
| + | | |
||
| + | Version 11| |
||
| + | Revi and Vice jump into the air before spinning vertically while covered in energy and surrounded by electricity of the same color. Revi's energy and electricity are red while Vice's are blue. This spinning produces purple wind as the opponent is lifted into the air via magnetism. The two Riders' opposite polarities cause them to fly in opposite directions as a magnetic field is formed between them along with a red and blue band of energy. The Riders are then pulled back toward one another and deliver a flying kick to each side of the opponent, producing more energy and electricity in their respective colors. |
||
| + | <gallery> |
||
| + | Revi Giffard Finish + Vice Giffard Finish Ver 11 Step 1.png|Revi Giffard Finish + Vice Giffard Finish (Version 11) (Step 1: Riders covered in electricity) |
||
| + | Revi Giffard Finish + Vice Giffard Finish Ver 11 Step 2.png|Revi Giffard Finish + Vice Giffard Finish (Version 11) (Step 2: Spinning) |
||
| + | Revi Giffard Finish + Vice Giffard Finish Ver 11 Step 3.png|Revi Giffard Finish + Vice Giffard Finish (Version 11) (Step 3: Lifting enemy) |
||
| + | Revi Giffard Finish + Vice Giffard Finish Ver 11 Step 4.png|Revi Giffard Finish + Vice Giffard Finish (Version 11) (Step 4: Riders repelled from each other) |
||
| + | Revi Giffard Finish + Vice Giffard Finish Ver 11 Step 5.png|Revi Giffard Finish + Vice Giffard Finish (Version 11) (Step 5: Energy trail) |
||
| + | Revi Giffard Finish + Vice Giffard Finish Ver 11 Step 6.png|Revi Giffard Finish + Vice Giffard Finish (Version 11) (Step 6: Flying kicks) |
||
| + | Revi Giffard Finish + Vice Giffard Finish Ver 11 Step 7.png|Revi Giffard Finish + Vice Giffard Finish (Version 11) (Step 7: Impact) |
||
| + | Revi Giffard Finish + Vice Giffard Finish Ver 11 Step 8.png|Revi Giffard Finish + Vice Giffard Finish (Version 11) (Step 8: Continued contact) |
||
| + | Revi Giffard Finish + Vice Giffard Finish 11.gif|Revi Giffard Finish + Vice Giffard Finish (Version 11) |
||
| + | </gallery> |
||
| + | }} |
||
| + | }} |
||
| + | |||
| + | | |
||
| + | Final Remix| |
||
| + | {{nihongo|'''Bari Vol Rolling Thunder Gale Giffard Rex Final Stamping'''|バリボルローリングサンダーゲイルギファードレックスファイナルスタンピング|Bari Boru Rōringu Sandā Geiru Gifādo Rekkusu Fainaru Sutanpingu}}: This finisher has two variations. |
||
| + | *The emblems on Revi and Vice's chests glow before a magenta projection of the Rex Vistamp's seal appears in front of Revi and a blue version appears in front of Vice. The two seals combine into a red projection of Revice's emblem as Vice transforms into a ball-like form and bounces into the air. Revi jumps up and kicks Vice toward the opponent, producing dark crimson energy and a magenta shockwave. While flying toward the target, Vice is covered in fire and leaves a trail of lightning and cold air before striking the enemy, producing a shockwave. Vice continues spinning and grinds against the opponent, producing more fire and electricity as well as splashes of black paint. Vice then bounces off of the enemy, producing an orange shockwave as well as an explosion surrounded by fire, lightning, and wind. |
||
| + | *A red projection of Revice's emblem appears as Vice transforms into a ball-like form and bounces into the air. Revi then kicks Vice toward the target, producing a shockwave. Vice leaves behind a sparkling blue trail as he flies through the air and crashes through a crowd of enemies. |
||
| + | <gallery> |
||
| + | Bari Vol Rolling Thunder Gale Giffard Rex Final Stamping Step 1.png|Bari Vol Rolling Thunder Gale Giffard Rex Final Stamping (Version 1) (Step 1: Revi's emblem glowing) |
||
| + | Bari Vol Rolling Thunder Gale Giffard Rex Final Stamping Step 2.png|Bari Vol Rolling Thunder Gale Giffard Rex Final Stamping (Version 1) (Step 2: Vice's emblem glowing) |
||
| + | Bari Vol Rolling Thunder Gale Giffard Rex Final Stamping Step 3.png|Bari Vol Rolling Thunder Gale Giffard Rex Final Stamping (Version 1) (Step 3: Rex Vistamp seals) |
||
| + | Bari Vol Rolling Thunder Gale Giffard Rex Final Stamping Step 4.png|Bari Vol Rolling Thunder Gale Giffard Rex Final Stamping (Version 1) (Step 4: Revice emblem) |
||
| + | Bari Vol Rolling Thunder Gale Giffard Rex Final Stamping Step 5.png|Bari Vol Rolling Thunder Gale Giffard Rex Final Stamping (Version 1) (Step 5: Vice transformed into a ball) |
||
| + | Bari Vol Rolling Thunder Gale Giffard Rex Final Stamping Step 6.png|Bari Vol Rolling Thunder Gale Giffard Rex Final Stamping (Version 1) (Step 6: Revi kicking Vice) |
||
| + | Bari Vol Rolling Thunder Gale Giffard Rex Final Stamping Step 7.png|Bari Vol Rolling Thunder Gale Giffard Rex Final Stamping (Version 1) (Step 7: Flying toward the enemy) |
||
| + | Bari Vol Rolling Thunder Gale Giffard Rex Final Stamping Step 8.png|Bari Vol Rolling Thunder Gale Giffard Rex Final Stamping (Version 1) (Step 8: Impact) |
||
| + | Bari Vol Rolling Thunder Gale Giffard Rex Final Stamping Step 9.png|Bari Vol Rolling Thunder Gale Giffard Rex Final Stamping (Version 1) (Step 9: Spinning against enemy) |
||
| + | Bari Vol Rolling Thunder Gale Giffard Rex Final Stamping Step 10.png|Bari Vol Rolling Thunder Gale Giffard Rex Final Stamping (Version 1) (Step 10: Bouncing off) |
||
| + | Bari Vol Rolling Thunder Gale Giffard Rex Final Stamping Step 11.png|Bari Vol Rolling Thunder Gale Giffard Rex Final Stamping (Version 1) (Step 11: Explosion) |
||
| + | Bari Vol Rolling Thunder Gale Giffard Rex Final Stamping.gif|Bari Vol Rolling Thunder Gale Giffard Rex Final Stamping (Version 1) |
||
| + | Bari Vol Rolling Thunder Gale Giffard Rex Final Stamping Ver 2 Step 1.png|Bari Vol Rolling Thunder Gale Giffard Rex Final Stamping (Version 2) (Step 1: Revice emblem) |
||
| + | Bari Vol Rolling Thunder Gale Giffard Rex Final Stamping Ver 2 Step 2.png|Bari Vol Rolling Thunder Gale Giffard Rex Final Stamping (Version 2) (Step 2: Vice curling up) |
||
| + | Bari Vol Rolling Thunder Gale Giffard Rex Final Stamping Ver 2 Step 3.png|Bari Vol Rolling Thunder Gale Giffard Rex Final Stamping (Version 2) (Step 3: Vice transformed into a ball) |
||
| + | Bari Vol Rolling Thunder Gale Giffard Rex Final Stamping Ver 2 Step 4.png|Bari Vol Rolling Thunder Gale Giffard Rex Final Stamping (Version 2) (Step 4: Revi preparing to kick Vice) |
||
| + | Bari Vol Rolling Thunder Gale Giffard Rex Final Stamping Ver 2 Step 5.png|Bari Vol Rolling Thunder Gale Giffard Rex Final Stamping (Version 2) (Step 5: Kicking Vice) |
||
| + | Bari Vol Rolling Thunder Gale Giffard Rex Final Stamping Ver 2 Step 6.png|Bari Vol Rolling Thunder Gale Giffard Rex Final Stamping (Version 2) (Step 6: Vice flying through air) |
||
| + | Bari Vol Rolling Thunder Gale Giffard Rex Final Stamping Ver 2 Step 7.png|Bari Vol Rolling Thunder Gale Giffard Rex Final Stamping (Version 2) (Step 7: Striking enemies) |
||
| + | Bari Vol Rolling Thunder Gale Giffard Rex Final Stamping Ver 2 Step 8.png|Bari Vol Rolling Thunder Gale Giffard Rex Final Stamping (Version 2) (Step 8: Approaching portal) |
||
| + | Bari Vol Rolling Thunder Gale Giffard Rex Final Stamping Ver 2 Step 9.png|Bari Vol Rolling Thunder Gale Giffard Rex Final Stamping (Version 2) (Step 9: Entering portal) |
||
| + | </gallery> |
||
| + | }} |
||
| + | |||
| + | | |
||
| + | Gold Spino| |
||
| + | {{nihongo|'''Gold Spino Giragira Finish'''|ゴールドスピノギラギラフィニッシュ|Gōrudo Supino Giragira Finisshu}}: Revi somersaults into the air before his body is surrounded by light red energy. He then performs a flying kick, with his foot releasing several shockwaves of darker red energy. His foot strikes the enemy, producing another shockwave and launching the target away. The opponent explodes as a result after a brief moment, with the explosion surrounded by more red energy. |
||
| + | <gallery> |
||
| + | Gold Spino Giragira Finish Step 1.png|Gold Spino Giragira Finish (Step 1: Somersaulting) |
||
| + | Gold Spino Giragira Finish Step 2.png|Gold Spino Giragira Finish (Step 2: Body covered in energy) |
||
| + | Gold Spino Giragira Finish Step 3.png|Gold Spino Giragira Finish (Step 3: Flying kick) |
||
| + | Gold Spino Giragira Finish Step 4.png|Gold Spino Giragira Finish (Step 4: Approaching enemy) |
||
| + | Gold Spino Giragira Finish Step 5.png|Gold Spino Giragira Finish (Step 5: Foot about to strike enemy) |
||
| + | Gold Spino Giragira Finish Step 6.png|Gold Spino Giragira Finish (Step 6: Impact) |
||
| + | Gold Spino Giragira Finish Step 7.png|Gold Spino Giragira Finish (Step 7: Enemy damaged) |
||
| + | Gold Spino Giragira Finish Step 8.png|Gold Spino Giragira Finish (Step 8: Explosion) |
||
| + | </gallery> |
||
| + | }} |
||
| + | }} |
||
| + | |||
| + | | |
||
| + | Igarashi| |
||
| + | {{tabber| |
||
| + | Infinity 50 Strike| |
||
| + | {{nihongo|'''Infinity 50 Strike'''|インフィニティ50ストライク|Infiniti Fifuti Sutoraiku}}: Igarashi's lower arm is surrounded by swirling magenta, green, and blue energy as they punch several enemies in succession, with each punch producing a spiraling shockwave composed of the same colors and causing the enemy to explode. |
||
| + | <gallery> |
||
| + | Infinity 50 Strike Step 1.png|Infinity 50 Strike (Step 1: Arm covered in energy) |
||
| + | Infinity 50 Strike Step 2.png|Infinity 50 Strike (Step 2: Punching enemy) |
||
| + | Infinity 50 Strike Step 3.png|Infinity 50 Strike (Step 3: Explosion) |
||
| + | Infinity 50 Strike Step 4.png|Infinity 50 Strike (Step 4: In front of another enemy) |
||
| + | Infinity 50 Strike Step 5.png|Infinity 50 Strike (Step 5: Punching) |
||
| + | Infinity 50 Strike Step 6.png|Infinity 50 Strike (Step 6: Impact) |
||
| + | Infinity 50 Strike Step 7.png|Infinity 50 Strike (Step 7: Explosion) |
||
| + | Infinity 50 Strike Step 8.png|Infinity 50 Strike (Step 8: Punching final enemy) |
||
| + | Infinity 50 Strike Step 9.png|Infinity 50 Strike (Step 9: Impact) |
||
| + | Infinity 50 Strike Step 10.png|Infinity 50 Strike (Step 10: Explosion) |
||
| + | </gallery> |
||
| + | |||
| + | | |
||
| + | Stamping Justice Liberal Finish| |
||
| + | {{nihongo|'''Stamping Justice Liberal Finish'''|スタンピングジャステイスリベラルフィニッシュ|Sutanpingu Jasuteisu Riberaru Finisshu}}: Igarashi jumps into their air with their right foot covered in magenta energy. A yellow energy construct of Jeanne, green construct of Live, and magenta construct of Revi then appear around them and each perform a flying kick motion, with the energy covering Igarashi's foot continually changing between those colors. The energy Riders then merge with Igarashi as they perform a flying kick themselves, causing them to be surrounded by swirling magenta, yellow, green, and blue energy. The kick passes through a group of enemies, causing all of them to explode. |
||
| + | <gallery> |
||
| + | Stamping Justice Liberal Finish Step 1.png|Stamping Justice Liberal Finish (Step 1: Jumping with foot covered in energy) |
||
| + | Stamping Justice Liberal Finish Step 2.png|Stamping Justice Liberal Finish (Step 2: Energy constructs of Jeanne and Live appearing) |
||
| + | Stamping Justice Liberal Finish Step 3.png|Stamping Justice Liberal Finish (Step 3: Energy construct of Revi appearing) |
||
| + | Stamping Justice Liberal Finish Step 4.png|Stamping Justice Liberal Finish (Step 4: Rider constructs merging with Igarashi) |
||
| + | Stamping Justice Liberal Finish Step 5.png|Stamping Justice Liberal Finish (Step 5: Flying kick) |
||
| + | Stamping Justice Liberal Finish Step 6.png|Stamping Justice Liberal Finish (Step 6: Approaching enemies) |
||
| + | Stamping Justice Liberal Finish Step 7.png|Stamping Justice Liberal Finish (Step 7: Flying through groups) |
||
| + | Stamping Justice Liberal Finish Step 8.png|Stamping Justice Liberal Finish (Step 8: Past enemies) |
||
| + | Stamping Justice Liberal Finish Step 9.png|Stamping Justice Liberal Finish (Step 9: Explosion) |
||
| + | </gallery> |
||
| + | }} |
||
| + | }} |
||
| + | |||
| + | | |
||
| + | Two Sidriver| |
||
| + | {{tabber| |
||
| + | Evil| |
||
| + | {{tabber| |
||
| + | Bat Genome| |
||
{{nihongo|'''Bat Darkness Finish'''|バットダークネスフィニッシュ|Batto Dākunesu Finisshu}}: Varies depending on which mode the Two Sidriver is in. |
{{nihongo|'''Bat Darkness Finish'''|バットダークネスフィニッシュ|Batto Dākunesu Finisshu}}: Varies depending on which mode the Two Sidriver is in. |
||
| − | {{ |
+ | {{tabber| |
| − | Evilblade |
+ | Evilblade| |
| − | This finisher has |
+ | This finisher has six variations: |
*Evil forms a teal energy blade around the Evilblade and swings it, launching a large teal energy slash with copies of the energy blade embedded in it. This large slash is followed by a series of smaller, flickering slashes. After the slashes strike the target, Evil turns before charging and swinging the Evilblade again, launching more teal energy slashes at a second enemy. |
*Evil forms a teal energy blade around the Evilblade and swings it, launching a large teal energy slash with copies of the energy blade embedded in it. This large slash is followed by a series of smaller, flickering slashes. After the slashes strike the target, Evil turns before charging and swinging the Evilblade again, launching more teal energy slashes at a second enemy. |
||
*Evil covers the Evilblade in teal energy and swings it upward, creating a teal energy slash. When the slash strikes the enemy, it forms into a spinning circular energy blade that continually attacks the opponent. |
*Evil covers the Evilblade in teal energy and swings it upward, creating a teal energy slash. When the slash strikes the enemy, it forms into a spinning circular energy blade that continually attacks the opponent. |
||
| − | *Evil forms a teal energy blade around the Evilblade |
+ | *Evil forms a teal energy blade around the Evilblade and swings it, launching a series of flickering slashes of teal energy with copies of the energy blade embedded in them. The energy slashes fly forward before continually attacking the enemy. |
*Evil forms a teal energy blade around the Evilblade and delivers a large teal energy slash with copies of the energy blade embedded in it to the enemy at close range. This large slash creates an explosion and is followed by is followed by a series of smaller, flickering slashes that launch the enemy away. |
*Evil forms a teal energy blade around the Evilblade and delivers a large teal energy slash with copies of the energy blade embedded in it to the enemy at close range. This large slash creates an explosion and is followed by is followed by a series of smaller, flickering slashes that launch the enemy away. |
||
| + | *Evil forms a teal energy blade around the Evilblade and separately attacks two enemies with teal energy slashes that have copies of the energy blade embedded in it. He then delivers a giant energy slash to one of the opponents. The large slash is followed by a series of smaller slashes, destroying the enemy and causing them to explode. |
||
| + | *A teal energy blade forms around the Evilblade as it is held against an enemy. Evil then delivers a series of energy slashes with copies of the energy blade embedded in it. Each large slash delivered by the Evilblade directly is followed by a series of smaller slashes and results in an explosion. The final attack is an upward slash that pushes the opponent away. |
||
<gallery> |
<gallery> |
||
Bat Darkness Finish Ver 1 Part 1.png|Bat Darkness Finish (Evilblade) (Version 1) (Step 1: Charging) |
Bat Darkness Finish Ver 1 Part 1.png|Bat Darkness Finish (Evilblade) (Version 1) (Step 1: Charging) |
||
| Line 536: | Line 1,256: | ||
Bat Darkness Finish Ver 4 Part 6.png|Bat Darkness Finish (Evilblade) (Version 4) (Step 6: Enemy launched away) |
Bat Darkness Finish Ver 4 Part 6.png|Bat Darkness Finish (Evilblade) (Version 4) (Step 6: Enemy launched away) |
||
Bat Darkness Finish 4.gif|Bat Darkness Finish (Version 4) |
Bat Darkness Finish 4.gif|Bat Darkness Finish (Version 4) |
||
| + | Bat Darkness Finish Ver 5 Step 1.png|Bat Darkness Finish (Evilblade) (Version 5) (Step 1: Blade covered in energy) |
||
| + | Bat Darkness Finish Ver 5 Step 2.png|Bat Darkness Finish (Evilblade) (Version 5) (Step 2: Energy slash) |
||
| + | Bat Darkness Finish Ver 5 Step 3.png|Bat Darkness Finish (Evilblade) (Version 5) (Step 3: Slash striking enemy) |
||
| + | Bat Darkness Finish Ver 5 Step 4.png|Bat Darkness Finish (Evilblade) (Version 5) (Step 4: Large energy slash) |
||
| + | Bat Darkness Finish Ver 5 Step 5.png|Bat Darkness Finish (Evilblade) (Version 5) (Step 5: Smaller slashes) |
||
| + | Bat Darkness Finish Ver 5 Step 6.png|Bat Darkness Finish (Evilblade) (Version 5) (Step 6: Explosion) |
||
| + | Bat Darkness Finish 5.gif|Bat Darkness Finish (Evilblade) (Version 5) |
||
| + | Bat Darkness Finish Ver 6 Step 1.png|Bat Darkness Finish (Evilblade) (Version 6) (Step 1: Blade covered in energy) |
||
| + | Bat Darkness Finish Ver 6 Step 2.png|Bat Darkness Finish (Evilblade) (Version 6) (Step 2: First slash) |
||
| + | Bat Darkness Finish Ver 6 Step 3.png|Bat Darkness Finish (Evilblade) (Version 6) (Step 3: Smaller slashes and explosions) |
||
| + | Bat Darkness Finish Ver 6 Step 4.png|Bat Darkness Finish (Evilblade) (Version 6) (Step 4: Second slash) |
||
| + | Bat Darkness Finish Ver 6 Step 5.png|Bat Darkness Finish (Evilblade) (Version 6) (Step 5: Third slash) |
||
| + | Bat Darkness Finish Ver 6 Step 6.png|Bat Darkness Finish (Evilblade) (Version 6) (Step 6: Preparing to deliver final slash) |
||
| + | Bat Darkness Finish Ver 6 Step 7.png|Bat Darkness Finish (Evilblade) (Version 6) (Step 7: Upward slash) |
||
| + | Bat Darkness Finish Ver 6 Step 8.png|Bat Darkness Finish (Evilblade) (Version 6) (Step 8: Smaller slashes and explosion) |
||
| + | Bat Darkness Finish Ver 6 Step 9.png|Bat Darkness Finish (Evilblade) (Version 6) (Step 9: Enemy pushed away) |
||
</gallery> |
</gallery> |
||
| + | |||
| − | {{!}}-{{!}} |
||
| + | | |
||
| − | Driver= |
||
| + | Driver| |
||
This finisher has two variations: |
This finisher has two variations: |
||
*Teal energy from the Two Sidriver flows along the teal lines on Evil's suit before transferring to his lower leg. Evil then performs a spinning roundhouse kick while a rotating column of blue liquid appears behind him. The kick leaves behind a trail of teal liquid and creates a large teal energy slash upon impact. After the initial slash, several smaller teal energy slashes continue to attack the opponent |
*Teal energy from the Two Sidriver flows along the teal lines on Evil's suit before transferring to his lower leg. Evil then performs a spinning roundhouse kick while a rotating column of blue liquid appears behind him. The kick leaves behind a trail of teal liquid and creates a large teal energy slash upon impact. After the initial slash, several smaller teal energy slashes continue to attack the opponent |
||
| Line 565: | Line 1,302: | ||
</gallery> |
</gallery> |
||
}} |
}} |
||
| + | |||
| − | {{!}}-{{!}} |
||
| + | | |
||
| − | Jackal Genome= |
||
| + | Jackal Genome| |
||
{{nihongo|'''[[Rider Slash|Jackal Darkness Finish]]'''|ジャッカルダークネスフィニッシュ|Jakkaru Dākunesu Finisshu}}: Evil moves at high speeds with his body covered in teal energy and leaving behind a trail of purple lightning-like energy. He appears in front of two enemies and delivers a green energy slash to each target, moving past them during the second slash before dashing away. Evil then reappears and delivers another energy slash to the first opponent, followed by a series of slashes to the second. Finally, Evil moves behind the two enemies and delivers a large crescent-shaped teal energy slash that strikes both opponents simultaneously and creates an explosion while launching them away. |
{{nihongo|'''[[Rider Slash|Jackal Darkness Finish]]'''|ジャッカルダークネスフィニッシュ|Jakkaru Dākunesu Finisshu}}: Evil moves at high speeds with his body covered in teal energy and leaving behind a trail of purple lightning-like energy. He appears in front of two enemies and delivers a green energy slash to each target, moving past them during the second slash before dashing away. Evil then reappears and delivers another energy slash to the first opponent, followed by a series of slashes to the second. Finally, Evil moves behind the two enemies and delivers a large crescent-shaped teal energy slash that strikes both opponents simultaneously and creates an explosion while launching them away. |
||
<gallery> |
<gallery> |
||
| Line 583: | Line 1,321: | ||
</gallery> |
</gallery> |
||
}} |
}} |
||
| + | |||
| − | {{!}}-{{!}} |
||
| + | | |
||
| − | Live= |
||
| + | Live| |
||
| − | {{#tag:tabber| |
||
| + | {{tabber| |
||
| − | Bat Genome= |
||
| + | Bat Genome| |
||
| − | {{nihongo|'''Bat Justice Finish'''|バットジャスティスフィニッシュ|Batto Jasutisu Finisshu}}: Varies depending on which mode the Two Sidriver is in. |
||
| + | {{nihongo|'''Bat Justis Finish'''|バットジャスティスフィニッシュ|Batto Jasutisu Finisshu}}: Varies depending on which mode the Two Sidriver is in. |
||
| − | {{#tag:tabber| |
||
| + | {{tabber| |
||
| − | Livegun= |
||
| + | Livegun| |
||
| − | This finisher has two variations: |
||
| + | This finisher has four variations: |
||
*Live gathers gold energy at the end of the Livegun's barrel before firing a volley of gold blade-shaped energy projectiles while performing a cartwheel. |
*Live gathers gold energy at the end of the Livegun's barrel before firing a volley of gold blade-shaped energy projectiles while performing a cartwheel. |
||
*Gold light appears at the end of the Livegun's barrel before Live turns around and fires numerous gold blade-shaped energy projectiles at a group of enemies. |
*Gold light appears at the end of the Livegun's barrel before Live turns around and fires numerous gold blade-shaped energy projectiles at a group of enemies. |
||
| − | + | *Gold light appears at the end of the Livegun's barrel before Live fires a large blast of gold energy at close range, launching the enemy away. |
|
| + | *Live fires two volleys of gold blade-shaped energy projectiles at the enemy from close range. He then places the Livegun's barrel against the opponent's body and fires more blade-shaped projectiles at point-blank range, pushing the enemy backward. |
||
<gallery> |
<gallery> |
||
| − | Bat Justice Finish Ver 1 Step 1.png|Bat |
+ | Bat Justice Finish Ver 1 Step 1.png|Bat Justis Finish (Livegun) (Version 1) (Step 1: Charging) |
| − | Bat Justice Finish Ver 1 Step 2.png|Bat |
+ | Bat Justice Finish Ver 1 Step 2.png|Bat Justis Finish (Livegun) (Version 1) (Step 2: Firing projectiles) |
| − | Bat Justice Finish Ver 1 Step 3.png|Bat |
+ | Bat Justice Finish Ver 1 Step 3.png|Bat Justis Finish (Livegun) (Version 1) (Step 3: Explosion) |
| − | Bat |
+ | Bat Justis Finish.gif|Bat Justis Finish (Livegun) (Version 1) |
| − | Bat Justice Finish Ver 2 Step |
+ | Bat Justice Finish Ver 2 Step 1.png|Bat Justis Finish (Livegun) (Version 2) (Step 1: Charging) |
| − | Bat Justice Finish Ver 2 Step |
+ | Bat Justice Finish Ver 2 Step 2.png|Bat Justis Finish (Livegun) (Version 2) (Step 2: Preparing to fire) |
| − | Bat Justice Finish Ver 2 Step |
+ | Bat Justice Finish Ver 2 Step 3.png|Bat Justis Finish (Livegun) (Version 2) (Step 3: Firing projectiles) |
| − | Bat |
+ | Bat Justice Finish Ver 2 Step 4.png|Bat Justis Finish (Livegun) (Version 2) (Step 4: Explosions) |
| − | Bat |
+ | Bat Justis Finish 2.gif|Bat Justis Finish (Livegun) (Version 2) |
| − | Bat Justice Finish Ver 3 Step 1.png|Bat |
+ | Bat Justice Finish Ver 3 Step 1.png|Bat Justis Finish (Livegun) (Version 3) (Step 1: Charging) |
| − | Bat Justice Finish Ver 3 Step |
+ | Bat Justice Finish Ver 3 Step 2.png|Bat Justis Finish (Livegun) (Version 3) (Step 2: Firing) |
| − | Bat Justice Finish Ver 3 Step |
+ | Bat Justice Finish Ver 3 Step 3.png|Bat Justis Finish (Livegun) (Version 3) (Step 3: Enemy launched away) |
| + | Bat Justice Finish Ver 3 Step 4.png|Bat Justis Finish (Livegun) (Version 3) (Step 4: Enemy crashing through wall) |
||
| + | Bat Justis Finish 3.gif|Bat Justis Finish (Livegun) (Version 3) |
||
| + | Bat Justice Finish Ver 4 Step 1.png|Bat Justis Finish (Livegun) (Version 4) (Step 1: First volley) |
||
| + | Bat Justice Finish Ver 4 Step 2.png|Bat Justis Finish (Livegun) (Version 4) (Step 2: Second volley) |
||
| + | Bat Justice Finish Ver 4 Step 3.png|Bat Justis Finish (Livegun) (Version 4) (Step 3: Barrel against enemy) |
||
| + | Bat Justice Finish Ver 4 Step 4.png|Bat Justis Finish (Livegun) (Version 4) (Step 4: Firing at point-blank range) |
||
| + | Bat Justice Finish Ver 4 Step 5.png|Bat Justis Finish (Livegun) (Version 4) (Step 5: Continued projectiles) |
||
| + | Bat Justice Finish Ver 4 Step 6.png|Bat Justis Finish (Livegun) (Version 4) (Step 6: Impact) |
||
| + | Bat Justis Finish 4.gif|Bat Justis Finish (Livegun) (Version 4) |
||
</gallery> |
</gallery> |
||
| + | |||
| − | {{!}}-{{!}} |
||
| + | | |
||
| − | Driver= |
||
| + | Driver| |
||
| − | Live jumps into the air while teal energy flows from the Two Sidriver and into his lower leg before performing a flying kick. The energy is then released in the form of teal liquid that reaaranges into a bat shape and changes color, culminating in a white bat construct surrounded by spiraling golden energy. The bat construct flies alongside Live's kick before both strike the enemy, creating a gold shockwave upon impact. The bat construct then disappears into the point of impact before Live's kick breaks past the enemy, leaving behind a golden sonic boom. |
||
| + | Live jumps into the air while green energy flows from the Two Sidriver and into his lower leg before performing a flying kick. The energy is then released in the form of green liquid that rearranges into a bat shape and changes color, culminating in a white bat construct surrounded by spiraling golden energy. The bat construct flies alongside Live's kick before both strike the enemy, creating a gold shockwave upon impact. The bat construct then disappears into the point of impact before Live's kick breaks past the enemy, leaving behind a golden sonic boom. |
||
<gallery> |
<gallery> |
||
| − | Bat Justice Finish Kick Step 1.png|Bat |
+ | Bat Justice Finish Kick Step 1.png|Bat Justis Finish (Driver) (Step 1: Jumping and energy flowing along leg) |
| − | Bat Justice Finish Kick Step 2.png|Bat |
+ | Bat Justice Finish Kick Step 2.png|Bat Justis Finish (Driver) (Step 2: Energy transferring to lower leg) |
| − | Bat Justice Finish Kick Step 3.png|Bat |
+ | Bat Justice Finish Kick Step 3.png|Bat Justis Finish (Driver) (Step 3: Liquid energy) |
| − | Bat Justice Finish Kick Step 4.png|Bat |
+ | Bat Justice Finish Kick Step 4.png|Bat Justis Finish (Driver) (Step 4: Liquid forming bat) |
| − | Bat Justice Finish Kick Step 5.png|Bat |
+ | Bat Justice Finish Kick Step 5.png|Bat Justis Finish (Driver) (Step 5: Fully formed bat construct) |
| − | Bat Justice Finish Kick Step 6.png|Bat |
+ | Bat Justice Finish Kick Step 6.png|Bat Justis Finish (Driver) (Step 6: Impact) |
| − | Bat Justice Finish Kick Step 7.png|Bat |
+ | Bat Justice Finish Kick Step 7.png|Bat Justis Finish (Driver) (Step 7: Bat construct disappearing) |
| − | Bat Justice Finish Kick Step 8.png|Bat |
+ | Bat Justice Finish Kick Step 8.png|Bat Justis Finish (Driver) (Step 8: Live preparing to end kick) |
| − | Bat Justice Finish Kick Step 9.png|Bat |
+ | Bat Justice Finish Kick Step 9.png|Bat Justis Finish (Driver) (Step 9: Breaking past enemy) |
| − | Bat Justis Finish (Kick).gif|Bat |
+ | Bat Justis Finish (Kick).gif|Bat Justis Finish |
</gallery> |
</gallery> |
||
}} |
}} |
||
| + | |||
| − | {{!}}-{{!}} |
||
| + | | |
||
| − | Jackal Genome= {{nihongo|'''Jackal Justice Finish'''| ジャッカルジャスティスフィニッシュ|Jakkaru Jasutisu Finisshu}}: Live charges the Livegun and runs around multiple enemies, slashing and shooting at them. |
||
| + | Jackal Genome= |
||
| + | {{nihongo|'''Jackal Justis Finish'''| ジャッカルジャスティスフィニッシュ|Jakkaru Jasutisu Finisshu}}: Live moves at high speeds with his body is surrounded by gold energy. While moving, he individually fires gold blade-shaped energy projectiles at several enemies from medium to close range. He then jumps into the air and fires a volley of the blade-shaped projectiles at a second group of enemies. |
||
| + | <gallery> |
||
| + | Jackal Justice Finish Step 1.png|Jackal Justis Finish (Step 1: Firing) |
||
| + | Jackal Justice Finish Step 2.png|Jackal Justis Finish (Step 2: Impact) |
||
| + | Jackal Justice Finish Step 3.png|Jackal Justis Finish (Step 3: Firing at second enemy) |
||
| + | Jackal Justice Finish Step 4.png|Jackal Justis Finish (Step 4: Impact) |
||
| + | Jackal Justice Finish Step 5.png|Jackal Justis Finish (Step 5: Firing at close range) |
||
| + | Jackal Justice Finish Step 6.png|Jackal Justis Finish (Step 6: Final attack) |
||
| + | Jackal Justice Finish Step 7.png|Jackal Justis Finish (Step 7: Jumping) |
||
| + | Jackal Justice Finish Step 8.png|Jackal Justis Finish (Step 8: Firing volley of projectiles) |
||
| + | Jackal Justice Finish Step 9.png|Jackal Justis Finish (Step 9: Striking enemies) |
||
| + | Jackal Justice Finish Step 10.png|Jackal Justis Finish (Step 10: Explosion) |
||
| + | Jackal Justis Finish.gif|Jackal Justis Finish |
||
| + | </gallery> |
||
| + | |||
| + | | |
||
| + | Holy Live| |
||
| + | {{tabber| |
||
| + | Holy Justis Finish| |
||
| + | {{nihongo|'''Holy Justis Finish'''|ホリージャスティスフィニッシュ|Hōrī Jasutisu Finisshu}}: Varies depending on which mode the Two Sidriver is in. |
||
| + | {{tabber| |
||
| + | Driver| |
||
| + | This finisher has two variations: |
||
| + | *Holy Live flies into the air and performs a flying kick with his leg covered in light blue energy, creating a shockwave. A dome of blue energy then forms around Live as he approaches the opponent. The kick produces a shockwave of light blue energy upon impact before a mass of white feathers is scattered into the air. Soon afterwards, the enemy explodes. |
||
| + | *Holy Live performs a flying kick covered in light blue energy through a crowd of enemies, destroying them and resulting in multiple explosions. |
||
| + | *Holy Live jumps forward and extends his wings as his lower leg glows. He then performs a flying kick with his leg surrounded by spiraling cyan energy. Upon the kick striking the enemy, more of the spiraling cyan energy is produced and surrounds Live's entire body. |
||
| + | <gallery> |
||
| + | Holy Justice Finish Step 1.png|Holy Justis Finish (Driver) (Version 1) (Step 1: Holy Live in the air) |
||
| + | Holy Justice Finish Step 2.png|Holy Justis Finish (Driver) (Version 1) (Step 2: Leg covered in energy) |
||
| + | Holy Justice Finish Step 3.png|Holy Justis Finish (Driver) (Version 1) (Step 3: Extending leg and producing shockwave) |
||
| + | Holy Justice Finish Step 4.png|Holy Justis Finish (Driver) (Version 1) (Step 4: Dome of energy) |
||
| + | Holy Justice Finish Step 5.png|Holy Justis Finish (Driver) (Version 1) (Step 5: Impact) |
||
| + | Holy Justice Finish Step 6.png|Holy Justis Finish (Driver) (Version 1) (Step 6: Energy shockwave) |
||
| + | Holy Justice Finish Step 7.png|Holy Justis Finish (Driver) (Version 1) (Step 7: Feathers) |
||
| + | Holy Justice Finish Step 8.png|Holy Justis Finish (Driver) (Version 1) (Step 8: Enemy damaged) |
||
| + | Holy Justice Finish Step 9.png|Holy Justis Finish (Driver) (Version 1) (Step 9: Explosion) |
||
| + | Holy Justis Finish.gif|Holy Justis Finish (Driver) (Version 1) |
||
| + | Holy Justice Finish Ver 2 Step 1.png|Holy Justis Finish (Driver) (Version 2) (Step 1: Jumping forward) |
||
| + | Holy Justice Finish Ver 2 Step 2.png|Holy Justis Finish (Driver) (Version 2) (Step 2: Flying kick) |
||
| + | Holy Justice Finish Ver 2 Step 3.png|Holy Justis Finish (Driver) (Version 2) (Step 3: Destroying enemies) |
||
| + | Holy Justice Finish Ver 2 Step 4.png|Holy Justis Finish (Driver) (Version 2) (Step 4: Explosions) |
||
| + | Holy Justis Finish 2.gif|Holy Justis Finish (Driver) (Version 2) |
||
| + | Holy Justice Finish Ver 3 Step 1.png|Holy Justis Finish (Driver) (Version 3) (Step 1: Jumping) |
||
| + | Holy Justice Finish Ver 3 Step 2.png|Holy Justis Finish (Driver) (Version 3) (Step 2: Wings extending and leg glowing) |
||
| + | Holy Justice Finish Ver 3 Step 3.png|Holy Justis Finish (Driver) (Version 3) (Step 3: Leg surrounded by energy) |
||
| + | Holy Justice Finish Ver 3 Step 4.png|Holy Justis Finish (Driver) (Version 3) (Step 4: Impact) |
||
| + | Holy Justice Finish Ver 3 Step 5.png|Holy Justis Finish (Driver) (Version 3) (Step 5: Live surrounded by more energy) |
||
| + | Holy Justis Finish vs Demons Finish (Spider).gif|Holy Justis Finish (Driver) (Version 3) |
||
| + | </gallery> |
||
| + | |||
| + | | |
||
| + | Livegun| |
||
| + | This finisher has four variations: |
||
| + | *Holy Live parries the attack of an enemy using the Livegun's blade before delivering a cyan energy slash to a second opponent. He then charges cyan energy at the end of the Livegun's barrel and fires several cyan blade-shaped energy projectiles into the first enemy at close range, causing them to explode. |
||
| + | *Holy Live spins and uses the Livegun's blade to release several blue and cyan energy slashes around himself. The energy slashes form a full circle and destroy any enemies near Live, resulting in multiple explosions. |
||
| + | *Holy Live charges the Livegun for an extended period of time, with swirling cyan and dark blue energy appearing at the end of the barrel as a large cyan blade-shaped energy projectile is formed. He then fires the projectile at the enemy, producing a blue shockwave. The projectile is surrounded by additional cyan and dark blue energy before striking the target. |
||
| + | *Cyan energy gathers at the end of the Livegun's barrel, which is pointed towards the enemy at point blank range. Holy Live then fires several several cyan blade-shaped energy projectiles surrounded by additional cyan and black energy. The projectiles pierce through the enemy's body and leave cyan sparkles in the air. |
||
| + | <gallery> |
||
| + | Holy Justis Finish (Livegun) Step 1.png|Holy Justis Finish (Livegun) (Version 1) (Step 1: Parrying) |
||
| + | Holy Justis Finish (Livegun) Step 2.png|Holy Justis Finish (Livegun) (Version 1) (Step 2: Slash) |
||
| + | Holy Justis Finish (Livegun) Step 3.png|Holy Justis Finish (Livegun) (Version 1) (Step 3: Charging) |
||
| + | Holy Justis Finish (Livegun) Step 4.png|Holy Justis Finish (Livegun) (Version 1) (Step 4: Firing at close range) |
||
| + | Holy Justis Finish (Livegun) Step 5.png|Holy Justis Finish (Livegun) (Version 1) (Step 5: Explosion) |
||
| + | Holy Justis Finish (Livegun).gif|Holy Justis Finish (Livegun) (Version 1) |
||
| + | Holy Justis Finish (Livegun) Ver 2 Step 1.png|Holy Justis Finish (Livegun) (Version 2) (Step 1: Preparing to spin) |
||
| + | Holy Justis Finish (Livegun) Ver 2 Step 2.png|Holy Justis Finish (Livegun) (Version 2) (Step 2: Spinning slash) |
||
| + | Holy Justis Finish (Livegun) Ver 2 Step 3.png|Holy Justis Finish (Livegun) (Version 2) (Step 3: Continued slash) |
||
| + | Holy Justis Finish (Livegun) Ver 2 Step 4.png|Holy Justis Finish (Livegun) (Version 2) (Step 4: Explosions) |
||
| + | Holy Justis Finish (Livegun) 2.gif|Holy Justis Finish (Livegun) (Version 2) |
||
| + | Holy Justis Finish (Livegun) Ver 3 Step 1.png|Holy Justis Finish (Livegun) (Version 3) (Step 1: Charging) |
||
| + | Holy Justis Finish (Livegun) Ver 3 Step 2.png|Holy Justis Finish (Livegun) (Version 3) (Step 2: Continued charging) |
||
| + | Holy Justis Finish (Livegun) Ver 3 Step 3.png|Holy Justis Finish (Livegun) (Version 3) (Step 3: Preparing to fire) |
||
| + | Holy Justis Finish (Livegun) Ver 3 Step 4.png|Holy Justis Finish (Livegun) (Version 3) (Step 4: Firing) |
||
| + | Holy Justis Finish (Livegun) Ver 3 Step 5.png|Holy Justis Finish (Livegun) (Version 3) (Step 5: Projectile striking target) |
||
| + | Holy Justis Finish (Livegun) 3.gif|Holy Justis Finish (Livegun) (Version 3) |
||
| + | Holy Justis Finish (Livegun) Ver 4 Step 1.png|Holy Justis Finish (Livegun) (Version 4) (Step 1: Charging) |
||
| + | Holy Justis Finish (Livegun) Ver 4 Step 2.png|Holy Justis Finish (Livegun) (Version 4) (Step 2: Firing) |
||
| + | Holy Justis Finish (Livegun) Ver 4 Step 3.png|Holy Justis Finish (Livegun) (Version 4) (Step 3: Additional projectiles) |
||
| + | Holy Justis Finish (Livegun) Ver 4 Step 4.png|Holy Justis Finish (Livegun) (Version 4) (Step 4: Aftermath) |
||
| + | Holy Justis Finish (Livegun) 4.gif|Holy Justis Finish (Livegun) (Version 4) |
||
| + | </gallery> |
||
}} |
}} |
||
| + | |||
| + | | |
||
| + | Winning Justis Finale| |
||
| + | {{nihongo|'''Winning Justis Finale'''|ウイニングジャスティスフイナーレ|Uiningu Jasutisu Fināre}}: Varies depending on which mode the Two Sidriver is in. |
||
| + | {{tabber| |
||
| + | Driver| |
||
| + | Holy Live performs a flying kick covered in light blue energy, destroying enemy projectiles along the way before striking the opponent and producing light blue shockwaves upon impact. Live then kicks the enemy a second time with his other foot. As a result, the opponent is pushed back until crashing into a wall. Live then kicks off of the enemy shortly before the latter explodes. |
||
| + | <gallery> |
||
| + | Winning Justice Finale Step 1.png|Winning Justis Finale (Driver) (Step 1: Flying through projectile) |
||
| + | Winning Justice Finale Step 2.png|Winning Justis Finale (Driver) (Step 2: Impact) |
||
| + | Winning Justice Finale Step 3.png|Winning Justis Finale (Driver) (Step 3: Preparing to kick a second time) |
||
| + | Winning Justice Finale Step 4.png|Winning Justis Finale (Driver) (Step 4: Second kick) |
||
| + | Winning Justice Finale Step 5.png|Winning Justis Finale (Driver) (Step 5: Crashing) |
||
| + | Winning Justice Finale Step 6.png|Winning Justis Finale (Driver) (Step 6: Enemy embedded in wall) |
||
| + | Winning Justice Finale Step 7.png|Winning Justis Finale (Driver) (Step 7: Live kicking off) |
||
| + | Winning Justice Finale Step 8.png|Winning Justis Finale (Driver) (Step 8: Live landing) |
||
| + | Winning Justice Finale Step 9.png|Winning Justis Finale (Driver) (Step 9: Explosion) |
||
| + | Winning Justis Finale.gif|Winning Justis Finale (Driver) |
||
| + | </gallery> |
||
| + | |||
| + | | |
||
| + | Livegun| |
||
| + | Holy Live gathers blue and cyan energy at the end of the Livegun's barrel before firing a volley of cyan blade-shaped energy projectiles that tear through the enemy's body. |
||
| + | <gallery> |
||
| + | Winning Justice Finale (Livegun) Step 1.png|Winning Justis Finale (Livegun) (Step 1: Charging) |
||
| + | Winning Justice Finale (Livegun) Step 2.png|Winning Justis Finale (Livegun) (Step 2: Firing) |
||
| + | Winning Justice Finale (Livegun) Step 3.png|Winning Justis Finale (Livegun) (Step 3: Striking enemy) |
||
| + | Winning Justice Finale (Livegun) Step 4.png|Winning Justis Finale (Livegun) (Step 4: Tearing through enemy's body) |
||
| + | Winning Justice Finale (Livegun) Step 5.png|Winning Justis Finale (Livegun) (Step 5: Damaged enemy) |
||
| + | Winning Justis Finale (Shooting).gif|Winning Justis Finale (Livegun) |
||
| + | </gallery> |
||
}} |
}} |
||
| + | }} |
||
| − | {{!}}-{{!}} |
||
| + | |||
| − | Libera Driver= |
||
| + | | |
||
| − | {{#tag:tabber| |
||
| + | EvilytyLive| |
||
| − | Stamping Smash= |
||
| − | {{ |
+ | {{tabber| |
| + | Evilyty Perfect Finish| |
||
| − | Cobra= |
||
| + | {{nihongo|'''Evilyty Perfect Finish'''|エビリティパーフェクトフィニッシュ|Ebiriti Pāfekuto Finisshu}}: Varies depending on which mode the Two Sidriver is in. |
||
| − | {{nihongo|'''Cobra Stamping Smash'''|コブラスタンピングスマッシュ|Kobura Sutanpingu Sumasshu}}: After Jeanne jumps into the air, Lovekov transforms into a small, snake-like form composed of light blue energy and flies toward her before coiling around her leg. Jeanne then delivers a kick to an enemy in the air, producing an orange and blue energy shockwave upon impact. Jeanne keeps her foot against the enemy's body as the two fall until she uses her heel to slam the enemy into the ground beneath her. Jeanne ends up on top of the enemy, who explodes shortly after. |
||
| + | {{tabber| |
||
| + | Evilblade| |
||
| + | Live swings the Evilblade, creating a series of teal energy slashes with energy blades embedded in them. The energy slashes strike multiple enemies in succession, resulting in them exploding. Live then briefly transforms into Kamen Rider Evil and swings again while running, creating two back-to-back energy slashes to attack more enemies. Upon returning to normal, Live manifests a teal energy copy of Kamen Rider Evil beside him. The two Riders swing their Evilblades downward, causing a single energy slash to slice though a group of enemies. The copy of Evil disappears as the enemies explode. |
||
<gallery> |
<gallery> |
||
| − | + | Evilyty Perfect Finish (Evilblade) Step 1.png|Evilyty Perfect Finish (Evilblade) (Step 1: Swinging Evilblade) |
|
| − | + | Evilyty Perfect Finish (Evilblade) Step 2.png|Evilyty Perfect Finish (Evilblade) (Step 2: Slashes striking first enemy) |
|
| − | + | Evilyty Perfect Finish (Evilblade) Step 3.png|Evilyty Perfect Finish (Evilblade) (Step 3: Slashes striking second enemy) |
|
| − | + | Evilyty Perfect Finish (Evilblade) Step 4.png|Evilyty Perfect Finish (Evilblade) (Step 4: Slashes striking third enemy) |
|
| − | + | Evilyty Perfect Finish (Evilblade) Step 5.png|Evilyty Perfect Finish (Evilblade) (Step 5: Explosions) |
|
| − | + | Evilyty Perfect Finish (Evilblade) Step 6.png|Evilyty Perfect Finish (Evilblade) (Step 6: Live glowing) |
|
| − | + | Evilyty Perfect Finish (Evilblade) Step 7.png|Evilyty Perfect Finish (Evilblade) (Step 7: Transformed into Evil) |
|
| − | + | Evilyty Perfect Finish (Evilblade) Step 8.png|Evilyty Perfect Finish (Evilblade) (Step 8: First slash) |
|
| − | + | Evilyty Perfect Finish (Evilblade) Step 9.png|Evilyty Perfect Finish (Evilblade) (Step 9: Second slash) |
|
| − | + | Evilyty Perfect Finish (Evilblade) Step 10.png|Evilyty Perfect Finish (Evilblade) (Step 10: Energy copy of Evil) |
|
| − | + | Evilyty Perfect Finish (Evilblade) Step 11.png|Evilyty Perfect Finish (Evilblade) (Step 11: Swinging downward) |
|
| − | + | Evilyty Perfect Finish (Evilblade) Step 12.png|Evilyty Perfect Finish (Evilblade) (Step 12: Energy slash slicing through enemies) |
|
| + | Evilyty Perfect Finish (Evilblade) Step 13.png|Evilyty Perfect Finish (Evilblade) (Step 13: Energy slash after attacking enemies) |
||
| − | Cobra Stamping Smash.gif|Cobra Stamping Smash |
||
| + | Evilyty Perfect Finish (Evilblade) Step 14.png|Evilyty Perfect Finish (Evilblade) (Step 14: Aftermath) |
||
| + | Evilyty Perfect Finish (Evilblade) Step 15.png|Evilyty Perfect Finish (Evilblade) (Step 15: Explosion) |
||
| + | Evilyty Perfect Finish (Evilblade).gif|Evilyty Perfect Finish (Evilblade) |
||
</gallery> |
</gallery> |
||
| + | |||
| − | {{!}}-{{!}} |
||
| + | | |
||
| − | Kujaku= |
||
| + | Livegun| |
||
| + | Live covers the wing of the Perfect Wing Vistamp in teal energy and uses it to deliver a teal energy slash to the opponent. The attack leaves behind black and white feathers before causing the enemy to explode. |
||
| + | <gallery> |
||
| + | Evilyty Perfect Finish (Livegun) Step 1.png|Evilyty Perfect Finish (Livegun) (Step 1: Wing of Vistamp covered in energy) |
||
| + | Evilyty Perfect Finish (Livegun) Step 2.png|Evilyty Perfect Finish (Livegun) (Step 2: Energy slash) |
||
| + | Evilyty Perfect Finish (Livegun) Step 3.png|Evilyty Perfect Finish (Livegun) (Step 3: Aftermath) |
||
| + | Evilyty Perfect Finish (Livegun) Step 4.png|Evilyty Perfect Finish (Livegun) (Step 4: Explosion) |
||
| + | </gallery> |
||
| + | }} |
||
| + | |||
| + | | |
||
| + | Evilyty Perfect Finale| |
||
| + | {{nihongo|'''Evilyty Perfect Finale'''|エビリティパーフェクトフィナーレ|Ebiriti Pāfekuto Fināre}}: Varies depending on which mode the Two Sidriver is in. |
||
| + | {{tabber| |
||
| + | Livegun| |
||
| + | This finisher has three variations: |
||
| + | *Cyan light appears at the end of the Livegun's barrel before Live fires a sustained barrage of bladed projectiles made of black and white energy, with the barrel producing a cyan shockwave every time Live fires. He aims to the side while continuing to fire, attacking a line of enemies. The projectiles impale each opponent, causing them to explode. |
||
| + | *While flying through the air, Live disappears into a mass of feathers before reappearing in front of the enemy. He charges teal energy at the end of the Livegun's barrel before firing a large bladed projectile made of teal energy at close range. After the projectile strikes the enemy, it is followed by a beam of cyan energy fired from the Livegun. |
||
| + | *Waves of teal energy appear around the end of the Livegun's barrel before Live fires a volley of bladed projectiles made of teal energy. The projectiles are surrounded by semicircles of teal energy as they fly through the air before striking several enemies. Live then fires a cyan energy beam surrounded by additional black energy at a final target, producing a cyan shockwave upon impact. After striking the opponent, the beam traps them in a sphere of cyan energy covered by black and white feathers. |
||
| + | <gallery> |
||
| + | Evilyty Perfect Finale (Livegun) Step 1.png|Evilyty Perfect Finale (Livegun) (Version 1) (Step 1: Charging) |
||
| + | Evilyty Perfect Finale (Livegun) Step 2.png|Evilyty Perfect Finale (Livegun) (Version 1) (Step 2: Firing |
||
| + | Evilyty Perfect Finale (Livegun) Step 3.png|Evilyty Perfect Finale (Livegun) (Version 1) (Step 3: Projectile impaling enemy) |
||
| + | Evilyty Perfect Finale (Livegun) Step 4.png|Evilyty Perfect Finale (Livegun) (Version 1) (Step 4: Firing at second enemy) |
||
| + | Evilyty Perfect Finale (Livegun) Step 5.png|Evilyty Perfect Finale (Livegun) (Version 1) (Step 5: Firing barrage at first enemy) |
||
| + | Evilyty Perfect Finale (Livegun) Step 6.png|Evilyty Perfect Finale (Livegun) (Version 1) (Step 6: First enemy exploding) |
||
| + | Evilyty Perfect Finale (Livegun) Step 7.png|Evilyty Perfect Finale (Livegun) (Version 1) (Step 7: Firing at other enemies) |
||
| + | Evilyty Perfect Finale (Livegun) Step 8.png|Evilyty Perfect Finale (Livegun) (Version 1) (Step 8: Aftermath) |
||
| + | Evilyty Perfect Finale (Livegun).gif|Evilyty Perfect Finale (Livegun) (Version 1) |
||
| + | Evilyty Perfect Finale (Livegun) Ver 2 Step 1.png|Evilyty Perfect Finale (Livegun) (Version 2) (Step 1: Flying through the air) |
||
| + | Evilyty Perfect Finale (Livegun) Ver 2 Step 2.png|Evilyty Perfect Finale (Livegun) (Version 2) (Step 2: Glowing) |
||
| + | Evilyty Perfect Finale (Livegun) Ver 2 Step 3.png|Evilyty Perfect Finale (Livegun) (Version 2) (Step 3: Dissipating into feathers) |
||
| + | Evilyty Perfect Finale (Livegun) Ver 2 Step 4.png|Evilyty Perfect Finale (Livegun) (Version 2) (Step 4: Reappearing) |
||
| + | Evilyty Perfect Finale (Livegun) Ver 2 Step 5.png|Evilyty Perfect Finale (Livegun) (Version 2) (Step 5: Charging) |
||
| + | Evilyty Perfect Finale (Livegun) Ver 2 Step 6.png|Evilyty Perfect Finale (Livegun) (Version 2) (Step 6: Firing) |
||
| + | Evilyty Perfect Finale (Livegun) Ver 2 Step 7.png|Evilyty Perfect Finale (Livegun) (Version 2) (Step 7: Impact) |
||
| + | Evilyty Perfect Finale (Livegun) Ver 2 Step 8.png|Evilyty Perfect Finale (Livegun) (Version 2) (Step 8: Energy beam) |
||
| + | Evilyty Perfect Finale (Livegun) 2.gif|Evilyty Perfect Finale (Livegun) (Version 2) |
||
| + | Evilyty Perfect Finale (Livegun) Ver 3 Step 1.png|Evilyty Perfect Finale (Livegun) (Version 3) (Step 1: Charging) |
||
| + | Evilyty Perfect Finale (Livegun) Ver 3 Step 2.png|Evilyty Perfect Finale (Livegun) (Version 3) (Step 2: Firing) |
||
| + | Evilyty Perfect Finale (Livegun) Ver 3 Step 3.png|Evilyty Perfect Finale (Livegun) (Version 3) (Step 3: Projectiles striking enemies) |
||
| + | Evilyty Perfect Finale (Livegun) Ver 3 Step 4.png|Evilyty Perfect Finale (Livegun) (Version 3) (Step 4: Energy beam) |
||
| + | Evilyty Perfect Finale (Livegun) Ver 3 Step 5.png|Evilyty Perfect Finale (Livegun) (Version 3) (Step 5: Energy beam striking opponent) |
||
| + | Evilyty Perfect Finale (Livegun) Ver 3 Step 6.png|Evilyty Perfect Finale (Livegun) (Version 3) (Step 6: Opponent trapped in sphere of energy) |
||
| + | </gallery> |
||
| + | |||
| + | | |
||
| + | Driver| |
||
| + | Live jumps into the air and performs a flying kick with his wings extended. His entire body is surrounded by teal, green, and black energy, while additional strands of clear energy flow from his foot. |
||
| + | <gallery> |
||
| + | Evilyty Perfect Finale (Driver).png|Evilyty Perfect Finale (Driver) |
||
| + | </gallery> |
||
| + | }} |
||
| + | }} |
||
| + | }} |
||
| + | }} |
||
| + | |||
| + | | |
||
| + | Libera Driver| |
||
| + | {{tabber| |
||
| + | Stamping Smash| |
||
| + | {{tabber| |
||
| + | Cobra| |
||
| + | {{nihongo|'''Cobra Stamping Smash'''|コブラスタンピングスマッシュ|Kobura Sutanpingu Sumasshu}}: This finisher has three variations. |
||
| + | *After Jeanne jumps into the air, Lovekov transforms into a small, snake-like form composed of light blue energy and flies toward her before coiling around her leg. Jeanne then delivers a kick to an enemy in the air, producing an orange and blue energy shockwave upon impact. Jeanne keeps her foot against the enemy's body as the two fall until she uses her heel to slam the enemy into the ground beneath her. Jeanne ends up on top of the enemy, who explodes shortly after. |
||
| + | *After Jeanne jumps into the air, Lovekov transforms into a small, snake-like form composed of light blue energy and flies toward her before coiling around her leg. Jeanne then performs a flying kick covered in blue, yellow, and red energy. After the kick strikes the first target, Jeanne continues kicking more enemies, with each kick creating a blue and orange shockwave upon impact. She then somersaults backwards and away from the enemies as they explode. |
||
| + | *Jeanne delivers a roundhouse kick to two enemies, producing a trail of blue and orange fire. The kick sets the opponents on fire upon impact and launches them high into the air. The enemies explode in the sky shortly after. |
||
| + | <gallery> |
||
| + | Cobra Stamping Smash Step 1.png|Cobra Stamping Smash (Version 1) (Step 1: Lovekov glowing) |
||
| + | Cobra Stamping Smash Step 2.png|Cobra Stamping Smash (Version 1) (Step 2: Lovekov flying away) |
||
| + | Cobra Stamping Smash Step 3.png|Cobra Stamping Smash (Version 1) (Step 3: Jeanne and Lovekov in the air) |
||
| + | Cobra Stamping Smash Step 4.png|Cobra Stamping Smash (Version 1) (Step 4: Lovekov flying around Jeanne) |
||
| + | Cobra Stamping Smash Step 5.png|Cobra Stamping Smash (Version 1) (Step 5: Lovekov encircling Jeanne's leg) |
||
| + | Cobra Stamping Smash Step 6.png|Cobra Stamping Smash (Version 1) (Step 6: Jeanne preparing to kick enemy) |
||
| + | Cobra Stamping Smash Step 7.png|Cobra Stamping Smash (Version 1) (Step 7: Kick) |
||
| + | Cobra Stamping Smash Step 8.png|Cobra Stamping Smash (Version 1) (Step 8: Jeanne and enemy falling) |
||
| + | Cobra Stamping Smash Step 9.png|Cobra Stamping Smash (Version 1) (Step 9: Enemy under Jeanne's heel) |
||
| + | Cobra Stamping Smash Step 10.png|Cobra Stamping Smash (Version 1) (Step 10: Crashing into the ground) |
||
| + | Cobra Stamping Smash Step 11.png|Cobra Stamping Smash (Version 1) (Step 11: Jeanne on top of enemy) |
||
| + | Cobra Stamping Smash Step 12.png|Cobra Stamping Smash (Version 1) (Step 12: Explosion) |
||
| + | Cobra Stamping Smash.gif|Cobra Stamping Smash (Version 1) |
||
| + | Cobra Stamping Smash Ver 2 Step 1.png|Cobra Stamping Smash (Version 2) (Step 1: Lovekov flying toward Jeanne) |
||
| + | Cobra Stamping Smash Ver 2 Step 2.png|Cobra Stamping Smash (Version 2) (Step 2: Lovekov encircling Jeanne's leg) |
||
| + | Cobra Stamping Smash Ver 2 Step 3.png|Cobra Stamping Smash (Version 2) (Step 3: Flying kick) |
||
| + | Cobra Stamping Smash Ver 2 Step 4.png|Cobra Stamping Smash (Version 2) (Step 4: First impact) |
||
| + | Cobra Stamping Smash Ver 2 Step 5.png|Cobra Stamping Smash (Version 2) (Step 5: Kicking more enemies) |
||
| + | Cobra Stamping Smash Ver 2 Step 6.png|Cobra Stamping Smash (Version 2) (Step 6: Jumping away) |
||
| + | Cobra Stamping Smash Ver 2 Step 7.png|Cobra Stamping Smash (Version 2) (Step 7: Explosions) |
||
| + | Cobra Stamping Smash 2.gif|Cobra Stamping Smash (Version 2) |
||
| + | Cobra Stamping Smash Ver 3 Step 1.png|Cobra Stamping Smash (Version 3) (Step 1: Preparing to kick) |
||
| + | Cobra Stamping Smash Ver 3 Step 2.png|Cobra Stamping Smash (Version 3) (Step 2: Roundhouse kick) |
||
| + | Cobra Stamping Smash Ver 3 Step 3.png|Cobra Stamping Smash (Version 3) (Step 3: Impact) |
||
| + | Cobra Stamping Smash Ver 3 Step 4.png|Cobra Stamping Smash (Version 3) (Step 4: Enemies launched into the air) |
||
| + | Cobra Stamping Smash Ver 3 Step 5.png|Cobra Stamping Smash (Version 3) (Step 5: Explosion) |
||
| + | Cobra Stamping Smash 3.gif|Cobra Stamping Smash (Version 3) |
||
| + | </gallery> |
||
| + | |||
| + | | |
||
| + | Kujaku| |
||
{{nihongo|'''Kujaku Stamping Smash'''|クジャクスタンピングスマッシュ|Kujaku Sutanpingu Sumasshu}}: This finisher has two variations. |
{{nihongo|'''Kujaku Stamping Smash'''|クジャクスタンピングスマッシュ|Kujaku Sutanpingu Sumasshu}}: This finisher has two variations. |
||
*Lovekov floats into the air and glows yellow before separating into a total of 18 blades. Jeanne jumps into the air and ten of the blades attach to her back before spreading, generating cyan and purple-colored energy peacock feathers. The remaining eight blades then rotate around Jeanne's foot and form a drill-like configuration as she performs a flying kick. Blue energy is released upon the kick's impact, followed by orange energy. Jeanne brings her foot back as the eight blades surrounding it momentarily spread apart again before she delivers a second kick, launching the enemy away. |
*Lovekov floats into the air and glows yellow before separating into a total of 18 blades. Jeanne jumps into the air and ten of the blades attach to her back before spreading, generating cyan and purple-colored energy peacock feathers. The remaining eight blades then rotate around Jeanne's foot and form a drill-like configuration as she performs a flying kick. Blue energy is released upon the kick's impact, followed by orange energy. Jeanne brings her foot back as the eight blades surrounding it momentarily spread apart again before she delivers a second kick, launching the enemy away. |
||
| Line 683: | Line 1,651: | ||
Kujaku Stamping Smash Ver 2 Step 12.png|Kujaku Stamping Smash (Version 2) (Step 12: Explosion) |
Kujaku Stamping Smash Ver 2 Step 12.png|Kujaku Stamping Smash (Version 2) (Step 12: Explosion) |
||
Kujaku Stamping Smash 2.gif|Kujaku Stamping Smash (Version 2) |
Kujaku Stamping Smash 2.gif|Kujaku Stamping Smash (Version 2) |
||
| + | </gallery> |
||
| + | |||
| + | | |
||
| + | Hashibiroko| |
||
| + | {{nihongo|'''Hashibiroko Stamping Smash'''|ハシビロコウスタンピングスマッシュ|Hashibirokou Sutanpingu Sumasshu}}: Lovekov's blade is covered in purple fire before Jeanne launches a purple energy slash that destroys an enemy's projectile. The slash then continues to fly forward until it strikes the enemy, producing an explosion. |
||
| + | <gallery> |
||
| + | Hashibiroko Stamping Smash Step 1.png|Hashibiroko Stamping Smash (Step 1: Blade covered in fire) |
||
| + | Hashibiroko Stamping Smash Step 1.png|Hashibiroko Stamping Smash (Step 2: Energy slash) |
||
| + | Hashibiroko Stamping Smash Step 1.png|Hashibiroko Stamping Smash (Step 3: Clashing with enemy projectile) |
||
| + | Hashibiroko Stamping Smash Step 1.png|Hashibiroko Stamping Smash (Step 4: Destroying projectile) |
||
| + | Hashibiroko Stamping Smash Step 1.png|Hashibiroko Stamping Smash (Step 5: Striking enemy) |
||
| + | Hashibiroko Stamping Smash Step 1.png|Hashibiroko Stamping Smash (Step 6: Explosion) |
||
</gallery> |
</gallery> |
||
}} |
}} |
||
| + | |||
| − | {{!}}-{{!}} |
||
| + | | |
||
| − | Liberal Smash= |
||
| + | Liberal Smash| |
||
| − | {{#tag:tabber| |
||
| + | {{tabber| |
||
| − | Kujaku= |
||
| + | Cobra| |
||
| − | {{nihongo|'''Kujaku Liberal Smash'''|クジャクリベラルスマッシュ|Kujaku Riberaru Sumasshu}}: has two variations. |
||
| + | {{nihongo|'''Cobra Liberal Smash'''|コブラリベラルスマッシュ|Kobura Riberaru Sumasshu}}: This finisher has two variations. |
||
| + | *Jeanne covers her right foot in dark blue and orange energy while running, causing her footsteps to emit light blue shockwaves. She then jumps off of Lovekov before light blue and green energy flow around her leg. With her leg covered in this energy, Jeanne performs a flying kick that produces blue and yellow upon striking the enemy. |
||
| + | *Lovekov transforms into a small, snake-like form composed of light blue energy and coils around Jeanne's leg, producing blue light. The leg is then surrounded by additional blue energy as Jeanne performs a roundhouse kick. Her foot creates a blue and yellow energy slash that strikes the enemy, resulting in an explosion. |
||
| + | <gallery> |
||
| + | Cobra Liberal Smash Step 1.png|Cobra Liberal Smash (Version 1) (Step 1: Foot covered in energy) |
||
| + | Cobra Liberal Smash Step 2.png|Cobra Liberal Smash (Version 1) (Step 2: Footsteps producing shockwaves) |
||
| + | Cobra Liberal Smash Step 3.png|Cobra Liberal Smash (Version 1) (Step 3: Jumping off Lovekov) |
||
| + | Cobra Liberal Smash Step 4.png|Cobra Liberal Smash (Version 1) (Step 4: Energy flowing around leg) |
||
| + | Cobra Liberal Smash Step 5.png|Cobra Liberal Smash (Version 1) (Step 5: Leg covered in energy) |
||
| + | Cobra Liberal Smash Step 6.png|Cobra Liberal Smash (Version 1) (Step 6: Flying kick) |
||
| + | Cobra Liberal Smash Step 7.png|Cobra Liberal Smash (Version 1) (Step 7: Impact) |
||
| + | Cobra Liberal Smash.gif|Cobra Liberal Smash (Version 1) |
||
| + | Cobra Liberal Smash Ver 2 Step 1.png|Cobra Liberal Smash (Version 2) (Step 1: Lovekov flying through air) |
||
| + | Cobra Liberal Smash Ver 2 Step 2.png|Cobra Liberal Smash (Version 2) (Step 2: Encircling leg) |
||
| + | Cobra Liberal Smash Ver 2 Step 3.png|Cobra Liberal Smash (Version 2) (Step 3: Light produced when Lovekov coils around leg) |
||
| + | Cobra Liberal Smash Ver 2 Step 4.png|Cobra Liberal Smash (Version 2) (Step 4: Leg covered in energy) |
||
| + | Cobra Liberal Smash Ver 2 Step 5.png|Cobra Liberal Smash (Version 2) (Step 5: Roundhouse kick) |
||
| + | Cobra Liberal Smash Ver 2 Step 6.png|Cobra Liberal Smash (Version 2) (Step 6: Impact) |
||
| + | </gallery> |
||
| + | |||
| + | | |
||
| + | Kujaku| |
||
| + | {{nihongo|'''Kujaku Liberal Smash'''|クジャクリベラルスマッシュ|Kujaku Riberaru Sumasshu}}: This finisher has six variations. |
||
*Jeanne heats up Lovekov and performs a fire-covered slash using both fans. She then spins in order to perform a second slash, with one fan striking the enemy after the other, before delivering a third slash while jumping. Swirling fire forms underneath Jeanne while she holds the fans out, propelling Jeanne further. As she falls back to the ground, Jeanne swings both fans downward while they are covered in fire, creating a fiery explosion to attack the enemy. |
*Jeanne heats up Lovekov and performs a fire-covered slash using both fans. She then spins in order to perform a second slash, with one fan striking the enemy after the other, before delivering a third slash while jumping. Swirling fire forms underneath Jeanne while she holds the fans out, propelling Jeanne further. As she falls back to the ground, Jeanne swings both fans downward while they are covered in fire, creating a fiery explosion to attack the enemy. |
||
| + | *Jeanne throws Lovekov, who is then covered in fire. Jeanne controls the movement of the fans remotely by moving her arms, which leave behind trails of orange energy. The two fans fly back toward Jeanne before performing a red and blue energy slash together. They then perform another simultaneous slash in the other direction. Finally, the fans attack separately in opposite directions, creating an X-shaped energy slash. |
||
| − | *Jeanne throws Lovekov, igniting her in flames, and telepathically controls her, slashing multiple enemies. |
||
| + | *Jeanne somersaults into the air and lands in front of the opponent. With Lovekov covered in fire, Jeanne delivers two flaming slashes to the enemy using both fans together. The enemy is covered with red electricity for a brief moment before being destroyed in a fiery explosion. |
||
| + | *Jeanne performs three consecutive slashes of blue and orange fire in order to destroy incoming enemy projectiles. She then jumps a short distance into the air and performs two simultaneous slashes of the same fire. The two slashes combine into a single X-shaped slash before striking the enemy, resulting in an explosion. |
||
| + | *Jeanne covers Lovekov in light orange energy and uses her to parry the attacks of two enemies. Swinging the fans together, she then delivers a slash of blue and orange fire to each opponent. |
||
| + | *Jeanne covers Lovekov in light orange energy and uses one of the fans to block the enemy's attack before using the other to deliver a slash of blue and orange fire. She then uses both fans to deliver an X-shaped slash of the same fire, pushing the enemy back. |
||
<gallery> |
<gallery> |
||
| − | Kujaku Liberal Smash Step 1.png|Kujaku Liberal Smash (Step 1: Heated fans) |
+ | Kujaku Liberal Smash Step 1.png|Kujaku Liberal Smash (Version 1) (Step 1: Heated fans) |
| − | Kujaku Liberal Smash Step 2.png|Kujaku Liberal Smash (Step 2: First slash) |
+ | Kujaku Liberal Smash Step 2.png|Kujaku Liberal Smash (Version 1) (Step 2: First slash) |
| − | Kujaku Liberal Smash Step 3.png|Kujaku Liberal Smash (Step 3: Impact) |
+ | Kujaku Liberal Smash Step 3.png|Kujaku Liberal Smash (Version 1) (Step 3: Impact) |
| − | Kujaku Liberal Smash Step 4.png|Kujaku Liberal Smash (Step 4: Preparing for second slash) |
+ | Kujaku Liberal Smash Step 4.png|Kujaku Liberal Smash (Version 1) (Step 4: Preparing for second slash) |
| − | Kujaku Liberal Smash Step 5.png|Kujaku Liberal Smash (Step 5: Spinning slash) |
+ | Kujaku Liberal Smash Step 5.png|Kujaku Liberal Smash (Version 1) (Step 5: Spinning slash) |
| − | Kujaku Liberal Smash Step 6.png|Kujaku Liberal Smash (Step 6: Continued slash) |
+ | Kujaku Liberal Smash Step 6.png|Kujaku Liberal Smash (Version 1) (Step 6: Continued slash) |
| − | Kujaku Liberal Smash Step 7.png|Kujaku Liberal Smash (Step 7: Preparing for third slash) |
+ | Kujaku Liberal Smash Step 7.png|Kujaku Liberal Smash (Version 1) (Step 7: Preparing for third slash) |
| − | Kujaku Liberal Smash Step 8.png|Kujaku Liberal Smash (Step 8: Jumping slash) |
+ | Kujaku Liberal Smash Step 8.png|Kujaku Liberal Smash (Version 1) (Step 8: Jumping slash) |
| − | Kujaku Liberal Smash Step 9.png|Kujaku Liberal Smash (Step 9: Fire underneath Jeanne) |
+ | Kujaku Liberal Smash Step 9.png|Kujaku Liberal Smash (Version 1) (Step 9: Fire underneath Jeanne) |
| − | Kujaku Liberal Smash Step 10.png|Kujaku Liberal Smash (Step 10: Propelled into the air) |
+ | Kujaku Liberal Smash Step 10.png|Kujaku Liberal Smash (Version 1) (Step 10: Propelled into the air) |
| − | Kujaku Liberal Smash Step 11.png|Kujaku Liberal Smash (Step 11: Falling) |
+ | Kujaku Liberal Smash Step 11.png|Kujaku Liberal Smash (Version 1) (Step 11: Falling) |
| − | Kujaku Liberal Smash Step 12.png|Kujaku Liberal Smash (Step 12: Swinging fans downward) |
+ | Kujaku Liberal Smash Step 12.png|Kujaku Liberal Smash (Version 1) (Step 12: Swinging fans downward) |
| − | Kujaku Liberal Smash Step 13.png|Kujaku Liberal Smash (Step 13: Explosion) |
+ | Kujaku Liberal Smash Step 13.png|Kujaku Liberal Smash (Version 1) (Step 13: Explosion) |
| − | Kujaku Liberal Smash.gif|Kujaku Liberal Smash |
+ | Kujaku Liberal Smash.gif|Kujaku Liberal Smash (Version 1) |
| + | Kujaku Liberal Smash Ver 2 Step 1.png|Kujaku Liberal Smash (Version 2) (Step 1: Throwing fans) |
||
| + | Kujaku Liberal Smash Ver 2 Step 2.png|Kujaku Liberal Smash (Version 2) (Step 2: Fans returning) |
||
| + | Kujaku Liberal Smash Ver 2 Step 3.png|Kujaku Liberal Smash (Version 2) (Step 3: Preparing to slash) |
||
| + | Kujaku Liberal Smash Ver 2 Step 4.png|Kujaku Liberal Smash (Version 2) (Step 4: First slash) |
||
| + | Kujaku Liberal Smash Ver 2 Step 5.png|Kujaku Liberal Smash (Version 2) (Step 5: Preparing for second slash) |
||
| + | Kujaku Liberal Smash Ver 2 Step 6.png|Kujaku Liberal Smash (Version 2) (Step 6: Second slash) |
||
| + | Kujaku Liberal Smash Ver 2 Step 7.png|Kujaku Liberal Smash (Version 2) (Step 7: Preparing for final slash) |
||
| + | Kujaku Liberal Smash Ver 2 Step 8.png|Kujaku Liberal Smash (Version 2) (Step 8: X-shaped slash) |
||
| + | Kujaku Liberal Smash 2.gif|Kujaku Liberal Smash (Version 2) |
||
| + | Kujaku Liberal Smash Ver 3 Step 1.png|Kujaku Liberal Smash (Version 3) (Step 1: Somersault) |
||
| + | Kujaku Liberal Smash Ver 3 Step 2.png|Kujaku Liberal Smash (Version 3) (Step 2: First slash) |
||
| + | Kujaku Liberal Smash Ver 3 Step 3.png|Kujaku Liberal Smash (Version 3) (Step 3: Enemy on fire) |
||
| + | Kujaku Liberal Smash Ver 3 Step 4.png|Kujaku Liberal Smash (Version 3) (Step 4: Second slash) |
||
| + | Kujaku Liberal Smash Ver 3 Step 5.png|Kujaku Liberal Smash (Version 3) (Step 5: Aftermath of second slash) |
||
| + | Kujaku Liberal Smash Ver 3 Step 6.png|Kujaku Liberal Smash (Version 3) (Step 6: Enemy damaged) |
||
| + | Kujaku Liberal Smash Ver 3 Step 7.png|Kujaku Liberal Smash (Version 3) (Step 7: Explosion) |
||
| + | Kujaku Liberal Smash 3.gif|Kujaku Liberal Smash (Version 3) |
||
| + | Kujaku Liberal Smash Ver 4 Step 1.png|Kujaku Liberal Smash (Version 4) (Step 1: First slash) |
||
| + | Kujaku Liberal Smash Ver 4 Step 2.png|Kujaku Liberal Smash (Version 4) (Step 2: Second slash) |
||
| + | Kujaku Liberal Smash Ver 4 Step 3.png|Kujaku Liberal Smash (Version 4) (Step 3: Third slash) |
||
| + | Kujaku Liberal Smash Ver 4 Step 4.png|Kujaku Liberal Smash (Version 4) (Step 4: Jumping) |
||
| + | Kujaku Liberal Smash Ver 4 Step 5.png|Kujaku Liberal Smash (Version 4) (Step 5: Simultaneous slashes) |
||
| + | Kujaku Liberal Smash Ver 4 Step 6.png|Kujaku Liberal Smash (Version 4) (Step 6: Combined slash) |
||
| + | Kujaku Liberal Smash Ver 4 Step 7.png|Kujaku Liberal Smash (Version 4) (Step 7: Explosion) |
||
| + | Kujaku Liberal Smash 4.gif|Kujaku Liberal Smash (Version 4) |
||
| + | Kujaku Liberal Smash Ver 5 Step 1.png|Kujaku Liberal Smash (Version 5) (Step 1: Covering fans in energy) |
||
| + | Kujaku Liberal Smash Ver 5 Step 2.png|Kujaku Liberal Smash (Version 5) (Step 2: Parrying first enemy) |
||
| + | Kujaku Liberal Smash Ver 5 Step 3.png|Kujaku Liberal Smash (Version 5) (Step 3: Parrying second enemy) |
||
| + | Kujaku Liberal Smash Ver 5 Step 4.png|Kujaku Liberal Smash (Version 5) (Step 4: Preparing to attack first enemy) |
||
| + | Kujaku Liberal Smash Ver 5 Step 5.png|Kujaku Liberal Smash (Version 5) (Step 5: First slash) |
||
| + | Kujaku Liberal Smash Ver 5 Step 6.png|Kujaku Liberal Smash (Version 5) (Step 6: Aftermath of first slash) |
||
| + | Kujaku Liberal Smash Ver 5 Step 7.png|Kujaku Liberal Smash (Version 5) (Step 7: Preparing to attack second enemy) |
||
| + | Kujaku Liberal Smash Ver 5 Step 8.png|Kujaku Liberal Smash (Version 5) (Step 8: Second slash) |
||
| + | Kujaku Liberal Smash Ver 5 Step 9.png|Kujaku Liberal Smash (Version 5) (Step 9: Aftermath of second slash) |
||
| + | Kujaku Liberal Smash 5.gif|Kujaku Liberal Smash (Version 5) |
||
| + | Kujaku Liberal Smash Ver 6 Step 1.png|Kujaku Liberal Smash (Version 6) (Step 1: Covering fans in energy) |
||
| + | Kujaku Liberal Smash Ver 6 Step 2.png|Kujaku Liberal Smash (Version 6) (Step 2: Blocking attack) |
||
| + | Kujaku Liberal Smash Ver 6 Step 3.png|Kujaku Liberal Smash (Version 6) (Step 3: Slashing with other fan) |
||
| + | Kujaku Liberal Smash Ver 6 Step 4.png|Kujaku Liberal Smash (Version 6) (Step 4: Aftermath of slash) |
||
| + | Kujaku Liberal Smash Ver 6 Step 5.png|Kujaku Liberal Smash (Version 6) (Step 5: Cross slash) |
||
| + | Kujaku Liberal Smash Ver 6 Step 6.png|Kujaku Liberal Smash (Version 6) (Step 6: Aftermath of second slash) |
||
| + | Kujaku Liberal Smash 6.gif|Kujaku Liberal Smash (Version 6) |
||
| + | </gallery> |
||
| + | |||
| + | | |
||
| + | Turtle| |
||
| + | {{nihongo|'''Turtle Liberal Smash'''|タートルリベラルスマッシュ|Tātoru Riberaru Sumasshu}}: This finisher has two variations. |
||
| + | *Jeanne charges Lovekov's barrel with green energy while the sight glows red and her own visor glows green. She then fires a green energy artillery shell that explodes upon striking the enemy. |
||
| + | *Jeanne fires a turtle shell from Lovekov, generating a heart-shaped ring of green smoke from the barrel. Jeanne's leg is then covered in green energy before she kicks the shell, causing it to spin and be surrounded by spiraling green energy as it flies through the air. The shell crashes into a group of enemies, producing an orange shockwave and destroying them in an explosion. |
||
| + | <gallery> |
||
| + | Turtle Liberal Smash Step 1.png|Turtle Liberal Smash (Version 1) (Step 1: Charging) |
||
| + | Turtle Liberal Smash Step 2.png|Turtle Liberal Smash (Version 1) (Step 2: Firing) |
||
| + | Turtle Liberal Smash Step 3.png|Turtle Liberal Smash (Version 1) (Step 3: About to strike enemy) |
||
| + | Turtle Liberal Smash Step 4.png|Turtle Liberal Smash (Version 1) (Step 4: Explosion) |
||
| + | Turtle Liberal Smash.gif|Turtle Liberal Smash (Version 1) |
||
| + | Turtle Liberal Smash Ver 2 Step 1.png|Turtle Liberal Smash (Version 2) (Step 1: Firing) |
||
| + | Turtle Liberal Smash Ver 2 Step 2.png|Turtle Liberal Smash (Version 2) (Step 2: Performing kick) |
||
| + | Turtle Liberal Smash Ver 2 Step 3.png|Turtle Liberal Smash (Version 2) (Step 3: Shell spinning) |
||
| + | Turtle Liberal Smash Ver 2 Step 4.png|Turtle Liberal Smash (Version 2) (Step 4: Shell approaching enemies) |
||
| + | Turtle Liberal Smash Ver 2 Step 5.png|Turtle Liberal Smash (Version 2) (Step 5: Impact) |
||
| + | Turtle Liberal Smash Ver 2 Step 6.png|Turtle Liberal Smash (Version 2) (Step 6: Explosions) |
||
| + | </gallery> |
||
| + | |||
| + | | |
||
| + | Hashibiroko| |
||
| + | {{nihongo|'''Hashibiroko Liberal Smash'''|ハシビロコウリベラルスマッシュ|Hashibirokou Riberaru Sumasshu}}: This finisher has two variations. |
||
| + | *Jeanne covers Lovekov's blade in purple energy before delivering a downward purple energy slash to the enemy. The attack leaves purple fire in its path. |
||
| + | *Jeanne delivers three energy slashes to the enemy in quick succession. |
||
| + | <gallery> |
||
| + | Hashibiroko Liberal Smash Step 1.png|Hashibiroko Liberal Smash (Version 1) (Step 1: Lovekov covered in energy) |
||
| + | Hashibiroko Liberal Smash Step 2.png|Hashibiroko Liberal Smash (Version 1) (Step 2: Swinging) |
||
| + | Hashibiroko Liberal Smash Step 3.png|Hashibiroko Liberal Smash (Version 1) (Step 3: Energy slash) |
||
| + | Hashibiroko Liberal Smash.gif|Hashibiroko Liberal Smash (Version 1) |
||
| + | Hashibiroko Liberal Smash Ver 2 Step 1.png|Hashibiroko Liberal Smash (Version 2) (Step 1: Energy slash) |
||
| + | Hashibiroko Liberal Smash Ver 2 Step 2.png|Hashibiroko Liberal Smash (Version 2) (Step 2: Slash striking enemy) |
||
| + | Hashibiroko Liberal Smash Ver 2 Step 3.png|Hashibiroko Liberal Smash (Version 2) (Step 3: Preparing for second slash) |
||
| + | Hashibiroko Liberal Smash Ver 2 Step 4.png|Hashibiroko Liberal Smash (Version 2) (Step 4: Second slash) |
||
| + | Hashibiroko Liberal Smash Ver 2 Step 5.png|Hashibiroko Liberal Smash (Version 2) (Step 5: Preparing for third slash) |
||
| + | Hashibiroko Liberal Smash Ver 2 Step 6.png|Hashibiroko Liberal Smash (Version 2) (Step 6: Third slash) |
||
| + | Hashibiroko Liberal Smash Ver 2 Step 7.png|Hashibiroko Liberal Smash (Version 2) (Step 7: Gashes on enemy) |
||
| + | Hashibiroko Liberal Smash 2.gif|Hashibiroko Liberal Smash (Version 2) |
||
</gallery> |
</gallery> |
||
}} |
}} |
||
}} |
}} |
||
| + | |||
| − | {{!}}-{{!}} |
||
| + | | |
||
| − | Demons Driver= |
||
| + | Demons Driver| |
||
| − | {{#tag:tabber| |
||
| + | {{tabber| |
||
| − | Demons Finish= |
||
| + | Demons| |
||
| + | {{tabber| |
||
| + | Demons Finish| |
||
{{nihongo|''' Demons Finish'''|ディーモンズフィニッシュ|Demonzu Finisshu}}: Demons stamps a Vistamp onto the Demons Driver's screen and performs a finisher using its power. |
{{nihongo|''' Demons Finish'''|ディーモンズフィニッシュ|Demonzu Finisshu}}: Demons stamps a Vistamp onto the Demons Driver's screen and performs a finisher using its power. |
||
| − | {{ |
+ | {{tabber| |
| − | Spider |
+ | Spider| |
| + | This finisher has four variations: |
||
| − | Demons jumps into the air and produces crimson energy from his body as he floats in place. Eight red energy constructs of mechanical spider legs then emerge from his back and curl forward, gathering their pointed ends in front of Demons' foot as he performs a flying kick covered in red energy. The kick produces red and purple energy upon impact before causing the enemy to fly along with Demons until the two crash through a wall. |
||
| + | *Demons jumps into the air and produces crimson energy from his body as he floats in place. Eight red energy constructs of mechanical spider legs then emerge from his back and curl forward, gathering their pointed ends in front of Demons' foot as he performs a flying kick covered in red energy. The kick produces red and purple energy upon impact before causing the enemy to fly along with Demons until the two crash through a wall. |
||
| + | *From his hand, Demons fires string that wraps around the enemy and restrains him. He then pulls the string, causing the enemy to be launched through the air towards him. Demons jumps towards the enemy with his hand covered in crimson energy before delivering a punch that produces a large red shockwave upon impact. |
||
| + | *Demons covers his leg with red energy before performing a side kick motion. Eight red energy spider legs are then generated from Demon's leg and crush the enemy. Afterward, the enemy is covered with red energy and electricity. A crimson energy web then appears around the opponent shortly before they explode. |
||
| + | *Demons covers his arm with red energy and approaches the enemy as eight red energy spider legs are generated from his back. Demons punches the enemy, with the spider legs bending forward to surround his fist. The punch produces an explosion of light red energy upon impact. |
||
| + | *Demons jumps forward before his lower leg is covered in red energy. Eight red energy constructs of mechanical spider legs then emerge from his leg and curl forward, gathering their pointed ends in front of Demons' foot as he performs a flying kick. More red energy is produced upon the kick striking the enemy. Demons then activates the Demons Finish a second time, causing eight more energy spider legs to sprout from Demons' back and point forward as well. This strengthens the kick and allows Demons to overpower the enemy, resulting in an explosion. |
||
<gallery> |
<gallery> |
||
Spider Demons Finish Step 1.png|Demons Finish (Spider) (Version 1) (Step 1: Jumping into the air) |
Spider Demons Finish Step 1.png|Demons Finish (Spider) (Version 1) (Step 1: Jumping into the air) |
||
| Line 727: | Line 1,823: | ||
Spider Demons Finish Step 7.png|Demons Finish (Spider) (Version 1) (Step 7: Enemy flying along with kick) |
Spider Demons Finish Step 7.png|Demons Finish (Spider) (Version 1) (Step 7: Enemy flying along with kick) |
||
Spider Demons Finish Step 8.png|Demons Finish (Spider) (Version 1) (Step 8: Crashing through wall) |
Spider Demons Finish Step 8.png|Demons Finish (Spider) (Version 1) (Step 8: Crashing through wall) |
||
| + | Demons Finish (Spider).gif|Demons Finish (Spider) (Version 1) |
||
| + | Spider Demons Finish Ver 2 Step 1.png|Demons Finish (Spider) (Version 2) (Step 1: Firing string) |
||
| + | Spider Demons Finish Ver 2 Step 2.png|Demons Finish (Spider) (Version 2) (Step 2: String wrapping around enemy) |
||
| + | Spider Demons Finish Ver 2 Step 3.png|Demons Finish (Spider) (Version 2) (Step 3: Enemy restrained) |
||
| + | Spider Demons Finish Ver 2 Step 4.png|Demons Finish (Spider) (Version 2) (Step 4: Demons pulling string) |
||
| + | Spider Demons Finish Ver 2 Step 5.png|Demons Finish (Spider) (Version 2) (Step 5: Enemy pulled) |
||
| + | Spider Demons Finish Ver 2 Step 6.png|Demons Finish (Spider) (Version 2) (Step 6: Demons jumping and charging fist) |
||
| + | Spider Demons Finish Ver 2 Step 7.png|Demons Finish (Spider) (Version 2) (Step 7: Punch) |
||
| + | Spider Demons Finish Ver 2 Step 8.png|Demons Finish (Spider) (Version 2) (Step 8: Aftermath) |
||
| + | Demons Finish (Spider) 2.gif|Demons Finish (Spider) (Version 2) |
||
| + | Spider Demons Finish Ver 3 Step 1.png|Demons Finish (Spider) (Version 3) (Step 1: Leg covered in energy) |
||
| + | Spider Demons Finish Ver 3 Step 2.png|Demons Finish (Spider) (Version 3) (Step 2: Side kick with spider legs) |
||
| + | Spider Demons Finish Ver 3 Step 3.png|Demons Finish (Spider) (Version 3) (Step 3: Spider legs crushing enemy) |
||
| + | Spider Demons Finish Ver 3 Step 4.png|Demons Finish (Spider) (Version 3) (Step 4: Lowering leg) |
||
| + | Spider Demons Finish Ver 3 Step 5.png|Demons Finish (Spider) (Version 3) (Step 5: Enemy covered in red energy) |
||
| + | Spider Demons Finish Ver 3 Step 6.png|Demons Finish (Spider) (Version 3) (Step 6: Energy web) |
||
| + | Spider Demons Finish Ver 3 Step 7.png|Demons Finish (Spider) (Version 3) (Step 7: Explosion) |
||
| + | Demons Finish (Spider) 3.gif|Demons Finish (Spider) (Version 3) |
||
| + | Spider Demons Finish Ver 4 Step 1.png|Demons Finish (Spider) (Version 4) (Step 1: Charging) |
||
| + | Spider Demons Finish Ver 4 Step 2.png|Demons Finish (Spider) (Version 4) (Step 2: Spider legs) |
||
| + | Spider Demons Finish Ver 4 Step 3.png|Demons Finish (Spider) (Version 4) (Step 3: Punch) |
||
| + | Spider Demons Finish Ver 4 Step 4.png|Demons Finish (Spider) (Version 4) (Step 4: Impact) |
||
| + | Spider Demons Finish Ver 4 Step 5.png|Demons Finish (Spider) (Version 4) (Step 5: Explosion) |
||
| + | Demons Finish (Spider) 4.gif|Demons Finish (Spider) (Version 4) |
||
| + | Spider Demons Finish Ver 5 Step 1.png|Demons Finish (Spider) (Version 5) (Step 1: Jumping) |
||
| + | Spider Demons Finish Ver 5 Step 2.png|Demons Finish (Spider) (Version 5) (Step 2: Leg covered in red energy) |
||
| + | Spider Demons Finish Ver 5 Step 3.png|Demons Finish (Spider) (Version 5) (Step 3: Generating spider legs) |
||
| + | Spider Demons Finish Ver 5 Step 4.png|Demons Finish (Spider) (Version 5) (Step 4: Flying kick) |
||
| + | Spider Demons Finish Ver 5 Step 5.png|Demons Finish (Spider) (Version 5) (Step 5: Impact) |
||
| + | Spider Demons Finish Ver 5 Step 6.png|Demons Finish (Spider) (Version 5) (Step 6: Activating Demons Finish again) |
||
| + | Spider Demons Finish Ver 5 Step 7.png|Demons Finish (Spider) (Version 5) (Step 7: Continued kick) |
||
| + | Spider Demons Finish Ver 5 Step 8.png|Demons Finish (Spider) (Version 5) (Step 8: Additional spider legs) |
||
| + | Spider Demons Finish Ver 5 Step 9.png|Demons Finish (Spider) (Version 5) (Step 9: Explosion) |
||
| + | Spider Demons Finish Ver 5 Step 10.png|Demons Finish (Spider) (Version 5) (Step 10: Explosion expanding) |
||
| + | Holy Justis Finish vs Demons Finish (Spider).gif|Demons Finish (Spider) (Version 5) |
||
</gallery> |
</gallery> |
||
| + | |||
| − | {{!}}-{{!}} |
||
| + | | |
||
| − | Mogura= |
||
| + | Mogura| |
||
This finisher has two variations: |
This finisher has two variations: |
||
*Demons covers the Demon Digzon with spinning green and red energy like a drill before running up to the enemy and stabbing them with it. The Demon Dizon produces more green and red energy and Demons keeps it embedded in the enemy while the spinning energy continues damaging them. After a final burst of the energy, the enemy is ejected from the Demon Digzin and explodes. |
*Demons covers the Demon Digzon with spinning green and red energy like a drill before running up to the enemy and stabbing them with it. The Demon Dizon produces more green and red energy and Demons keeps it embedded in the enemy while the spinning energy continues damaging them. After a final burst of the energy, the enemy is ejected from the Demon Digzin and explodes. |
||
| Line 748: | Line 1,880: | ||
Mogura Demons Finish Ver 2 Step 3.png|Demons Finish (Mogura) (Version 2) (Step 3: Demon Digzon destroying enemies) |
Mogura Demons Finish Ver 2 Step 3.png|Demons Finish (Mogura) (Version 2) (Step 3: Demon Digzon destroying enemies) |
||
Demons Finish (Mogura) 2.gif|Demons Finish (Mogura) (Version 2) |
Demons Finish (Mogura) 2.gif|Demons Finish (Mogura) (Version 2) |
||
| + | </gallery> |
||
| + | |||
| + | | |
||
| + | Condor| |
||
| + | Demons flies into the air and uses the Demon Rumblejoker wings to fire eight bladed feather projectiles, which embed themselves in the enemy. He then performs a flying dropkick with both feet covered in purple energy, completely destroying the opponent upon impact. |
||
| + | <gallery> |
||
| + | Condor Demons Finish Step 1.png|Demons Finish (Condor) (Step 1: Firing feathers) |
||
| + | Condor Demons Finish Step 2.png|Demons Finish (Condor) (Step 2: Feathers striking enemy ) |
||
| + | Condor Demons Finish Step 3.png|Demons Finish (Condor) (Step 3: Flying dropkick) |
||
| + | Condor Demons Finish Step 4.png|Demons Finish (Condor) (Step 4: Impact) |
||
| + | Condor Demons Finish Step 5.png|Demons Finish (Condor) (Step 5: Flying past) |
||
| + | Condor Demons Finish Step 6.png|Demons Finish (Condor) (Step 6: Explosion) |
||
| + | Demons Finish (Condor).gif|Demons Finish (Condor) |
||
</gallery> |
</gallery> |
||
}} |
}} |
||
| + | |||
| − | {{!}}-{{!}} |
||
| + | | |
||
| − | Demons Requiem= |
||
| + | Demons Requiem| |
||
| − | {{#tag:tabber| |
||
| + | {{tabber| |
||
| − | Batta= |
||
| + | Batta| |
||
{{nihongo|'''Batta Demons Requiem'''|バッタデモンズレクイエム|Batta Demonzu Rekuiemu}}: Demons leaps into the air and curls his body into a ball, avoiding an enemy projectile as a result. He then spins while falling towards the enemy, crashing through more projectiles in the process before performing a flying dropkick with both grasshopper legs. The kick briefly collides with the target before knocking them back. |
{{nihongo|'''Batta Demons Requiem'''|バッタデモンズレクイエム|Batta Demonzu Rekuiemu}}: Demons leaps into the air and curls his body into a ball, avoiding an enemy projectile as a result. He then spins while falling towards the enemy, crashing through more projectiles in the process before performing a flying dropkick with both grasshopper legs. The kick briefly collides with the target before knocking them back. |
||
<gallery> |
<gallery> |
||
| Line 765: | Line 1,911: | ||
Batta Demons Requiem.gif|Batta Demons Requiem |
Batta Demons Requiem.gif|Batta Demons Requiem |
||
</gallery> |
</gallery> |
||
| + | |||
| − | {{!}}-{{!}} |
||
| + | | |
||
| − | Mogura= |
||
| + | Mogura| |
||
{{nihongo|'''Mogura Demons Requiem'''|モグラデモンズレクイエム|Mogura Demonzu Rekuiemu}}: Demons forms an energy construct of the Demon Digzon around his leg and performs a flying kick surrounded by spinning green, orange, and blue energy. The attack crashes through enemy projectiles before striking the target. The Demon Digzon construct then impales the enemy, causing them to explode. |
{{nihongo|'''Mogura Demons Requiem'''|モグラデモンズレクイエム|Mogura Demonzu Rekuiemu}}: Demons forms an energy construct of the Demon Digzon around his leg and performs a flying kick surrounded by spinning green, orange, and blue energy. The attack crashes through enemy projectiles before striking the target. The Demon Digzon construct then impales the enemy, causing them to explode. |
||
<gallery> |
<gallery> |
||
| Line 775: | Line 1,922: | ||
Mogura Demons Requiem Step 5.png|Mogura Demons Requiem (Step 5: Explosion) |
Mogura Demons Requiem Step 5.png|Mogura Demons Requiem (Step 5: Explosion) |
||
Mogura Demons Requiem.gif|Mogura Demons Requiem |
Mogura Demons Requiem.gif|Mogura Demons Requiem |
||
| + | </gallery> |
||
| + | |||
| + | | |
||
| + | Batta + Scorpion| |
||
| + | {{nihongo|'''Batta Scorpion Demons Requiem'''|バッタスコーピオンデモンズレクイエム|Batta Sukōpion Demonzu Rekuiemu}}: This finisher has two variations. |
||
| + | {{tabber| |
||
| + | Version 1| |
||
| + | Demons jumps toward a group of enemies and kicks the one in the middle before kicking back off and into the air. He lands in front of a second enemy and attacks them with the Demon Ridolstinger. Demons jumps away again before delivering an axe kick to a third enemy, creating a red energy energy as he lands. He follows this up with a rotating red energy slash using both his leg and the Demon Ridolstinger. Demons then jumps into the air once again and performs a dropkick with the Demon Ridolstinger coiled around his body. The kick strikes the center enemy before Demons, still on top of them, uncoils the Demons Ridolstinger and rotates his body with the tail outstretched, striking the other two opponents with it. Demons then jumps off of the center enemy before all three opponents explode. |
||
| + | <gallery> |
||
| + | Batta Scorpion Demons Requiem Step 1.png|Batta Scorpion Demons Requiem (Version 1) (Step 1: Preparing to jump) |
||
| + | Batta Scorpion Demons Requiem Step 2.png|Batta Scorpion Demons Requiem (Version 1) (Step 2: Jumping) |
||
| + | Batta Scorpion Demons Requiem Step 3.png|Batta Scorpion Demons Requiem (Version 1) (Step 3: In the air) |
||
| + | Batta Scorpion Demons Requiem Step 4.png|Batta Scorpion Demons Requiem (Version 1) (Step 4: Kick) |
||
| + | Batta Scorpion Demons Requiem Step 5.png|Batta Scorpion Demons Requiem (Version 1) (Step 5: Preparing to jump off) |
||
| + | Batta Scorpion Demons Requiem Step 6.png|Batta Scorpion Demons Requiem (Version 1) (Step 6: Jumping off enemy) |
||
| + | Batta Scorpion Demons Requiem Step 7.png|Batta Scorpion Demons Requiem (Version 1) (Step 7: In the air again) |
||
| + | Batta Scorpion Demons Requiem Step 8.png|Batta Scorpion Demons Requiem (Version 1) (Step 8: Tail strike) |
||
| + | Batta Scorpion Demons Requiem Step 9.png|Batta Scorpion Demons Requiem (Version 1) (Step 9: Preparing to jump again) |
||
| + | Batta Scorpion Demons Requiem Step 10.png|Batta Scorpion Demons Requiem (Version 1) (Step 10: Jumping away) |
||
| + | Batta Scorpion Demons Requiem Step 11.png|Batta Scorpion Demons Requiem (Version 1) (Step 11: Rotating body) |
||
| + | Batta Scorpion Demons Requiem Step 12.png|Batta Scorpion Demons Requiem (Version 1) (Step 12: Axe kick energy slash) |
||
| + | Batta Scorpion Demons Requiem Step 13.png|Batta Scorpion Demons Requiem (Version 1) (Step 13: Aftermath of first slash) |
||
| + | Batta Scorpion Demons Requiem Step 14.png|Batta Scorpion Demons Requiem (Version 1) (Step 14: Second energy slash) |
||
| + | Batta Scorpion Demons Requiem Step 15.png|Batta Scorpion Demons Requiem (Version 1) (Step 15: Aftermath of second slash and jumping) |
||
| + | Batta Scorpion Demons Requiem Step 16.png|Batta Scorpion Demons Requiem (Version 1) (Step 16: Jumping into the air) |
||
| + | Batta Scorpion Demons Requiem Step 17.png|Batta Scorpion Demons Requiem (Version 1) (Step 17: Wrapping tail around body) |
||
| + | Batta Scorpion Demons Requiem Step 18.png|Batta Scorpion Demons Requiem (Version 1) (Step 18: Dropkick) |
||
| + | Batta Scorpion Demons Requiem Step 19.png|Batta Scorpion Demons Requiem (Version 1) (Step 19: Kick impact) |
||
| + | Batta Scorpion Demons Requiem Step 20.png|Batta Scorpion Demons Requiem (Version 1) (Step 20: Attacking second enemy with tail) |
||
| + | Batta Scorpion Demons Requiem Step 21.png|Batta Scorpion Demons Requiem (Version 1) (Step 21: Attacking third enemy with tail) |
||
| + | Batta Scorpion Demons Requiem Step 22.png|Batta Scorpion Demons Requiem (Version 1) (Step 22: Preparing to jump off) |
||
| + | Batta Scorpion Demons Requiem Step 23.png|Batta Scorpion Demons Requiem (Version 1) (Step 23: Jumping off) |
||
| + | Batta Scorpion Demons Requiem Step 24.png|Batta Scorpion Demons Requiem (Version 1) (Step 24: Explosions) |
||
| + | Batta Scorpion Demons Requiem.gif|Batta Scorpion Demons Requiem (Version 1) |
||
| + | </gallery> |
||
| + | |||
| + | | |
||
| + | Version 2| |
||
| + | Demons jumps into the air and performs a flying kick, landing on the ground near the opponent. He then delivers several kicks and stabs with the Demon Ridolstinger before jumping into the air once again. Demons performs a dropkick with the Demon Ridolstinger coiled around his body, producing a dome of red energy in front of him. |
||
| + | <gallery> |
||
| + | Batta Scorpion Demons Requiem Ver 2 Step 1.png|Batta Scorpion Demons Requiem (Version 2) (Step 1: In the air) |
||
| + | Batta Scorpion Demons Requiem Ver 2 Step 2.png|Batta Scorpion Demons Requiem (Version 2) (Step 2: Falling kick) |
||
| + | Batta Scorpion Demons Requiem Ver 2 Step 3.png|Batta Scorpion Demons Requiem (Version 2) (Step 3: Landing) |
||
| + | Batta Scorpion Demons Requiem Ver 2 Step 4.png|Batta Scorpion Demons Requiem (Version 2) (Step 4: Stabbing with tail) |
||
| + | Batta Scorpion Demons Requiem Ver 2 Step 5.png|Batta Scorpion Demons Requiem (Version 2) (Step 5: Kicking) |
||
| + | Batta Scorpion Demons Requiem Ver 2 Step 6.png|Batta Scorpion Demons Requiem (Version 2) (Step 6: Jumping) |
||
| + | Batta Scorpion Demons Requiem Ver 2 Step 7.png|Batta Scorpion Demons Requiem (Version 2) (Step 7: Wrapping tail around body) |
||
| + | Batta Scorpion Demons Requiem Ver 2 Step 8.png|Batta Scorpion Demons Requiem (Version 2) (Step 8: Flying kick) |
||
| + | Batta Scorpion Demons Requiem Ver 2 Step 9.png|Batta Scorpion Demons Requiem (Version 2) (Step 9: Impact) |
||
| + | Batta Scorpion Demons Requiem 2.gif|Batta Scorpion Demons Requiem (Version 2) |
||
</gallery> |
</gallery> |
||
}} |
}} |
||
| + | }} |
||
| + | }} |
||
| + | |||
| + | | |
||
| + | Over Demons| |
||
| + | {{tabber| |
||
| + | Demons Finish| |
||
| + | {{nihongo|''' Demons Finish'''|ディーモンズフィニッシュ|Demonzu Finisshu}}: Over Demons stamps a Vistamp onto the Demons Driver's screen and performs a finisher using its power. |
||
| + | {{tabber| |
||
| + | Kuwagata| |
||
| + | Over Demons extends four cable-like mechanical appendages from his back and uses the manipulators at the ends to grab four bystanders. He then activates the wing on his shoulder and flies away from the battlefield while producing a trail of cyan energy and pulling the people along with him. |
||
| + | <gallery> |
||
| + | Kuwagata Demons Finish Step 1.png|Demons Finish (Kuwagata) (Step 1: Extending appendages) |
||
| + | Kuwagata Demons Finish Step 2.png|Demons Finish (Kuwagata) (Step 2: Grabbing first person) |
||
| + | Kuwagata Demons Finish Step 3.png|Demons Finish (Kuwagata) (Step 3: Grabbing second person) |
||
| + | Kuwagata Demons Finish Step 4.png|Demons Finish (Kuwagata) (Step 4: Grabbing last two people) |
||
| + | Kuwagata Demons Finish Step 5.png|Demons Finish (Kuwagata) (Step 5: Activating wing) |
||
| + | Kuwagata Demons Finish Step 6.png|Demons Finish (Kuwagata) (Step 6: Over Demons with activated wing) |
||
| + | Kuwagata Demons Finish Step 7.png|Demons Finish (Kuwagata) (Step 7: Flying) |
||
| + | Kuwagata Demons Finish Step 8.png|Demons Finish (Kuwagata) (Step 8: Pulling people along with him) |
||
| + | Demons Finish (Kuwagata).gif|Demons Finish (Kuwagata) |
||
| + | </gallery> |
||
| + | }} |
||
| + | |||
| + | | |
||
| + | Demons Requiem| |
||
| + | {{tabber| |
||
| + | Full Genomix| |
||
| + | {{nihongo|'''Batta Condor Scorpion Anomalocaris Demons Requiem'''|バッタコンドルスコーピオンアノマロカリスデモンズレクイエム|Batta Kondoru Sukōpion Anomarokarisu Demonzu Rekuiemu}}: Over Demons jumps towards the enemy and delivers a kick covered in green energy. Upon landing, he swings his scorpion tail, which is covered in red energy. He then rams the enemy with his shoulder. After rebounding, he jumps forward and performs a dual cyan energy slash with his right claw. Now at a distance, he extends his tail and covers it in red energy before stabbing the opponent twice with it. When the opponent counterattacks, he parries the attack with another energy slash with his right claw. He then jumps toward the enemy and delivers an energy slash with his left claw. Afterwards, he performs a series of punches and kicks before delivering an upward kick that produces a trail of red energy, launching the enemy into the air. Over Demons flies up to meet them, with his wings covered in purple energy. He then launches eight feather-shaped projectiles made of purple energy. The projectiles home in on the enemy and pierce them simultaneously before dissipating. Soon afterwards, Over Demons delivers a flying kick surrounded by a dome of red energy, producing an orange shockwave upon impact. Over Demons continues flying through the air with the enemy as the kick produced red electricity. He then kicks the opponent away, producing red shockwaves as well as a sonic boom. |
||
| + | <gallery> |
||
| + | Batta Condor Scorpion Anomalocaris Demons Requiem Step 1.png|Batta Condor Scorpion Anomalocaris Demons Requiem (Step 1: Preparing to jump toward enemy) |
||
| + | Batta Condor Scorpion Anomalocaris Demons Requiem Step 2.png|Batta Condor Scorpion Anomalocaris Demons Requiem (Step 2: Kick covered in green energy) |
||
| + | Batta Condor Scorpion Anomalocaris Demons Requiem Step 3.png|Batta Condor Scorpion Anomalocaris Demons Requiem (Step 3: Swinging tail) |
||
| + | Batta Condor Scorpion Anomalocaris Demons Requiem Step 4.png|Batta Condor Scorpion Anomalocaris Demons Requiem (Step 4: Landing) |
||
| + | Batta Condor Scorpion Anomalocaris Demons Requiem Step 5.png|Batta Condor Scorpion Anomalocaris Demons Requiem (Step 5: Ramming) |
||
| + | Batta Condor Scorpion Anomalocaris Demons Requiem Step 6.png|Batta Condor Scorpion Anomalocaris Demons Requiem (Step 6: Rebounding) |
||
| + | Batta Condor Scorpion Anomalocaris Demons Requiem Step 7.png|Batta Condor Scorpion Anomalocaris Demons Requiem (Step 7: Jumping slash) |
||
| + | Batta Condor Scorpion Anomalocaris Demons Requiem Step 8.png|Batta Condor Scorpion Anomalocaris Demons Requiem (Step 8: Extending tail) |
||
| + | Batta Condor Scorpion Anomalocaris Demons Requiem Step 9.png|Batta Condor Scorpion Anomalocaris Demons Requiem (Step 9: Stabbing enemy) |
||
| + | Batta Condor Scorpion Anomalocaris Demons Requiem Step 10.png|Batta Condor Scorpion Anomalocaris Demons Requiem (Step 10: Parrying with slash) |
||
| + | Batta Condor Scorpion Anomalocaris Demons Requiem Step 11.png|Batta Condor Scorpion Anomalocaris Demons Requiem (Step 11: Aftermath of slash) |
||
| + | Batta Condor Scorpion Anomalocaris Demons Requiem Step 12.png|Batta Condor Scorpion Anomalocaris Demons Requiem (Step 12: Jumping toward enemy) |
||
| + | Batta Condor Scorpion Anomalocaris Demons Requiem Step 13.png|Batta Condor Scorpion Anomalocaris Demons Requiem (Step 13: Flying slash) |
||
| + | Batta Condor Scorpion Anomalocaris Demons Requiem Step 14.png|Batta Condor Scorpion Anomalocaris Demons Requiem (Step 14: Kicking) |
||
| + | Batta Condor Scorpion Anomalocaris Demons Requiem Step 15.png|Batta Condor Scorpion Anomalocaris Demons Requiem (Step 15: Punching) |
||
| + | Batta Condor Scorpion Anomalocaris Demons Requiem Step 16.png|Batta Condor Scorpion Anomalocaris Demons Requiem (Step 16: Upward kick) |
||
| + | Batta Condor Scorpion Anomalocaris Demons Requiem Step 17.png|Batta Condor Scorpion Anomalocaris Demons Requiem (Step 17: Enemy launched) |
||
| + | Batta Condor Scorpion Anomalocaris Demons Requiem Step 18.png|Batta Condor Scorpion Anomalocaris Demons Requiem (Step 18: Flying up with wings covered in energy) |
||
| + | Batta Condor Scorpion Anomalocaris Demons Requiem Step 19.png|Batta Condor Scorpion Anomalocaris Demons Requiem (Step 19: Launching feather projectiles) |
||
| + | Batta Condor Scorpion Anomalocaris Demons Requiem Step 20.png|Batta Condor Scorpion Anomalocaris Demons Requiem (Step 20: Projectiles about to strike enemy) |
||
| + | Batta Condor Scorpion Anomalocaris Demons Requiem Step 21.png|Batta Condor Scorpion Anomalocaris Demons Requiem (Step 21: Projectiles piercing enemy) |
||
| + | Batta Condor Scorpion Anomalocaris Demons Requiem Step 22.png|Batta Condor Scorpion Anomalocaris Demons Requiem (Step 22: About to perform flying kick) |
||
| + | Batta Condor Scorpion Anomalocaris Demons Requiem Step 23.png|Batta Condor Scorpion Anomalocaris Demons Requiem (Step 23: Flying kick) |
||
| + | Batta Condor Scorpion Anomalocaris Demons Requiem Step 24.png|Batta Condor Scorpion Anomalocaris Demons Requiem (Step 24: Impact) |
||
| + | Batta Condor Scorpion Anomalocaris Demons Requiem Step 25.png|Batta Condor Scorpion Anomalocaris Demons Requiem (Step 25: Continuing to fly forward with enemy) |
||
| + | Batta Condor Scorpion Anomalocaris Demons Requiem Step 26.png|Batta Condor Scorpion Anomalocaris Demons Requiem (Step 26: Preparing to kick away enemy) |
||
| + | Batta Condor Scorpion Anomalocaris Demons Requiem Step 27.png|Batta Condor Scorpion Anomalocaris Demons Requiem (Step 27: Kicking enemy away) |
||
| + | Batta Condor Scorpion Anomalocaris Demons Requiem Step 28.png|Batta Condor Scorpion Anomalocaris Demons Requiem (Step 28: Enemy launched away) |
||
| + | Batta Condor Scorpion Anomalocaris Demons Requiem.gif|Batta Condor Scorpion Anomalocaris Demons Requiem |
||
| + | </gallery> |
||
| + | }} |
||
| + | }} |
||
| + | |||
| + | | |
||
| + | Demons Troopers| |
||
| + | {{tabber| |
||
| + | Demons Finish| |
||
| + | {{nihongo|''' Demons Finish'''|ディーモンズフィニッシュ|Demonzu Finisshu}}: A Demons Trooper stamps a Vistamp onto the Demons Driver's screen and performs a finisher using its power. |
||
| + | }} |
||
| + | }} |
||
| + | |||
| + | | |
||
| + | Vail Driver| |
||
| + | {{tabber| |
||
| + | Vailing Impact| |
||
| + | {{nihongo|'''Vailing Impact'''|ベイリングインパクト|Beiringu Inpakuto}}: This finisher has four variations. |
||
| + | *With an enemy against a wall, Vail performs a punching motion, creating a red shockwave that crushes the enemy. He then performs a series of punching motions so fast that his arm leaves afterimages, with each punch creating another shockwave. After a brief pause, Vail delivers a final punch to the enemy directly, creating a large red shockwave that expands outward from the opponent before they explode. |
||
| + | *Vail covers his lower arm in crimson energy and punches the opponent. Simultaneously, an energy construct of a rhinoceros beetle appears from behind Vail and impales the enemy as the punch makes contact. After a brief moment, the enemy explodes. |
||
| + | *Vail's lower leg is covered in red energy as an energy construct of a rhinoceros beetle flies behind him with its horn glowing red. Vail delivers a roundhouse kick to the opponent, leaving behind crimson energy. Simultaneously, the beetle construct slashes the enemy with its horn, leaving behind a trail of light blue energy. The force of the combined attack damages the surrounding area, and waves of multicolored energy emanate from the opponent's body. A large multicolored shockwave is then released from the opponent before they explode. |
||
| + | *Vail covers his lower arm in crimson energy before punching the opponent while an energy construct of a rhinoceros beetle appears beside him. Multiple streams of red and black energy are released when the punch strikes the target. After a brief moment, the enemy then explodes. |
||
| + | <gallery> |
||
| + | Vailing Impact Step 1.png|Vailing Impact (Version 1) (Step 1: Enemy against wall) |
||
| + | Vailing Impact Step 2.png|Vailing Impact (Version 1) (Step 2: Punch motion creating shockwave) |
||
| + | Vailing Impact Step 3.png|Vailing Impact (Version 1) (Step 3: Series of punches) |
||
| + | Vailing Impact Step 4.png|Vailing Impact (Version 1) (Step 4: Preparing to deliver final punch) |
||
| + | Vailing Impact Step 5.png|Vailing Impact (Version 1) (Step 5: Direct punch) |
||
| + | Vailing Impact Step 6.png|Vailing Impact (Version 1) (Step 6: Enemy exploding and shockwave expanding) |
||
| + | Vailing Impact Step 7.png|Vailing Impact (Version 1) (Step 7: Explosion) |
||
| + | Vailing Impact.gif|Vailing Impact (Version 1) |
||
| + | Vailing Impact Ver 2 Step 1.png|Vailing Impact (Version 2) (Step 1: Arm covered in crimson energy) |
||
| + | Vailing Impact Ver 2 Step 2.png|Vailing Impact (Version 2) (Step 2: Performing punch) |
||
| + | Vailing Impact Ver 2 Step 3.png|Vailing Impact (Version 2) (Step 3: Beetle construct impaling enemy) |
||
| + | Vailing Impact Ver 2 Step 4.png|Vailing Impact (Version 2) (Step 4: Aftermath of punch) |
||
| + | Vailing Impact Ver 2 Step 5.png|Vailing Impact (Version 2) (Step 5: Damaged enemy) |
||
| + | Vailing Impact Ver 2 Step 6.png|Vailing Impact (Version 2) (Step 6: Explosion) |
||
| + | Vailing Impact 2.gif|Vailing Impact (Version 2) |
||
| + | Vailing Impact Ver 3 Step 1.png|Vailing Impact (Version 3) (Step 1: Vail with leg covered in red energy) |
||
| + | Vailing Impact Ver 3 Step 2.png|Vailing Impact (Version 3) (Step 2: Vail and beetle construct about to attack) |
||
| + | Vailing Impact Ver 3 Step 3.png|Vailing Impact (Version 3) (Step 3: Kick and horn slash) |
||
| + | Vailing Impact Ver 3 Step 4.png|Vailing Impact (Version 3) (Step 4: Impact) |
||
| + | Vailing Impact Ver 3 Step 5.png|Vailing Impact (Version 3) (Step 5: Aftermath of attack) |
||
| + | Vailing Impact Ver 3 Step 6.png|Vailing Impact (Version 3) (Step 6: Enemy emanating energy) |
||
| + | Vailing Impact Ver 3 Step 7.png|Vailing Impact (Version 3) (Step 7: Multicolored shockwave) |
||
| + | Vailing Impact Ver 3 Step 8.png|Vailing Impact (Version 3) (Step 8: Enemy damaged) |
||
| + | Vailing Impact Ver 3 Step 9.png|Vailing Impact (Version 3) (Step 9: Explosion) |
||
| + | Vailing Impact 3.gif|Vailing Impact (Version 3) |
||
| + | Vailing Impact Ver 4 Step 1.png|Vailing Impact (Version 4) (Step 1: Arm covered in crimson energy) |
||
| + | Vailing Impact Ver 4 Step 2.png|Vailing Impact (Version 4) (Step 2: Punch) |
||
| + | Vailing Impact Ver 4 Step 3.png|Vailing Impact (Version 4) (Step 3: Energy released upon impact) |
||
| + | Vailing Impact Ver 4 Step 4.png|Vailing Impact (Version 4) (Step 4: Aftermath of punch) |
||
| + | Vailing Impact Ver 4 Step 5.png|Vailing Impact (Version 4) (Step 5: Damaged enemy) |
||
| + | Vailing Impact Ver 4 Step 6.png|Vailing Impact (Version 4) (Step 6: Explosion) |
||
| + | Vailing Impact 4.gif|Vailing Impact (Version 4) |
||
| + | </gallery> |
||
| + | |||
| + | | |
||
| + | Vailing Nova| |
||
| + | {{nihongo|'''Vailing Nova'''|ベイリングノヴァ|Beiringu Novā}}: This finisher has two variations. |
||
| + | *Vail covers both lower arms in crimson energy and uses them to block the opponent's attack. He then performs a punch surrounded by swirling red energy using each arm, with each punch creating an explosion upon impact. An energy construct of a rhinoceros beetle also appears beside Vail's arm during each punch. |
||
| + | *Vail's lower leg is covered in crimson energy and surrounded by swirling light red energy as an energy construct of a rhinoceros beetle behind him. He then delivers a side kick to the enemy, producing a large red shockwave upon impact. The beetle construct rams into the enemy soon afterward, resulting in an explosion. |
||
| + | <gallery> |
||
| + | Vailing Nova Step 1.png|Vailing Nova (Version 1) (Step 1: Blocking attack with arms covered in crimson energy) |
||
| + | Vailing Nova Step 2.png|Vailing Nova (Version 1) (Step 2: Pushing off enemy) |
||
| + | Vailing Nova Step 3.png|Vailing Nova (Version 1) (Step 3: Preparing to punch opponent) |
||
| + | Vailing Nova Step 4.png|Vailing Nova (Version 1) (Step 4: First punch) |
||
| + | Vailing Nova Step 5.png|Vailing Nova (Version 1) (Step 5: Second punch) |
||
| + | Vailing Nova Step 6.png|Vailing Nova (Version 1) (Step 6: Aftermath of second punch) |
||
| + | Vailing Nova.gif|Vailing Nova (Version 1) |
||
| + | Vailing Nova Ver 2 Step 1.png|Vailing Nova (Version 2) (Step 1: Leg covered in energy and rhinoceros beetle construct) |
||
| + | Vailing Nova Ver 2 Step 2.png|Vailing Nova (Version 2) (Step 2: Side kick) |
||
| + | Vailing Nova Ver 2 Step 3.png|Vailing Nova (Version 2) (Step 3: Beetle construct colliding with enemy) |
||
| + | Vailing Nova Ver 2 Step 4.png|Vailing Nova (Version 2) (Step 4: Explosion) |
||
| + | Vailing Nova Ver 2 Step 5.png|Vailing Nova (Version 2) (Step 5: Aftermath of kick) |
||
| + | Vailing Nova Ver 2 Step 6.png|Vailing Nova (Version 2) (Step 6: Damaged enemy) |
||
| + | Vailing Nova 2.gif|Vailing Nova (Version 2) |
||
| + | </gallery> |
||
| + | }} |
||
| + | |||
| + | | |
||
| + | Week Endriver| |
||
| + | {{tabber| |
||
| + | Stamping Break| |
||
| + | {{Nihongo|'''Queen Bee Stamping Break'''|クイーンビースタンピングブレイク|Kuīn Bī Sutanpingu Bureiku}}: This finisher has five variations. |
||
| + | *Aguilera forms a sphere of golden honey-like energy from her hand and fires it a sustained stream at the enemy. The stream produced a shockwave of golden energy upon initially striking the enemy and continually bombards them, eventually resulting in an explosion. |
||
| + | *Aguilera's leg is covered in magenta energy and surrounded by a burst of red energy. The energy covering her leg is then strengthened and accompanied by additional crimson and yellow energy. Aguilera performs a roundhouse kick, producing a trail of the energy covering her leg. The kick releases a large amount of red energy upon impact and launches the enemy away. |
||
| + | *Aguilera grabs an enemy and flies into the air with them. She releases the opponent, resulting in them continuing to move forward, while she flies higher into the air by herself. Aguilera then performs a flying kick that produces waves of orange and gold energy. The opponent crashes into a building and bounces off before Aguilera's kick strikes them, producing a shockwave and smashing the enemy into the building a second time. The surrounding wall is destroyed even more as a result shortly before the enemy explodes. |
||
| + | *Aguilera covers the blades of the Needle Kunai with yellow energy and uses them to parry the attacks of two enemies. She pushes the opponents away and delivers an X-shaped orange energy slash using both Needle Kunai, destroying them and resulting in an explosion. She then swings the Needle Kunai, launching several smaller kunai made of yellow energy at two more enemies. The kunai strike the opponents, causing them to explode as well. |
||
| + | *Aguilera jumps into the air as a mechanical bee flies beside her. The bee then turns gold and merges with her foot, causing it to be surrounded by spiraling gold energy along with red and gold lightning as Aguilera performs a lying kick. The kick produces more red lightning upon impact and shatters the target. |
||
| + | <gallery> |
||
| + | Queen Bee Stamping Break Step 1.png|Queen Bee Stamping Break (Version 1) (Step 1: Producing honey-like energy) |
||
| + | Queen Bee Stamping Break Step 2.png|Queen Bee Stamping Break (Version 1) (Step 2: Throwing arm forward) |
||
| + | Queen Bee Stamping Break Step 3.png|Queen Bee Stamping Break (Version 1) (Step 3: Stream of energy) |
||
| + | Queen Bee Stamping Break Step 4.png|Queen Bee Stamping Break (Version 1) (Step 4: Impact) |
||
| + | Queen Bee Stamping Break Step 5.png|Queen Bee Stamping Break (Version 1) (Step 5: Continued attacking) |
||
| + | Queen Bee Stamping Break Step 6.png|Queen Bee Stamping Break (Version 1) (Step 6: Explosion) |
||
| + | Queen Bee Stamping Break Step 7.png|Queen Bee Stamping Break (Version 1) (Step 7: Continued explosion) |
||
| + | Queen Bee Stamping Break.gif|Queen Bee Stamping Break (Version 1) |
||
| + | Queen Bee Stamping Break Ver 2 Step 1.png|Queen Bee Stamping Break (Version 2) (Step 1: Leg covered in energy) |
||
| + | Queen Bee Stamping Break Ver 2 Step 2.png|Queen Bee Stamping Break (Version 2) (Step 2: Strengthened energy) |
||
| + | Queen Bee Stamping Break Ver 2 Step 3.png|Queen Bee Stamping Break (Version 2) (Step 3: Roundhouse kick) |
||
| + | Queen Bee Stamping Break Ver 2 Step 4.png|Queen Bee Stamping Break (Version 2) (Step 4: Impact) |
||
| + | Queen Bee Stamping Break Ver 2 Step 5.png|Queen Bee Stamping Break (Version 2) (Step 5: Enemy launched away) |
||
| + | Queen Bee Stamping Break 2.gif|Queen Bee Stamping Break (Version 2) |
||
| + | Queen Bee Stamping Break Ver 3 Step 1.png|Queen Bee Stamping Break (Version 3) (Step 1: Flying with enemy) |
||
| + | Queen Bee Stamping Break Ver 3 Step 2.png|Queen Bee Stamping Break (Version 3) (Step 2: Releasing enemy) |
||
| + | Queen Bee Stamping Break Ver 3 Step 3.png|Queen Bee Stamping Break (Version 3) (Step 3: Flying higher into the air) |
||
| + | Queen Bee Stamping Break Ver 3 Step 4.png|Queen Bee Stamping Break (Version 3) (Step 4: Preparing to kick) |
||
| + | Queen Bee Stamping Break Ver 3 Step 5.png|Queen Bee Stamping Break (Version 3) (Step 5: Flying kick) |
||
| + | Queen Bee Stamping Break Ver 3 Step 6.png|Queen Bee Stamping Break (Version 3) (Step 6: Enemy bouncing off of building) |
||
| + | Queen Bee Stamping Break Ver 3 Step 7.png|Queen Bee Stamping Break (Version 3) (Step 7: Kick impact) |
||
| + | Queen Bee Stamping Break Ver 3 Step 8.png|Queen Bee Stamping Break (Version 3) (Step 8: Surrounding wall destroyed) |
||
| + | Queen Bee Stamping Break Ver 3 Step 9.png|Queen Bee Stamping Break (Version 3) (Step 9: Explosion) |
||
| + | Queen Bee Stamping Break 3.gif|Queen Bee Stamping Break (Version 3) |
||
| + | Queen Bee Stamping Break Ver 4 Step 1.png|Queen Bee Stamping Break (Version 4) (Step 1: Needle Kunai covered in energy) |
||
| + | Queen Bee Stamping Break Ver 4 Step 2.png|Queen Bee Stamping Break (Version 4) (Step 2: Parrying) |
||
| + | Queen Bee Stamping Break Ver 4 Step 3.png|Queen Bee Stamping Break (Version 4) (Step 3: Pushing enemies away) |
||
| + | Queen Bee Stamping Break Ver 4 Step 4.png|Queen Bee Stamping Break (Version 4) (Step 4: Energy slash) |
||
| + | Queen Bee Stamping Break Ver 4 Step 5.png|Queen Bee Stamping Break (Version 4) (Step 5: Explosion) |
||
| + | Queen Bee Stamping Break Ver 4 Step 6.png|Queen Bee Stamping Break (Version 4) (Step 6: Preparing to swing) |
||
| + | Queen Bee Stamping Break Ver 4 Step 7.png|Queen Bee Stamping Break (Version 4) (Step 7: Launching energy kunai) |
||
| + | Queen Bee Stamping Break Ver 4 Step 8.png|Queen Bee Stamping Break (Version 4) (Step 8: Enemies exploding) |
||
| + | Queen Bee Stamping Break Ver 4 Step 9.png|Queen Bee Stamping Break (Version 4) (Step 9: Remainder of explosion) |
||
| + | Queen Bee Stamping Break 4.gif|Queen Bee Stamping Break (Version 4) |
||
| + | Queen Bee Stamping Break Ver 5 Step 1.png|Queen Bee Stamping Break (Version 5) (Step 1: Jumping into the air) |
||
| + | Queen Bee Stamping Break Ver 5 Step 2.png|Queen Bee Stamping Break (Version 5) (Step 2: Bee turning gold) |
||
| + | Queen Bee Stamping Break Ver 5 Step 3.png|Queen Bee Stamping Break (Version 5) (Step 3: Bee merging with foot) |
||
| + | Queen Bee Stamping Break Ver 5 Step 4.png|Queen Bee Stamping Break (Version 5) (Step 4: Flying kick) |
||
| + | Queen Bee Stamping Break Ver 5 Step 5.png|Queen Bee Stamping Break (Version 5) (Step 5: Impact) |
||
| + | Queen Bee Stamping Break Ver 5 Step 6.png|Queen Bee Stamping Break (Version 5) (Step 6: Shattering) |
||
| + | Queen Bee Stamping Break Ver 5 Step 7.png|Queen Bee Stamping Break (Version 5) (Step 7: Aftermath) |
||
| + | </gallery> |
||
| + | |||
| + | | |
||
| + | Stamping Destroy| |
||
| + | {{Nihongo|'''Queen Bee Stamping Destroy'''|クイーンビースタンピングデストロイ|Kuīn Bī Sutanpingu Desutoroi}}: This finisher has four variations. |
||
| + | *Aguilera covers the blades of the Needle Kunai with red and yellow energy before slashing the enemy with one of them. She then uses both weapons to stab the opponent's feet, pinning them to the ground. |
||
| + | *Aguilera uses the Needle Kunai to deliver a series of yellow energy slashes to multiple enemies. She first performs a slash using each Needle Kunai individually, then uses both weapons together to perform two spinning slashes. Finally, she swings both Needle Kunai forward to perform two slashes simultaneously. |
||
| + | *Aguilera generates numerous orange energy kunai in a circle around herself before launching them at the opponent. The kunai home in on the enemy and follow them. |
||
| + | *Aguilera covers the blades of the Needle Kunai with red and yellow energy before delivering a series of red energy slashes to an enemy, consisting of two horizontal slashes followed by an upward slash. Aguilera then rolls onto the ground in order to avoid the attacks of a second opponent. She stabs both enemies with the Needle Kunai, impaling them with streams of orange energy before causing them to explode. |
||
| + | <gallery> |
||
| + | Queen Bee Stamping Destroy Step 1.png|Queen Bee Stamping Destroy (Version 1) (Step 1: Needle Kunai covered in energy) |
||
| + | Queen Bee Stamping Destroy Step 2.png|Queen Bee Stamping Destroy (Version 1) (Step 2: Slashing enemy) |
||
| + | Queen Bee Stamping Destroy Step 3.png|Queen Bee Stamping Destroy (Version 1) (Step 3: Impact of slash) |
||
| + | Queen Bee Stamping Destroy Step 4.png|Queen Bee Stamping Destroy (Version 1) (Step 4: Raising Needle Kunai) |
||
| + | Queen Bee Stamping Destroy Step 5.png|Queen Bee Stamping Destroy (Version 1) (Step 5: Stabbing enemy's feet) |
||
| + | Queen Bee Stamping Destroy Step 6.png|Queen Bee Stamping Destroy (Version 1) (Step 6: Enemy pinned to the ground) |
||
| + | Queen Bee Stamping Destroy.gif|Queen Bee Stamping Destroy (Version 1) |
||
| + | Queen Bee Stamping Destroy Ver 2 Step 1.png|Queen Bee Stamping Destroy (Version 2) (Step 1: First individual slash) |
||
| + | Queen Bee Stamping Destroy Ver 2 Step 2.png|Queen Bee Stamping Destroy (Version 2) (Step 2: Second individual slash) |
||
| + | Queen Bee Stamping Destroy Ver 2 Step 3.png|Queen Bee Stamping Destroy (Version 2) (Step 3: Preparing for first spinning slash) |
||
| + | Queen Bee Stamping Destroy Ver 2 Step 4.png|Queen Bee Stamping Destroy (Version 2) (Step 4: First spinning slash) |
||
| + | Queen Bee Stamping Destroy Ver 2 Step 5.png|Queen Bee Stamping Destroy (Version 2) (Step 5: Preparing for second spinning slash) |
||
| + | Queen Bee Stamping Destroy Ver 2 Step 6.png|Queen Bee Stamping Destroy (Version 2) (Step 6: Second spinning slash) |
||
| + | Queen Bee Stamping Destroy Ver 2 Step 7.png|Queen Bee Stamping Destroy (Version 2) (Step 7: Preparing for double slash) |
||
| + | Queen Bee Stamping Destroy Ver 2 Step 8.png|Queen Bee Stamping Destroy (Version 2) (Step 8: Double slash) |
||
| + | Queen Bee Stamping Destroy Ver 2 Step 9.png|Queen Bee Stamping Destroy (Version 2) (Step 9: Explosion) |
||
| + | Queen Bee Stamping Destroy 2.gif|Queen Bee Stamping Destroy (Version 2) |
||
| + | Queen Bee Stamping Destroy Ver 3 Step 1.png|Queen Bee Stamping Destroy (Version 3) (Step 1: Generating kunai) |
||
| + | Queen Bee Stamping Destroy Ver 3 Step 2.png|Queen Bee Stamping Destroy (Version 3) (Step 2: Kunai assembled around Aguilera) |
||
| + | Queen Bee Stamping Destroy Ver 3 Step 3.png|Queen Bee Stamping Destroy (Version 3) (Step 3: Launching kunai) |
||
| + | Queen Bee Stamping Destroy 3.gif|Queen Bee Stamping Destroy (Version 3) |
||
| + | Queen Bee Stamping Destroy Ver 4 Step 1.png|Queen Bee Stamping Destroy (Version 4) (Step 1: Needle Kunai covered in energy) |
||
| + | Queen Bee Stamping Destroy Ver 4 Step 2.png|Queen Bee Stamping Destroy (Version 4) (Step 2: First slash) |
||
| + | Queen Bee Stamping Destroy Ver 4 Step 3.png|Queen Bee Stamping Destroy (Version 4) (Step 3: Second slash) |
||
| + | Queen Bee Stamping Destroy Ver 4 Step 4.png|Queen Bee Stamping Destroy (Version 4) (Step 4: Third slash) |
||
| + | Queen Bee Stamping Destroy Ver 4 Step 5.png|Queen Bee Stamping Destroy (Version 4) (Step 5: On the ground) |
||
| + | Queen Bee Stamping Destroy Ver 4 Step 6.png|Queen Bee Stamping Destroy (Version 4) (Step 6: Stabbing enemies) |
||
| + | Queen Bee Stamping Destroy Ver 4 Step 7.png|Queen Bee Stamping Destroy (Version 4) (Step 7: Enemies impaled by energy) |
||
| + | Queen Bee Stamping Destroy Ver 4 Step 8.png|Queen Bee Stamping Destroy (Version 4) (Step 8: Explosion) |
||
| + | Queen Bee Stamping Destroy 4.gif|Queen Bee Stamping Destroy (Version 4) |
||
| + | </gallery> |
||
| + | }} |
||
| + | |||
| + | | |
||
| + | Destream Driver| |
||
| + | {{tabber| |
||
| + | Destream Finish| |
||
| + | {{nihongo|'''Destream Finish'''|デストリームフィニッシュ|Desutorīmu Finisshu}}: Destream stamps a Vistamp onto the Destream Driver's screen and performs a finisher using its power. |
||
| + | {{tabber| |
||
| + | Hercules| |
||
| + | Polygons made from lines of cyan energy emanate from Destream's fist before he delivers a running punch surrounded by additional red and blue energy to the enemy. Afterward, he then turns to face the enemy again before channeling streams of cyan energy into his lower leg, which is then covered by cyan energy itself. Destream performs a side kick, with several cyan energy components appearing before attaching to his leg, forming a Hercules beetle's head. The energy beetle's head spins and is surrounded by a cone of cyan and red energy, acting similar to a drill. Cyan electricity is generated as the energy beetle head strikes the enemy. After a short moment, cyan lightning is produced from the enemy just before they explode. |
||
| + | <gallery> |
||
| + | Destream Finish Step 1.png|Destream Finish (Hercules) (Step 1: Charging) |
||
| + | Destream Finish Step 2.png|Destream Finish (Hercules) (Step 2: Running toward enemy) |
||
| + | Destream Finish Step 3.png|Destream Finish (Hercules) (Step 3: Punch) |
||
| + | Destream Finish Step 4.png|Destream Finish (Hercules) (Step 4: Channeling energy into lower leg) |
||
| + | Destream Finish Step 5.png|Destream Finish (Hercules) (Step 5: Leg covered in energy) |
||
| + | Destream Finish Step 6.png|Destream Finish (Hercules) (Step 6: Energy components) |
||
| + | Destream Finish Step 7.png|Destream Finish (Hercules) (Step 7: Energy Hercules beetle head) |
||
| + | Destream Finish Step 8.png|Destream Finish (Hercules) (Step 8: Impact) |
||
| + | Destream Finish Step 9.png|Destream Finish (Hercules) (Step 9: Pulling leg away from enemy) |
||
| + | Destream Finish Step 10.png|Destream Finish (Hercules) (Step 10: Energy beetle head dissipating) |
||
| + | Destream Finish Step 11.png|Destream Finish (Hercules) (Step 11: Damaged enemy) |
||
| + | Destream Finish Step 12.png|Destream Finish (Hercules) (Step 12: Cyan lightning around enemy) |
||
| + | Destream Finish Step 13.png|Destream Finish (Hercules) (Step 13: Explosion) |
||
| + | Destream Finish vs Crimson Finish.gif|Destream Finish (Hercules) |
||
| + | </gallery> |
||
| + | }} |
||
| + | }} |
||
| + | |||
| + | | |
||
| + | Chimera Driver| |
||
| + | {{tabber| |
||
| + | Chimera| |
||
| + | {{tabber| |
||
| + | King Crab Edge| |
||
| + | {{nihongo|'''King Crab Edge'''|キングクラブエッジ|Kingu Kurabu Ejji}}: Chimera's forearm is covered with orange energy before he punches the opponent. A silver energy construct of a crab's claw appears beside Chimera and crushes the enemy as the punch makes contact. |
||
| + | <gallery> |
||
| + | King Crab Edge Step 1.png|King Crab Edge (Step 1: Arm covered in energy) |
||
| + | King Crab Edge Step 2.png|King Crab Edge (Step 2: Preparing to punch) |
||
| + | King Crab Edge Step 3.png|King Crab Edge (Step 3: Crab claw) |
||
| + | King Crab Edge.gif|King Crab Edge |
||
| + | </gallery> |
||
| + | |||
| + | | |
||
| + | Crocodile Edge| |
||
| + | {{nihongo|'''Crocodile Edge'''|クロコダイルエッジ|Kurokodairu Ejji}}: This finisher has two variations. |
||
| + | *Chimera jumps into the air as his lower leg is covered in orange and yellow energy. The energy then forms into a construct of a crocodile's head before Chimera kicks the opponent, producing an orange shockwave upon impact and launching away the enemy. The opponent's upper body then explodes after a brief moment, with their lower body exploding as well shortly after. |
||
| + | *Chimera's leg is covered in orange and yellow energy as he performs a roundhouse kick, with an energy construct of a crocodile head appearing as his foot strikes the opponent. Chimera and the enemy then fall to the ground. At the same time, electricity appears around the crocodile head and its open jaws surround the opponent. The crocodile head then bites down on the enemy, destroying them in an explosion. |
||
| + | <gallery> |
||
| + | Crocodile Edge Step 1.png|Crocodile Edge (Version 1) (Step 1: Jumping with leg covered in energy) |
||
| + | Crocodile Edge Step 2.png|Crocodile Edge (Version 1) (Step 2: Crocodile head construct) |
||
| + | Crocodile Edge Step 3.png|Crocodile Edge (Version 1) (Step 3: Crocodile head opening) |
||
| + | Crocodile Edge Step 4.png|Crocodile Edge (Version 1) (Step 4: Kick) |
||
| + | Crocodile Edge Step 5.png|Crocodile Edge (Version 1) (Step 5: Shockwave) |
||
| + | Crocodile Edge Step 6.png|Crocodile Edge (Version 1) (Step 6: Damaged enemy) |
||
| + | Crocodile Edge Step 7.png|Crocodile Edge (Version 1) (Step 7: Upper body exploding) |
||
| + | Crocodile Edge Step 8.png|Crocodile Edge (Version 1) (Step 8: Lower body left behind) |
||
| + | Crocodile Edge Step 9.png|Crocodile Edge (Version 1) (Step 9: Lower body exploding) |
||
| + | Crocodile Edge.gif|Crocodile Edge (Version 1) |
||
| + | Crocodile Edge Ver 2 Step 1.png|Crocodile Edge (Version 2) (Step 1: Leg covered in energy) |
||
| + | Crocodile Edge Ver 2 Step 2.png|Crocodile Edge (Version 2) (Step 2: Roundhouse kick) |
||
| + | Crocodile Edge Ver 2 Step 3.png|Crocodile Edge (Version 2) (Step 3: Crocodile head construct) |
||
| + | Crocodile Edge Ver 2 Step 4.png|Crocodile Edge (Version 2) (Step 4: Chimera and enemy falling to the ground) |
||
| + | Crocodile Edge Ver 2 Step 5.png|Crocodile Edge (Version 2) (Step 5: Electricity) |
||
| + | Crocodile Edge Ver 2 Step 6.png|Crocodile Edge (Version 2) (Step 6: Crocodile construct biting enemy) |
||
| + | Crocodile Edge Ver 2 Step 7.png|Crocodile Edge (Version 2) (Step 7: Enemy about to explode) |
||
| + | Crocodile Edge Ver 2 Step 8.png|Crocodile Edge (Version 2) (Step 8: Explosion) |
||
| + | </gallery> |
||
| + | }} |
||
| + | |||
| + | | |
||
| + | Daimon| |
||
| + | {{tabber| |
||
| + | Octopus Edge| |
||
| + | {{nihongo|'''Octopus Edge'''|オクトパスエッジ|Okutopasu Ejji}}: This finisher has three variations |
||
| + | *Daimon strikes the enemy with his palm, producing a shockwave of crimson energy upon impact. His leg is then covered in orange energy before additionally being surrounded by several red energy constructs of octopus tentacles. Daimon delivers a side kick to the enemy, with the tentacles crushing them as the kick makes contact, producing shockwaves of black energy. The enemy explodes as a result after a brief moment. |
||
| + | *Daimon's leg is covered in orange energy before additionally being surrounded by several red energy constructs of octopus tentacles. Daimon delivers a side kick to the enemy, with the tentacles crushing them as the kick makes contact, releasing red and black energy. The attack also produces an explosion and pushes the enemy away. |
||
| + | *Daimon levitates into the air, producing a shockwave of red energy on the ground beneath him. Eight red energy constructs of octopus tentacles then appear from his feet. Several of the tentacles strike the enemy at a time before all of them simultaneously crush the opponent, resulting in an explosion and launching them away. |
||
| + | <gallery> |
||
| + | Octopus Edge Step 1.png|Octopus Edge (Version 1) (Step 1: Palm strike) |
||
| + | Octopus Edge Step 2.png|Octopus Edge (Version 1) (Step 2: Leg covered in energy) |
||
| + | Octopus Edge Step 3.png|Octopus Edge (Version 1) (Step 3: Energy tentacles) |
||
| + | Octopus Edge Step 4.png|Octopus Edge (Version 1) (Step 4: Tentacles crushing enemy) |
||
| + | Octopus Edge Step 5.png|Octopus Edge (Version 1) (Step 5: Aftermath) |
||
| + | Octopus Edge Step 6.png|Octopus Edge (Version 1) (Step 6: Damaged enemy) |
||
| + | Octopus Edge Step 7.png|Octopus Edge (Version 1) (Step 7: Explosion) |
||
| + | Octopus Edge.gif|Octopus Edge (Version 1) |
||
| + | Octopus Edge Ver 2 Step 1.png|Octopus Edge (Version 2) (Step 1: Leg covered in energy) |
||
| + | Octopus Edge Ver 2 Step 2.png|Octopus Edge (Version 2) (Step 2: Energy tentacles) |
||
| + | Octopus Edge Ver 2 Step 3.png|Octopus Edge (Version 2) (Step 3: Tentacles crushing enemy) |
||
| + | Octopus Edge Ver 2 Step 4.png|Octopus Edge (Version 2) (Step 4: Explosion) |
||
| + | Octopus Edge Ver 2 Step 5.png|Octopus Edge (Version 2) (Step 5: Enemy pushed away) |
||
| + | Octopus Edge Ver 3 Step 1.png|Octopus Edge (Version 3) (Step 1: Levitating) |
||
| + | Octopus Edge Ver 3 Step 2.png|Octopus Edge (Version 3) (Step 2: Stopping in air) |
||
| + | Octopus Edge Ver 3 Step 3.png|Octopus Edge (Version 3) (Step 3: Raising legs) |
||
| + | Octopus Edge Ver 3 Step 4.png|Octopus Edge (Version 3) (Step 4: Energy octopus tentacles) |
||
| + | Octopus Edge Ver 3 Step 5.png|Octopus Edge (Version 3) (Step 5: Tentacles striking enemy) |
||
| + | Octopus Edge Ver 3 Step 6.png|Octopus Edge (Version 3) (Step 6: Continued attacking) |
||
| + | Octopus Edge Ver 3 Step 7.png|Octopus Edge (Version 3) (Step 7: All tentacles rearing back) |
||
| + | Octopus Edge Ver 3 Step 8.png|Octopus Edge (Version 3) (Step 8: Crushing enemy) |
||
| + | Octopus Edge Ver 3 Step 9.png|Octopus Edge (Version 3) (Step 9: Explosion) |
||
| + | </gallery> |
||
| + | |||
| + | | |
||
| + | Kurosai Edge| |
||
| + | {{nihongo|'''Kurosai Edge'''|クロサイエッジ|Kurosai Ejji}}: Daimon's fist is covered by purple energy before he punches the opponent. At the same time, a purple energy construct of a rhinoceros head appears beside him and also strikes the enemy, producing a shockwave as well as an explosion. |
||
| + | <gallery> |
||
| + | Kurosai Edge Step 1.png|Kurosai Edge (Step 1: Fist covered in energy) |
||
| + | Kurosai Edge Step 2.png|Kurosai Edge (Step 2: Punch) |
||
| + | Kurosai Edge Step 3.png|Kurosai Edge (Step 3: Shockwave and explosion) |
||
| + | Kurosai Edge Step 4.png|Kurosai Edge (Step 4: Enemy pushed away) |
||
| + | </gallery> |
||
| + | |||
| + | | |
||
| + | Oomukade Edge| |
||
| + | {{nihongo|'''Oomukade Edge'''|オオムカデエッジ|Oomukade Ejji}}: This finisher has two variations. |
||
| + | *Daimon's cape transforms into two large centipede constructs made of orange energy. The centipedes fly through the air and crash into the opponent several times, with each attack releasing orange energy upon impact. The final attack additionally results in an explosion and launches the enemy away. |
||
| + | *Daimon jumps into the air as two large centipede constructs made of orange energy fly through the air around him. He is then surrounded by spiraling red energy before the centipedes coil together and combine with his leg. This produces waves of red and yellow energy as Daimon performs a flying kick with his foot covered in orange energy. The kick produces an orange shockwave upon impact. |
||
| + | <gallery> |
||
| + | Oomukade Edge Step 1.png|Oomukade Edge (Version 1) (Step 1: Cape transforming into centipedes) |
||
| + | Oomukade Edge Step 2.png|Oomukade Edge (Version 1) (Step 2: Centipedes flying forward) |
||
| + | Oomukade Edge Step 3.png|Oomukade Edge (Version 1) (Step 3: Striking enemy) |
||
| + | Oomukade Edge Step 4.png|Oomukade Edge (Version 1) (Step 4: Second centipede attacking) |
||
| + | Oomukade Edge Step 5.png|Oomukade Edge (Version 1) (Step 5: Aftermath of second attack) |
||
| + | Oomukade Edge Step 6.png|Oomukade Edge (Version 1) (Step 6: Centipede about to attack enemy the final time) |
||
| + | Oomukade Edge Step 7.png|Oomukade Edge (Version 1) (Step 7: Final attack) |
||
| + | Oomukade Edge Step 8.png|Oomukade Edge (Version 1) (Step 8: Explosion) |
||
| + | Oomukade Edge Ver 2 Step 1.png|Oomukade Edge (Version 2) (Step 1: Jumping) |
||
| + | Oomukade Edge Ver 2 Step 2.png|Oomukade Edge (Version 2) (Step 2: Centipede constructs) |
||
| + | Oomukade Edge Ver 2 Step 3.png|Oomukade Edge (Version 2) (Step 3: Daimon surrounded by spiraling energy) |
||
| + | Oomukade Edge Ver 2 Step 4.png|Oomukade Edge (Version 2) (Step 4: Centipedes combining with Daimon) |
||
| + | Oomukade Edge Ver 2 Step 5.png|Oomukade Edge (Version 2) (Step 5: Flying kick) |
||
| + | Oomukade Edge vs Rex Stamping Finish.png|Oomukade Edge (Version 2) (Step 6: Approaching enemy) |
||
| + | Oomukade Edge Ver 2 Step 7.png|Oomukade Edge (Version 2) (Step 7: About to strike enemy) |
||
| + | Oomukade Edge Ver 2 Step 8.png|Oomukade Edge (Version 2) (Step 8: Impact) |
||
| + | </gallery> |
||
| + | |||
| + | | |
||
| + | Tri Chimera Edge| |
||
| + | {{nihongo|'''Tri Chimera Edge'''|トライキメラエッジ|Torai Kimera Ejji}}: Daimon produces gold shockwaves from his body followed by a sustained, wide ray of crimson and golden energy that separates anyone in front of him from their inner demons. |
||
| + | <gallery> |
||
| + | Tri Chimera Edge Step 1.png|Tri Chimera Edge (Step 1: Gold shockwaves) |
||
| + | Tri Chimera Edge Step 2.png|Tri Chimera Edge (Step 2: Crimson and gold energy) |
||
| + | Tri Chimera Edge Step 3.png|Tri Chimera Edge (Step 3: Continuing to emit enegy) |
||
| + | Tri Chimera Edge Step 4.png|Tri Chimera Edge (Step 4: Enemies beginning to separate from their demons) |
||
| + | Tri Chimera Edge Step 5.png|Tri Chimera Edge (Step 5: Inner demons separated from host) |
||
| + | </gallery> |
||
| + | |||
| + | | |
||
| + | Tri Chimera Charge| |
||
| + | {{nihongo|'''Tri Chimera Charge'''|トライキメラチャージ|Torai Kimera Chāji}}: Daimon's body glows orange before a purple energy rhinoceros head and orange energy centipede appear on either side of him while several octopus tentacles made of red energy appear below his feet. This is accompanied by waves of purple, yellow, and red energy that launch nearby enemies away. |
||
| + | <gallery> |
||
| + | Tri Chimera Charge Step 1.png|Tri Chimera Charge (Step 1: Daimon glowing) |
||
| + | Tri Chimera Charge Step 2.png|Tri Chimera Charge (Step 2: Energy animals) |
||
| + | Tri Chimera Charge Step 3.png|Tri Chimera Charge (Step 3: Enemies launched away) |
||
| + | </gallery> |
||
| + | }} |
||
| + | }} |
||
| + | |||
| + | | |
||
| + | Juuga Driver| |
||
| + | {{tabber| |
||
| + | Impulse Genome Finish| |
||
| + | {{nihongo|'''Impulse Genome Finish'''|インパルスゲノムフィニッシュ|Inparusu Genomu Finisshu}}: This finisher has two variations. |
||
| + | *A yellow energy construct of a jackal appears from the Juuga Driver and combines with Juuga's leg, causing it to glow the same color. The energy then expands to cover the rest of Juuga's body, granting him super speed. Juuga rapidly attacks the enemy while moving at extreme speeds, producing a shockwave with each strike. The series of attacks ends with a side kick that launches the opponent away. |
||
| + | *Purple energy flows from the Juuga Driver and covers Juuga's lower leg. A giant purple energy construct of a T-Rex's head then appears in front him and bites the enemy as Juuga performs a side kick motion, producing an explosion. |
||
| + | <gallery> |
||
| + | Impulse Genome Finish Step 1.png|Impulse Genome Finish (Version 1) (Step 1: Energy jackal appearing from Juuga Driver) |
||
| + | Impulse Genome Finish Step 2.png|Impulse Genome Finish (Version 1) (Step 2: Energy jackal moving to leg) |
||
| + | Impulse Genome Finish Step 3.png|Impulse Genome Finish (Version 1) (Step 3: Leg glowing) |
||
| + | Impulse Genome Finish Step 4.png|Impulse Genome Finish (Version 1) (Step 4: Entire body glowing) |
||
| + | Impulse Genome Finish Step 5.png|Impulse Genome Finish (Version 1) (Step 5: Moving toward opponent at high speeds) |
||
| + | Impulse Genome Finish Step 6.png|Impulse Genome Finish (Version 1) (Step 6: Impact) |
||
| + | Impulse Genome Finish Step 7.png|Impulse Genome Finish (Version 1) (Step 7: Behind enemy) |
||
| + | Impulse Genome Finish Step 8.png|Impulse Genome Finish (Version 1) (Step 8: Rushing away) |
||
| + | Impulse Genome Finish Step 9.png|Impulse Genome Finish (Version 1) (Step 9: Reappearing) |
||
| + | Impulse Genome Finish Step 10.png|Impulse Genome Finish (Version 1) (Step 10: Attacking again) |
||
| + | Impulse Genome Finish Step 11.png|Impulse Genome Finish (Version 1) (Step 11: Maneuvering around enemy) |
||
| + | Impulse Genome Finish Step 12.png|Impulse Genome Finish (Version 1) (Step 12: Continued attacking) |
||
| + | Impulse Genome Finish Step 13.png|Impulse Genome Finish (Version 1) (Step 13: Preparing to perform kick) |
||
| + | Impulse Genome Finish Step 14.png|Impulse Genome Finish (Version 1) (Step 14: Kick) |
||
| + | Impulse Genome Finish Step 15.png|Impulse Genome Finish (Version 1) (Step 15: Enemy launched away) |
||
| + | Impulse Genome Finish Ver 2 Step 1.png|Impulse Genome Finish (Version 2) (Step 1: Energy flowing down leg) |
||
| + | Impulse Genome Finish Ver 2 Step 2.png|Impulse Genome Finish (Version 2) (Step 2: Energy T-Rex head) |
||
| + | Impulse Genome Finish Ver 2 Step 3.png|Impulse Genome Finish (Version 2) (Step 3: Side kick) |
||
| + | Impulse Genome Finish Ver 2 Step 4.png|Impulse Genome Finish (Version 2) (Step 4: Closing jaws) |
||
| + | Impulse Genome Finish Ver 2 Step 5.png|Impulse Genome Finish (Version 2) (Step 5: Biting enemy) |
||
| + | Impulse Genome Finish Ver 2 Step 6.png|Impulse Genome Finish (Version 2) (Step 6: T-Rex head dissipating) |
||
| + | Impulse Genome Finish Ver 2 Step 7.png|Impulse Genome Finish (Version 2) (Step 7: Fire from explosion) |
||
| + | </gallery> |
||
| + | |||
| + | | |
||
| + | Crash Genome Finish| |
||
| + | {{nihongo|'''Crash Genome Finish'''|クラッシュゲノムフィニッシュ|Kurasshu Genomu Finisshu}}: This finisher has five variations. |
||
| + | *Juuga covers his arm in green energy and raises it into the air, creating a green tornado that immobilizes two opponents. He then swings both arms, launching two jagged slashes of magenta energy. One of the slashes strikes each enemy, launching them away. |
||
| + | *Juuga's right forearm glows orange while his left glows blue. By swinging his left arm, he delivers a claw-shaped orange energy slash to the enemy that produces a blast of fire upon impact. This is followed by two cyan energy slashes that produce water using the left arm before Juuga finally delivers another fire slash. |
||
| + | *Juuga performs a roundhouse kick motion with his lower leg covered in magenta energy, producing a pair of jagged magenta energy slashes that strike two enemies. His arms are then equipped with blue energy blades, which he uses to perform a series of crescent-shaped slashes of light purple energy. He first performs a spinning slash using both arms, then an upward slash using both arms, and finally another spinning slash while jumping backward. Juuga then crouches and swings his arms, producing a 360 degree wave of magenta and blue energy slashes. |
||
| + | *Large fists made of orange energy appear on Juuga's arms before he uses them to punch the ground, creating a tremor that moves in the direction of two enemies. A giant red energy construct of a mammoth's foot then appears to the side of the enemies. When Juuga performs a roundhouse kick, the energy foot mirrors his movement and swipes horizontally. Another energy mammoth foot then appears in the air above one of the enemies and attempts to crush them when Juuga stomps the ground. Juuga does the same for the second opponent before performing another roundhouse kick. |
||
| + | *Golden energy covers Juuga's hand while crimson electricity appears around his arm. He then performs a punch surrounded by gold and black energy, producing additional red energy upon contact with the enemy |
||
| + | <gallery> |
||
| + | Crash Genome Finish Step 1.png|Crash Genome Finish (Version 1) (Step 1: Raising arm) |
||
| + | Crash Genome Finish Step 2.png|Crash Genome Finish (Version 1) (Step 2: Green tornado) |
||
| + | Crash Genome Finish Step 3.png|Crash Genome Finish (Version 1) (Step 3: Energy slashes) |
||
| + | Crash Genome Finish Step 4.png|Crash Genome Finish (Version 1) (Step 4: Slashes striking enemies) |
||
| + | Crash Genome Finish Step 5.png|Crash Genome Finish (Version 1) (Step 5: Enemies launched away) |
||
| + | Crash Genome Finish Ver 2 Step 1.png|Crash Genome Finish (Version 2) (Step 1: Claw slash) |
||
| + | Crash Genome Finish Ver 2 Step 2.png|Crash Genome Finish (Version 2) (Step 2: Impact) |
||
| + | Crash Genome Finish Ver 2 Step 3.png|Crash Genome Finish (Version 2) (Step 3: First water slash) |
||
| + | Crash Genome Finish Ver 2 Step 4.png|Crash Genome Finish (Version 2) (Step 4: Second water slash) |
||
| + | Crash Genome Finish Ver 2 Step 5.png|Crash Genome Finish (Version 2) (Step 5: Final fire slash) |
||
| + | Crash Genome Finish Ver 3 Step 1.png|Crash Genome Finish (Version 3) (Step 1: Kick creating first energy slash) |
||
| + | Crash Genome Finish Ver 3 Step 2.png|Crash Genome Finish (Version 3) (Step 2: Two slashes striking enemies) |
||
| + | Crash Genome Finish Ver 3 Step 3.png|Crash Genome Finish (Version 3) (Step 3: Spinning slash using energy blades) |
||
| + | Crash Genome Finish Ver 3 Step 4.png|Crash Genome Finish (Version 3) (Step 4: Preparing to perform upward slash) |
||
| + | Crash Genome Finish Ver 3 Step 5.png|Crash Genome Finish (Version 3) (Step 5: Upward slash) |
||
| + | Crash Genome Finish Ver 3 Step 6.png|Crash Genome Finish (Version 3) (Step 6: Between enemies) |
||
| + | Crash Genome Finish Ver 3 Step 7.png|Crash Genome Finish (Version 3) (Step 7: Second spinning slash) |
||
| + | Crash Genome Finish Ver 3 Step 8.png|Crash Genome Finish (Version 3) (Step 8: Preparing to perform final slash) |
||
| + | Crash Genome Finish Ver 3 Step 9.png|Crash Genome Finish (Version 3) (Step 9: 360 degree slash) |
||
| + | Crash Genome Finish Ver 4 Step 1.png|Crash Genome Finish (Version 4) (Step 1: Energy fists) |
||
| + | Crash Genome Finish Ver 4 Step 2.png|Crash Genome Finish (Version 4) (Step 2: Punching ground) |
||
| + | Crash Genome Finish Ver 4 Step 3.png|Crash Genome Finish (Version 4) (Step 3: Tremor approaching enemies) |
||
| + | Crash Genome Finish Ver 4 Step 4.png|Crash Genome Finish (Version 4) (Step 4: Ground broken) |
||
| + | Crash Genome Finish Ver 4 Step 5.png|Crash Genome Finish (Version 4) (Step 5: Energy mammoth foot) |
||
| + | Crash Genome Finish Ver 4 Step 6.png|Crash Genome Finish (Version 4) (Step 6: Roundhouse kick) |
||
| + | Crash Genome Finish Ver 4 Step 7.png|Crash Genome Finish (Version 4) (Step 7: Second mammoth foot) |
||
| + | Crash Genome Finish Ver 4 Step 8.png|Crash Genome Finish (Version 4) (Step 8: Stomp) |
||
| + | Crash Genome Finish Ver 4 Step 9.png|Crash Genome Finish (Version 4) (Step 9: Third mammoth foot) |
||
| + | Crash Genome Finish Ver 4 Step 10.png|Crash Genome Finish (Version 4) (Step 10: Second stomp) |
||
| + | Crash Genome Finish Ver 4 Step 11.png|Crash Genome Finish (Version 4) (Step 11: Fourth mammoth foot) |
||
| + | Crash Genome Finish Ver 4 Step 12.png|Crash Genome Finish (Version 4) (Step 12: Second roundhouse kick) |
||
| + | Crash Genome Finish Ver 5 Step 1.png|Crash Genome Finish (Version 5) (Step 1: Energy and electricity) |
||
| + | Crash Genome Finish Ver 5 Step 2.png|Crash Genome Finish (Version 5) (Step 2: Punch) |
||
| + | Crash Genome Finish Ver 5 Step 3.png|Crash Genome Finish (Version 5) (Step 3: Impact) |
||
| + | </gallery> |
||
| + | |||
| + | | |
||
| + | Powered Genome Finish| |
||
| + | {{nihongo|'''Powered Genome Finish'''|パワードゲノムフィニッシュ|Pawādo Genomu Finisshu}} |
||
| + | |||
| + | | |
||
| + | Juuga Amazing Finish| |
||
| + | {{nihongo|'''Juuga Amazing Finish'''|ジュウガアメイジングフィニッシュ|Juuga Ameijingu Finisshu}}: This finisher has two variations. |
||
| + | *Juuga sprouts Pteranodon wings made of red energy from his back before setting his body on fire and flying into the enemy. He then performs an uppercut motion, causing a magenta energy construct of a Brachiosaurus head to appear from the ground beneath the enemy, launching them into the air. When Juuga next performs a downward punch motion, the head slams the enemy downward, causing them to crash into the ground and bounce a short distance into the air. A red energy construct of a mammoth's foot then appears above the enemy before Juuga performs a stomping motion, causing it to crush the opponent. |
||
| + | *Different types of energy cover Juuga's leg each time he pulls the Juuga Vistamp. First, his foot glows bright gold. Next, light gold energy flows from the Juuga Driver and down his leg. After that, black particles then surround the leg. Finally, a silver double helix flows down the leg as its footsteps create waves of gold energy. Swirling black and gold energy then appears around Juuga as he performs a spinning roundhouse kick. His foot creates an arc of black and gold energy before striking the enemy, launching them away. |
||
| + | *Juuga's lower leg is surrounded by black and gold energy before a large shockwave of gold and crimson energy emanates from him. As a result, the rest of his body is surrounded by black energy as well and lightning is continually produced from his leg. Juuga then jumps high into the sky and performs a flying kick, producing a sonic boom as he descends. The kick pushes the enemy across the ground after striking them. |
||
| + | <gallery> |
||
| + | Juuga Amazing Finish Step 1.png|Juuga Amazing Finish (Version 1) (Step 1: Energy Pteranodon wings) |
||
| + | Juuga Amazing Finish Step 2.png|Juuga Amazing Finish (Version 1) (Step 2: Flying while covered in fire) |
||
| + | Juuga Amazing Finish Step 3.png|Juuga Amazing Finish (Version 1) (Step 3: Crashing into enemy) |
||
| + | Juuga Amazing Finish Step 4.png|Juuga Amazing Finish (Version 1) (Step 4: Aftermath) |
||
| + | Juuga Amazing Finish Step 5.png|Juuga Amazing Finish (Version 1) (Step 5: Energy underneath enemy) |
||
| + | Juuga Amazing Finish Step 6.png|Juuga Amazing Finish (Version 1) (Step 6: Energy Brachiosaurus head launching enemy) |
||
| + | Juuga Amazing Finish Step 7.png|Juuga Amazing Finish (Version 1) (Step 7: Head rearing back) |
||
| + | Juuga Amazing Finish Step 8.png|Juuga Amazing Finish (Version 1) (Step 8: Head slamming down on enemy) |
||
| + | Juuga Amazing Finish Step 9.png|Juuga Amazing Finish (Version 1) (Step 9: Enemy crashing into ground) |
||
| + | Juuga Amazing Finish Step 10.png|Juuga Amazing Finish (Version 1) (Step 10: Energy mammoth foot) |
||
| + | Juuga Amazing Finish Step 11.png|Juuga Amazing Finish (Version 1) (Step 11: Crushing enemy) |
||
| + | Juuga Amazing Finish Ver 2 Step 1.png|Juuga Amazing Finish (Version 2) (Step 1: Foot glowing) |
||
| + | Juuga Amazing Finish Ver 2 Step 2.png|Juuga Amazing Finish (Version 2) (Step 2: Gold energy flowing down leg) |
||
| + | Juuga Amazing Finish Ver 2 Step 3.png|Juuga Amazing Finish (Version 2) (Step 3: Black particles) |
||
| + | Juuga Amazing Finish Ver 2 Step 4.png|Juuga Amazing Finish (Version 2) (Step 4: Silver double helix) |
||
| + | Juuga Amazing Finish Ver 2 Step 5.png|Juuga Amazing Finish (Version 2) (Step 5: Eye glowing) |
||
| + | Juuga Amazing Finish Ver 2 Step 6.png|Juuga Amazing Finish (Version 2) (Step 6: Swirling black and gold energy) |
||
| + | Juuga Amazing Finish Ver 2 Step 7.png|Juuga Amazing Finish (Version 2) (Step 7: Turning on foot) |
||
| + | Juuga Amazing Finish Ver 2 Step 8.png|Juuga Amazing Finish (Version 2) (Step 8: Preparing to deliver kick) |
||
| + | Juuga Amazing Finish Ver 2 Step 9.png|Juuga Amazing Finish (Version 2) (Step 9: Roundhouse kick) |
||
| + | Juuga Amazing Finish Ver 2 Step 10.png|Juuga Amazing Finish (Version 2) (Step 10: Impact) |
||
| + | Juuga Amazing Finish Ver 2 Step 11.png|Juuga Amazing Finish (Version 2) (Step 11: Enemy launched) |
||
| + | Juuga Amazing Finish Ver 3 Step 1.png|Juuga Amazing Finish (Version 3) (Step 1: Foot surrounded by energy) |
||
| + | Juuga Amazing Finish Ver 3 Step 2.png|Juuga Amazing Finish (Version 3) (Step 2: Energy wave) |
||
| + | Juuga Amazing Finish Ver 3 Step 3.png|Juuga Amazing Finish (Version 3) (Step 3: Lightning) |
||
| + | Juuga Amazing Finish Ver 3 Step 4.png|Juuga Amazing Finish (Version 3) (Step 4: Jumping) |
||
| + | Juuga Amazing Finish Ver 3 Step 5.png|Juuga Amazing Finish (Version 3) (Step 5: High in the air) |
||
| + | Juuga Amazing Finish Ver 3 Step 6.png|Juuga Amazing Finish (Version 3) (Step 6: Sonic boom) |
||
| + | Juuga Amazing Finish Ver 3 Step 7.png|Juuga Amazing Finish (Version 3) (Step 7: Descending) |
||
| + | Juuga Amazing Finish Ver 3 Step 8.png|Juuga Amazing Finish (Version 3) (Step 8: Flying kick about to strike enemies) |
||
| + | Juuga Amazing Finish Ver 3 Step 9.png|Juuga Amazing Finish (Version 3) (Step 9: Impact) |
||
| + | Juuga Amazing Finish Ver 3 Step 10.png|Juuga Amazing Finish (Version 3) (Step 10: Pushing enemies across the ground) |
||
| + | </gallery> |
||
}} |
}} |
||
}} |
}} |
||
==Weapons== |
==Weapons== |
||
| − | {{ |
+ | {{tabber| |
| − | Ohinbuster50 |
+ | Ohinbuster50| |
| − | {{ |
+ | {{tabber| |
| − | Ohinstamp |
+ | Ohinstamp| |
| − | {{ |
+ | {{tabber| |
| − | Axe Mode |
+ | Axe Mode| |
{{nihongo|'''Ohing Slash'''|オーイングスラッシュ|Ōingu Surasshu}}: The blade of the Ohinbuster50 projects a larger cyan energy blade surrounded by red energy, which disappears before the physical blade itself is covered by blue energy. Revi then swings the weapon, launching three three rotating pink energy seals of the Revice logo, with each seal surrounded by two light blue energy blades. The projectiles collide with the enemies, resulting in a large magenta explosion with a single large red and black seal of the Revice logo. |
{{nihongo|'''Ohing Slash'''|オーイングスラッシュ|Ōingu Surasshu}}: The blade of the Ohinbuster50 projects a larger cyan energy blade surrounded by red energy, which disappears before the physical blade itself is covered by blue energy. Revi then swings the weapon, launching three three rotating pink energy seals of the Revice logo, with each seal surrounded by two light blue energy blades. The projectiles collide with the enemies, resulting in a large magenta explosion with a single large red and black seal of the Revice logo. |
||
<gallery> |
<gallery> |
||
| Line 797: | Line 2,505: | ||
Ohing Slash.gif|Ohing Slash |
Ohing Slash.gif|Ohing Slash |
||
</gallery> |
</gallery> |
||
| + | |||
| − | {{!}}-{{!}} |
||
| + | | |
||
| − | Gun Mode= |
||
| + | Gun Mode| |
||
{{nihongo|'''Ohing Strike'''|オーイングストライク|Ōingu Sutoraiku}}: This finisher has two variations. |
{{nihongo|'''Ohing Strike'''|オーイングストライク|Ōingu Sutoraiku}}: This finisher has two variations. |
||
*Blank pink and blue energy stamps appear in front of the Ohinbuster50's barrel while Revi charges the weapon. Eventually, Revi's body is surrounded by pink and blue energy along with pink lightning. He then fires a large screen resembling the Ohinbuster50's Ohinjector with an animated version of the Ohinstamp's seal on it. This screen is followed by several blank pink and blue screens trailing behind it. When the screen reaches enemies, the seal on it moves left and right while biting them as the screen moves forward. |
*Blank pink and blue energy stamps appear in front of the Ohinbuster50's barrel while Revi charges the weapon. Eventually, Revi's body is surrounded by pink and blue energy along with pink lightning. He then fires a large screen resembling the Ohinbuster50's Ohinjector with an animated version of the Ohinstamp's seal on it. This screen is followed by several blank pink and blue screens trailing behind it. When the screen reaches enemies, the seal on it moves left and right while biting them as the screen moves forward. |
||
| Line 815: | Line 2,524: | ||
Ohing Strike Ver 2 Step 4.png|Ohing Strike (Version 2) (Step 4: Firing) |
Ohing Strike Ver 2 Step 4.png|Ohing Strike (Version 2) (Step 4: Firing) |
||
Ohing Strike Ver 2 Step 5.png|Ohing Strike (Version 2) (Step 5: Enemy launched away) |
Ohing Strike Ver 2 Step 5.png|Ohing Strike (Version 2) (Step 5: Enemy launched away) |
||
| + | Ohing Strike 2.gif|Ohing Strike (Version 2) |
||
</gallery> |
</gallery> |
||
}} |
}} |
||
| + | |||
| − | {{!}}-{{!}} |
||
| + | | |
||
| − | Vistamp= |
||
| + | Vistamp| |
||
| − | {{#tag:tabber| |
||
| + | {{tabber| |
||
| − | Axe Mode= |
||
| + | Axe Mode| |
||
| − | {{#tag:tabber| |
||
| + | {{tabber| |
||
| − | Rex= |
||
| + | Rex| |
||
{{nihongo|'''Rex Stamping Slash'''|レックススタンピングスラッシュ|Rekkusu Sutanpingu Surasshu}}: Revi leaps into the air with the Ohinbuster50's blade covered in light blue energy. A red projection of the Rex Vistamp's seal then appears behind Revi before a giant blue energy construct of a T-Rex's skull appears around him and bites the enemy as he falls. The T-Rex skull shatters shortly afterwards as Revi slashes the opponent with the Ohinbuster50 itself. |
{{nihongo|'''Rex Stamping Slash'''|レックススタンピングスラッシュ|Rekkusu Sutanpingu Surasshu}}: Revi leaps into the air with the Ohinbuster50's blade covered in light blue energy. A red projection of the Rex Vistamp's seal then appears behind Revi before a giant blue energy construct of a T-Rex's skull appears around him and bites the enemy as he falls. The T-Rex skull shatters shortly afterwards as Revi slashes the opponent with the Ohinbuster50 itself. |
||
<gallery> |
<gallery> |
||
| Line 831: | Line 2,542: | ||
Rex Stamping Slash Step 5.png|Rex Stamping Slash (Step 5: T-Rex skull shattering and slashing enemy) |
Rex Stamping Slash Step 5.png|Rex Stamping Slash (Step 5: T-Rex skull shattering and slashing enemy) |
||
Rex Stamping Slash.gif|Rex Stamping Slash |
Rex Stamping Slash.gif|Rex Stamping Slash |
||
| + | </gallery> |
||
| + | |||
| + | | |
||
| + | Volcano| |
||
| + | {{nihongo|'''Volcano Stamping Slash'''|ボルケーノスタンピングスラッシュ|Borukēno Sutanpingu Surasshu}}: Revi delivers a series of orange energy slashes covered in flames using the Ohinbuster50, setting the enemy on fire. |
||
| + | <gallery> |
||
| + | Volcano Stamping Slash Step 1.png|Volcano Stamping Slash (Step 1: Missed slash) |
||
| + | Volcano Stamping Slash Step 2.png|Volcano Stamping Slash (Step 2: First slash) |
||
| + | Volcano Stamping Slash Step 3.png|Volcano Stamping Slash (Step 3: Second slash) |
||
| + | Volcano Stamping Slash Step 4.png|Volcano Stamping Slash (Step 4: Third slash) |
||
| + | Volcano Stamping Slash Step 5.png|Volcano Stamping Slash (Step 5: Enemy set on fire) |
||
| + | Volcano Stamping Slash.gif|Volcano Stamping Slash |
||
| + | </gallery> |
||
| + | |||
| + | | |
||
| + | Rolling| |
||
| + | {{nihongo|'''Rolling Stamping Slash'''|ローリングスタンピングスラッシュ|Rōringu Sutanpingu Surasshu}}: Revice covers the Ohibuster50's blade with electricity before running toward the enemy. Revice's body is surrounded by electricity and red wind, which continue moving toward the enemy as the Rider briefly disappears. Upon reaching the opponent, Revice reappears and delivers a yellow energy slash while moving past them. The enemy is then covered in blue electricity for a brief moment before exploding. |
||
| + | <gallery> |
||
| + | Rolling Stamping Slash Step 1.png|Rolling Stamping Slash (Step 1: Blade covered in electricity) |
||
| + | Rolling Stamping Slash Step 2.png|Rolling Stamping Slash (Step 2: Running toward opponent) |
||
| + | Rolling Stamping Slash Step 3.png|Rolling Stamping Slash (Step 3: Surrounded by electricity and wind) |
||
| + | Rolling Stamping Slash Step 4.png|Rolling Stamping Slash (Step 4: Revice disappearing) |
||
| + | Rolling Stamping Slash Step 5.png|Rolling Stamping Slash (Step 5: Slashing enemy) |
||
| + | Rolling Stamping Slash Step 6.png|Rolling Stamping Slash (Step 6: Energy slash) |
||
| + | Rolling Stamping Slash Step 7.png|Rolling Stamping Slash (Step 7: Enemy covered in electricity) |
||
| + | Rolling Stamping Slash Step 8.png|Rolling Stamping Slash (Step 8: Explosion) |
||
| + | Rolling Stamping Slash.gif|Rolling Stamping Slash |
||
| + | </gallery> |
||
| + | |||
| + | | |
||
| + | Thunder Gale| |
||
| + | {{nihongo|'''Thunder Gale Stamping Slash'''|サンダーゲイルスタンピングスラッシュ|Sandā Geiru Sutanpingu Surasshu}}: Revice swings the Ohinbuster50 so that a red and yellow energy slash with electricity strikes the opponent, causing them to explode. |
||
| + | <gallery> |
||
| + | Thunder Gale Stamping Slash Step 1.png|Thunder Gale Stamping Slash (Step 1: Swinging Ohinbuster50) |
||
| + | Thunder Gale Stamping Slash Step 2.png|Thunder Gale Stamping Slash (Step 2: Energy slash) |
||
| + | Thunder Gale Stamping Slash Step 3.png|Thunder Gale Stamping Slash (Step 3: Explosion) |
||
| + | Thunder Gale Stamping Slash.gif|Thunder Gale Stamping Slash |
||
</gallery> |
</gallery> |
||
}} |
}} |
||
| + | |||
| − | {{!}}-{{!}} |
||
| + | | |
||
| − | Gun Mode= |
||
| + | Gun Mode| |
||
| − | {{#tag:tabber| |
||
| + | {{tabber| |
||
| − | Rex= |
||
| + | Rex| |
||
{{nihongo|'''Rex Stamping Strike'''|レックススタンピンググストライク|Rekkusu Sutanpingu Sutoraiku}}: This finisher has two variations. |
{{nihongo|'''Rex Stamping Strike'''|レックススタンピンググストライク|Rekkusu Sutanpingu Sutoraiku}}: This finisher has two variations. |
||
*Revi charges the Ohinbuster50 in its gun mode, with cyan energy concentrated at the barrel and pink energy surrounding the entire weapon. He then fires a massive cyan energy construct of a T-Rex skull, with a red projection of the Rex Vistamp's seal appearing in front of the barrel. The T-Rex skull then moves through a group of enemies, biting the opponents as it goes. |
*Revi charges the Ohinbuster50 in its gun mode, with cyan energy concentrated at the barrel and pink energy surrounding the entire weapon. He then fires a massive cyan energy construct of a T-Rex skull, with a red projection of the Rex Vistamp's seal appearing in front of the barrel. The T-Rex skull then moves through a group of enemies, biting the opponents as it goes. |
||
| − | *Revi charges the Ohinbuster50 with pink energy before firing a cyan energy construct of a T-Rex skull that flies toward the enemy, with a red projection of the Rex Vistamp's seal appearing in front of the weapon's barrel. When Revi used this finisher, the opponent dodged the T-Rex skull, causing it to fly toward Vice instead. Vice used the |
+ | *Revi charges the Ohinbuster50 with pink energy before firing a cyan energy construct of a T-Rex skull that flies toward the enemy, with a red projection of the Rex Vistamp's seal appearing in front of the weapon's barrel. When Revi used this finisher, the opponent dodged the T-Rex skull, causing it to fly toward Vice instead. Vice used the Osutoderuhammer50 to strike the T-Rex skull, causing a projection of the Osutoderuhammer50's seal to appear and redirecting the attack back toward the enemy. The T-Rex skull then collides with the enemy, creating a shockwave of dark blue energy upon impact and resulting in a fiery explosion. |
<gallery> |
<gallery> |
||
Rex Stamping Strike Step 1.png|Rex Stamping Strike (Version 1) (Step 1: Charging) |
Rex Stamping Strike Step 1.png|Rex Stamping Strike (Version 1) (Step 1: Charging) |
||
| Line 856: | Line 2,605: | ||
Rex Stamping Strike Ver 2 Step 5.png|Rex Stamping Strike (Version 2) (Step 5: T-Rex skull approaching Vice) |
Rex Stamping Strike Ver 2 Step 5.png|Rex Stamping Strike (Version 2) (Step 5: T-Rex skull approaching Vice) |
||
Rex Stamping Strike Ver 2 Step 6.png|Rex Stamping Strike (Version 2) (Step 6: Vice preparing to strike T-Rex skull) |
Rex Stamping Strike Ver 2 Step 6.png|Rex Stamping Strike (Version 2) (Step 6: Vice preparing to strike T-Rex skull) |
||
| − | Rex Stamping Strike Ver 2 Step 7.png|Rex Stamping Strike (Version 2) (Step 7: Vice striking with |
+ | Rex Stamping Strike Ver 2 Step 7.png|Rex Stamping Strike (Version 2) (Step 7: Vice striking with Osutoderuhammer50) |
Rex Stamping Strike Ver 2 Step 8.png|Rex Stamping Strike (Version 2) (Step 8: Attack redirected to enemy) |
Rex Stamping Strike Ver 2 Step 8.png|Rex Stamping Strike (Version 2) (Step 8: Attack redirected to enemy) |
||
Rex Stamping Strike Ver 2 Step 9.png|Rex Stamping Strike (Version 2) (Step 9: Impact) |
Rex Stamping Strike Ver 2 Step 9.png|Rex Stamping Strike (Version 2) (Step 9: Impact) |
||
Rex Stamping Strike Ver 2 Step 10.png|Rex Stamping Strike (Version 2) (Step 10: Explosion) |
Rex Stamping Strike Ver 2 Step 10.png|Rex Stamping Strike (Version 2) (Step 10: Explosion) |
||
| + | Rex Stamping Strike 2.gif|Rex Stamping Strike (Version 2) |
||
| + | </gallery> |
||
| + | |||
| + | | |
||
| + | Rolling| |
||
| + | {{nihongo|'''Rolling Stamping Strike'''|ローリングスタンピングストライク|Rōringu Sutanpingu Sutoraiku}}: Jack Revice forms a dark blue energy orb in front of the Ohinbuster50's barrel and channels black energy into it. After the charging is finished, the orb transforms into cyan electricity surrounded by blue energy. Revice then aims the Ohinbuster50 at a falling enemy and fires a beam of black energy surrounded by cyan energy and electricity, creating a large hole in the enemy before they explode. |
||
| + | <gallery> |
||
| + | Rolling Stamping Strike Step 1.png|Rolling Stamping Strike (Step 1: Charging) |
||
| + | Rolling Stamping Strike Step 2.png|Rolling Stamping Strike (Step 2: Finished charging) |
||
| + | Rolling Stamping Strike Step 3.png|Rolling Stamping Strike (Step 3: Aiming) |
||
| + | Rolling Stamping Strike Step 4.png|Rolling Stamping Strike (Step 4: Firing beam) |
||
| + | Rolling Stamping Strike Step 5.png|Rolling Stamping Strike (Step 5: Hole in enemy) |
||
| + | Rolling Stamping Strike Step 6.png|Rolling Stamping Strike (Step 6: Explosion) |
||
| + | Rolling Stamping Strike.gif|Rolling Stamping Strike |
||
</gallery> |
</gallery> |
||
}} |
}} |
||
}} |
}} |
||
}} |
}} |
||
| + | |||
| − | {{!}}-{{!}} |
||
| + | | |
||
| − | OsutoderuHammer50= |
||
| + | Osutoderuhammer50| |
||
| − | The OsutoderuHammer50's finisher is the {{nihongo|'''Osutoderu Crash'''|オストデルクラッシュ}}, which is performed by either striking an object or scanning a [[Vistamps|Vistamp]]. The attack will take on the attributes of the type of object that was struck or the power of the scanned Vistamp. |
||
| + | The Osutoderuhammer50's finisher is the {{nihongo|'''Osutoderu Crash'''|オストデルクラッシュ}}, which is performed by either striking an object or scanning a [[Vistamps|Vistamp]]. The attack will take on the attributes of the type of object that was struck or the power of the scanned Vistamp. |
||
| − | {{#tag:tabber| |
||
| + | {{tabber| |
||
| − | Object= |
||
| + | Object| |
||
| − | {{#tag:tabber| |
||
| + | {{tabber| |
||
| − | Drive-in= |
||
| + | Drive-in| |
||
| − | Vice strikes a car, causing a projection of the OsutoderuHammer50's seal to appear. Vice then spins, with his body surrounded by pink energy, while holding out the OsutoderuHammer50, which produces a trail of yellow and cyan energy. He approaches the target while spinning and crashes into them, continuously striking them with the OsutoderuHammer50. Vice then moves away and briefly stops spinning before starting again and resuming his attack. At the end of the second spinning attack, a yellow projection of the design on the OsutoderuHammer50's head to appear as the enemy is launched away. |
||
| + | Vice strikes a car, causing a projection of the Osutoderuhammer50's seal to appear. Vice then spins, with his body surrounded by pink energy, while holding out the Osutoderuhammer50, which produces a trail of yellow and cyan energy. He approaches the target while spinning and crashes into them, continuously striking them with the Osutoderuhammer50. Vice then moves away and briefly stops spinning before starting again and resuming his attack. At the end of the second spinning attack, a yellow projection of the design on the Osutoderuhammer50's head to appear as the enemy is launched away. |
||
<gallery> |
<gallery> |
||
Drive-in Osutoderu Crash Step 1.png|Osutoderu Crash (Drive-in) (Step 1: Vice striking car) |
Drive-in Osutoderu Crash Step 1.png|Osutoderu Crash (Drive-in) (Step 1: Vice striking car) |
||
| Line 883: | Line 2,647: | ||
Drive-in Osutoderu Crash.gif|Drive-in Osutoderu Crash |
Drive-in Osutoderu Crash.gif|Drive-in Osutoderu Crash |
||
</gallery> |
</gallery> |
||
| + | |||
| − | {{!}}-{{!}} |
||
| + | | |
||
| − | Splash Ra-in= |
||
| + | Splash Ra-in| |
||
| − | {{!}}-{{!}} |
||
| + | |||
| − | Stop Tra-in= |
||
| + | | |
||
| − | {{!}}-{{!}} |
||
| − | + | Stop Tra-in| |
|
| + | |||
| − | {{!}}-{{!}} |
||
| + | | |
||
| − | Element-in= |
||
| + | Metchakyu-in| |
||
| + | |||
| + | | |
||
| + | Element-in| |
||
This finisher has two variations: |
This finisher has two variations: |
||
| − | *Vice strikes a stone on the ground, causing a projection of the |
+ | *Vice strikes a stone on the ground, causing a projection of the Osutoderuhammer50's seal to appear. Numerous balls of yellow energy emerge from the stone and float into the air before transforming into large rocks. Vice swings the Osutoderuhammer50, sending the rocks towards the target. The rocks then rain down, relentlessly striking the enemy and the surrounding environment. |
| − | *Revi strikes Vice's Barid Shield, causing the |
+ | *Revi strikes Vice's Barid Shield, causing the Osutoderuhammer50 to be covered in light blue energy and emit freezing air from its head. Revi raises the weapon, which constructs a giant version of itself made of ice. Revi then swings the Osutoderuhammer50 downward, causing the ice construct to slam into the opponent and shatter upon impact. |
<gallery> |
<gallery> |
||
Element-in Osutoderu Crash Step 1.png|Osutoderu Crash (Element-in) (Version 1) (Step 1: Vice striking stone) |
Element-in Osutoderu Crash Step 1.png|Osutoderu Crash (Element-in) (Version 1) (Step 1: Vice striking stone) |
||
| Line 905: | Line 2,673: | ||
Element-in Osutoderu Crash.gif|Osutoderu Crash (Element-in) (Version 1) |
Element-in Osutoderu Crash.gif|Osutoderu Crash (Element-in) (Version 1) |
||
Element-in Osutoderu Crash Ver 2 Step 1.png|Osutoderu Crash (Element-in) (Version 2) (Step 1: Striking Barid Shield) |
Element-in Osutoderu Crash Ver 2 Step 1.png|Osutoderu Crash (Element-in) (Version 2) (Step 1: Striking Barid Shield) |
||
| − | Element-in Osutoderu Crash Ver 2 Step 2.png|Osutoderu Crash (Element-in) (Version 2) (Step 2: Empowered |
+ | Element-in Osutoderu Crash Ver 2 Step 2.png|Osutoderu Crash (Element-in) (Version 2) (Step 2: Empowered Osutoderuhammer50) |
| − | Element-in Osutoderu Crash Ver 2 Step 3.png|Osutoderu Crash (Element-in) (Version 2) (Step 3: Raising |
+ | Element-in Osutoderu Crash Ver 2 Step 3.png|Osutoderu Crash (Element-in) (Version 2) (Step 3: Raising Osutoderuhammer50) |
Element-in Osutoderu Crash Ver 2 Step 4.png|Osutoderu Crash (Element-in) (Version 2) (Step 4: Creating ice construct) |
Element-in Osutoderu Crash Ver 2 Step 4.png|Osutoderu Crash (Element-in) (Version 2) (Step 4: Creating ice construct) |
||
Element-in Osutoderu Crash Ver 2 Step 5.png|Osutoderu Crash (Element-in) (Version 2) (Step 5: Completed ice construct) |
Element-in Osutoderu Crash Ver 2 Step 5.png|Osutoderu Crash (Element-in) (Version 2) (Step 5: Completed ice construct) |
||
Element-in Osutoderu Crash Ver 2 Step 6.png|Osutoderu Crash (Element-in) (Version 2) (Step 6: Ice construct striking enemy) |
Element-in Osutoderu Crash Ver 2 Step 6.png|Osutoderu Crash (Element-in) (Version 2) (Step 6: Ice construct striking enemy) |
||
Element-in Osutoderu Crash Ver 2 Step 7.png|Osutoderu Crash (Element-in) (Version 2) (Step 7: Shattering) |
Element-in Osutoderu Crash Ver 2 Step 7.png|Osutoderu Crash (Element-in) (Version 2) (Step 7: Shattering) |
||
| + | Element-in Osutoderu Crash 2.gif|Osutoderu Crash (Element-in) (Version 2) |
||
</gallery> |
</gallery> |
||
}} |
}} |
||
| + | |||
| − | {{!}}-{{!}} |
||
| + | | |
||
| − | Vistamp= |
||
| + | Vistamp| |
||
}} |
}} |
||
| + | |||
| − | {{!}}-{{!}} |
||
| + | | |
||
| − | Revicelasher= |
||
| + | Revicelasher| |
||
The Revicelasher's finisher is the {{nihongo|'''Revi Vicelash'''|リバイバイスラッシュ|Ribai Baisurasshu}}, which is performed by stamping either the Ohinstamp or a Vistamp onto the Ohinjector. The latter results in an attack using the Vistamp's power. |
The Revicelasher's finisher is the {{nihongo|'''Revi Vicelash'''|リバイバイスラッシュ|Ribai Baisurasshu}}, which is performed by stamping either the Ohinstamp or a Vistamp onto the Ohinjector. The latter results in an attack using the Vistamp's power. |
||
| − | {{ |
+ | {{tabber| |
| − | Ohinstamp |
+ | Ohinstamp| |
| − | This finisher has |
+ | This finisher has three variations: |
| − | *Vice delivers a series of three energy slashes to the enemy, with each slash being composed of both blue and purple energy as well as yelow |
+ | *Vice delivers a series of three energy slashes to the enemy, with each slash being composed of both blue and purple energy as well as yelow and cyan energy. Each slash produces a shockwave of yellow energy upon impact, and the third slash additionally produces a yellow projection of the design on the Osutoderuhammer50's head. |
| − | *Revi jumps into the air and delivers a downward yellow energy slash to the enemy as he falls. Revi then runs |
+ | *Revi jumps into the air and delivers a downward yellow energy slash to the enemy as he falls. Revi then runs toward the enemy and delivers a second slash while sliding. |
| + | *Revi covers the blade of the Revicelasher with cyan energy and slashes the opponent, creating a burst of cyan and yellow energy upon impact. |
||
<gallery> |
<gallery> |
||
Revi Vicelash Step 1.png|Revi Vicelash (Version 1) (Step 1: Blade covered in energy) |
Revi Vicelash Step 1.png|Revi Vicelash (Version 1) (Step 1: Blade covered in energy) |
||
| Line 936: | Line 2,708: | ||
Revi Vicelash Step 10.png|Revi Vicelash (Version 1) (Step 10: Aftermath of third slash) |
Revi Vicelash Step 10.png|Revi Vicelash (Version 1) (Step 10: Aftermath of third slash) |
||
Revi Vicelash.gif|Revi Vicelash (Version 1) |
Revi Vicelash.gif|Revi Vicelash (Version 1) |
||
| − | Revi Vicelash Ver 2 Step 1.png|Revi Vicelash (Version |
+ | Revi Vicelash Ver 2 Step 1.png|Revi Vicelash (Version 2) (Step 1: Jumping) |
| − | Revi Vicelash Ver 2 Step 2.png|Revi Vicelash (Version |
+ | Revi Vicelash Ver 2 Step 2.png|Revi Vicelash (Version 2) (Step 2: Downward slash) |
| − | Revi Vicelash Ver 2 Step 3.png|Revi Vicelash (Version |
+ | Revi Vicelash Ver 2 Step 3.png|Revi Vicelash (Version 2) (Step 3: Aftermath of first slash) |
| − | Revi Vicelash Ver 2 Step 4.png|Revi Vicelash (Version |
+ | Revi Vicelash Ver 2 Step 4.png|Revi Vicelash (Version 2) (Step 4: Running toward enemy) |
| − | Revi Vicelash Ver 2 Step 5.png|Revi Vicelash (Version |
+ | Revi Vicelash Ver 2 Step 5.png|Revi Vicelash (Version 2) (Step 5: Second slash) |
| − | Revi Vicelash Ver 2 Step 6.png|Revi Vicelash (Version |
+ | Revi Vicelash Ver 2 Step 6.png|Revi Vicelash (Version 2) (Step 6: Aftermath of second slash) |
| + | Revi Vicelash 2.gif|Revi Vicelash (Version 2) |
||
| + | Revi Vicelash Ver 3 Step 1.png|Revi Vicelash (Version 3) (Step 1: Blade covered in energy) |
||
| + | Revi Vicelash Ver 3 Step 2.png|Revi Vicelash (Version 3) (Step 2: Slash) |
||
</gallery> |
</gallery> |
||
| + | |||
| − | {{!}}-{{!}} |
||
| + | | |
||
| − | Vistamp= |
||
| + | Vistamp| |
||
| − | {{#tag:tabber| |
||
| + | {{tabber| |
||
| − | Mammoth= |
||
| + | Mammoth| |
||
Revi covers the Revicelasher's blade in light blue energy and delivers several slashes to the enemy. He then parries one of the opponent's attacks before performing a final blue energy slash. |
Revi covers the Revicelasher's blade in light blue energy and delivers several slashes to the enemy. He then parries one of the opponent's attacks before performing a final blue energy slash. |
||
<gallery> |
<gallery> |
||
| Line 957: | Line 2,733: | ||
Revi Vicelash (Mammoth) Step 7.png|Revi Vicelash (Mammoth) (Step 7: Energy slash) |
Revi Vicelash (Mammoth) Step 7.png|Revi Vicelash (Mammoth) (Step 7: Energy slash) |
||
Revi Vicelash (Mammoth) Step 8.png|Revi Vicelash (Mammoth) (Step 8: Aftermath of energy slash) |
Revi Vicelash (Mammoth) Step 8.png|Revi Vicelash (Mammoth) (Step 8: Aftermath of energy slash) |
||
| + | Revi Vicelash (Mammoth).gif|Revi Vicelash (Mammoth) |
||
| + | </gallery> |
||
| + | |||
| + | | |
||
| + | Volcano| |
||
| + | Revi charges the Revicelasher with flames before forming them into a large sword of fire around the weapon's own blade. At the same time, Vice forms a large sword of ice for himself to wield. Together, the two Riders deliver a series of numerous slashes to the enemy, with Revi performing slashes of fire and Vice performing slashes of ice. |
||
| + | <gallery> |
||
| + | Revi Vicelash (Volcano) Step 1.png|Revi Vicelash (Volcano) (Step 1: Charging with fire) |
||
| + | Revi Vicelash (Volcano) Step 2.png|Revi Vicelash (Volcano) (Step 2: Forming fire sword) |
||
| + | Revi Vicelash (Volcano) Step 3.png|Revi Vicelash (Volcano) (Step 3: Fire and ice swords) |
||
| + | Revi Vicelash (Volcano) Step 4.png|Revi Vicelash (Volcano) (Step 4: Fire slash) |
||
| + | Revi Vicelash (Volcano) Step 5.png|Revi Vicelash (Volcano) (Step 5: Ice slash) |
||
| + | Revi Vicelash (Volcano) Step 6.png|Revi Vicelash (Volcano) (Step 6: Aftermath of slashes) |
||
| + | Revi Vicelash (Volcano) Step 7.png|Revi Vicelash (Volcano) (Step 7: Simultaneous slashes) |
||
| + | Revi Vicelash (Volcano) Step 8.png|Revi Vicelash (Volcano) (Step 8: Continued slashes) |
||
| + | Revi Vicelash (Volcano) Step 9.png|Revi Vicelash (Volcano) (Step 9: End of slashes) |
||
| + | Revi Vicelash (Volcano).gif|Revi Vicelash (Volcano) |
||
| + | </gallery> |
||
| + | |||
| + | | |
||
| + | Brachio| |
||
| + | Pink energy swirls around the Reviceslasher while the weapon's blade is covered in energy of the same color. The energy blade then elongates until it is twice as tall as Revi himself. Revi swings the energy blade into multiple enemies standing outside normal melee range, striking them and launching them away. The energy blade then shortens and dissipates while the launched enemies crash into a wall. |
||
| + | <gallery> |
||
| + | Revi Vicelash (Brachio) Step 1.png|Revi Vicelash (Brachio) (Step 1: Charging) |
||
| + | Revi Vicelash (Brachio) Step 2.png|Revi Vicelash (Brachio) (Step 2: Energy blade becoming longer) |
||
| + | Revi Vicelash (Brachio) Step 3.png|Revi Vicelash (Brachio) (Step 3: Fully elongated blade) |
||
| + | Revi Vicelash (Brachio) Step 4.png|Revi Vicelash (Brachio) (Step 4: Swinging) |
||
| + | Revi Vicelash (Brachio) Step 5.png|Revi Vicelash (Brachio) (Step 5: Launching enemies) |
||
| + | Revi Vicelash (Brachio) Step 6.png|Revi Vicelash (Brachio) (Step 6: Blade shortening) |
||
| + | Revi Vicelash (Brachio) Step 7.png|Revi Vicelash (Brachio) (Step 7: Enemies crashing) |
||
| + | Revi Vicelash (Brachio).gif|Revi Vicelash (Brachio) |
||
| + | </gallery> |
||
| + | |||
| + | | |
||
| + | Rolling| |
||
| + | Revice engages in several high-speed clashes with the enemy, appearing only as a trail of yellow electricity. After the two return to normal speed, Revice performs a yellow energy slash using the Revicelasher before cutting through the enemy's weapons when they attempt to block the attack. Revice then raises the Rolling Vistamp into the air as lightning strikes it. With their body glowing, Revice disappears then reappears in front of the enemy and delivers a slash of yellow paint surrounded by electricity before disappearing again. Revice then reappears and disappears to deliver a second slash in the same way. Upon reappearing for the third time, Revice instead uses the Rolling Vistamp to deliver two slashes of yellow paint. Revice reappears for the final time a short distance away from the enemy before performing a giant upward slash of yellow paint surrounded by electricity using the Revicelasher, causing the opponent to explode after a brief moment. |
||
| + | <gallery> |
||
| + | Revi Vicelash (Rolling) Step 1.png|Revi Vicelash (Rolling) (Step 1: Running towards enemy) |
||
| + | Revi Vicelash (Rolling) Step 2.png|Revi Vicelash (Rolling) (Step 2: High-speed movement) |
||
| + | Revi Vicelash (Rolling) Step 3.png|Revi Vicelash (Rolling) (Step 3: High-speed clashes) |
||
| + | Revi Vicelash (Rolling) Step 4.png|Revi Vicelash (Rolling) (Step 4: Returning to normal speed) |
||
| + | Revi Vicelash (Rolling) Step 5.png|Revi Vicelash (Rolling) (Step 5: Preparing to slash) |
||
| + | Revi Vicelash (Rolling) Step 6.png|Revi Vicelash (Rolling) (Step 6: Energy slash) |
||
| + | Revi Vicelash (Rolling) Step 7.png|Revi Vicelash (Rolling) (Step 7: Preparing for second slash) |
||
| + | Revi Vicelash (Rolling) Step 8.png|Revi Vicelash (Rolling) (Step 8: Cutting enemy's weapons) |
||
| + | Revi Vicelash (Rolling) Step 9.png|Revi Vicelash (Rolling) (Step 9: Lighting striking Rolling Vistamp) |
||
| + | Revi Vicelash (Rolling) Step 10.png|Revi Vicelash (Rolling) (Step 10: Revice glowing) |
||
| + | Revi Vicelash (Rolling) Step 11.png|Revi Vicelash (Rolling) (Step 11: Appearing in front of enemy) |
||
| + | Revi Vicelash (Rolling) Step 12.png|Revi Vicelash (Rolling) (Step 12: Slash of paint and electricity) |
||
| + | Revi Vicelash (Rolling) Step 13.png|Revi Vicelash (Rolling) (Step 13: Disappearing) |
||
| + | Revi Vicelash (Rolling) Step 14.png|Revi Vicelash (Rolling) (Step 14: Reappearing) |
||
| + | Revi Vicelash (Rolling) Step 15.png|Revi Vicelash (Rolling) (Step 15: Second slash) |
||
| + | Revi Vicelash (Rolling) Step 16.png|Revi Vicelash (Rolling) (Step 16: Disappearing again) |
||
| + | Revi Vicelash (Rolling) Step 17.png|Revi Vicelash (Rolling) (Step 17: Reappearing again) |
||
| + | Revi Vicelash (Rolling) Step 18.png|Revi Vicelash (Rolling) (Step 18: First paint slash with the Rolling Vistamp) |
||
| + | Revi Vicelash (Rolling) Step 19.png|Revi Vicelash (Rolling) (Step 19: Second paint slash) |
||
| + | Revi Vicelash (Rolling) Step 20.png|Revi Vicelash (Rolling) (Step 20: Disappearing) |
||
| + | Revi Vicelash (Rolling) Step 21.png|Revi Vicelash (Rolling) (Step 21: Reappearing for the final time) |
||
| + | Revi Vicelash (Rolling) Step 22.png|Revi Vicelash (Rolling) (Step 22: Final slash) |
||
| + | Revi Vicelash (Rolling) Step 23.png|Revi Vicelash (Rolling) (Step 23: Aftermath of slash) |
||
| + | Revi Vicelash (Rolling) Step 24.png|Revi Vicelash (Rolling) (Step 24: Explosion) |
||
| + | Revi Vicelash (Rolling).gif|Revi Vicelash (Rolling) |
||
</gallery> |
</gallery> |
||
| − | {{!}}-{{!}} |
||
| − | Volcano= |
||
| − | Revi covers the Revicelasher’s blade in flames, and does multiple several slashes. |
||
}} |
}} |
||
| + | }} |
||
| + | |||
| + | | |
||
| + | Rolling Vistamp| |
||
| + | {{tabber| |
||
| + | Rolling Rider Punch| |
||
| + | {{nihongo|'''Rolling Rider Punch'''|ローリングライダーパンチ|Rōringu Raidā Panchi}}: This finisher has three variations. |
||
| + | *Jack Revice charges the Rolling Vistamp with black and blue paint-like energy before swinging it, causing a slash of black paint to appear on the enemy. He then swings again, causing another paint slash to appear in the opposite direction. The two slashes form an X shape, immobilizing the enemy. Revice charges the Rolling Vistamp again before launching forward instantaneously and striking the enemy with it, producing blue shockwaves upon impact and causing light blue energy to appear in the black paint. The enemy is then destroyed in an explosion of purple energy, scattering the paint. |
||
| + | *Jack Revice uses the Rolling Vistamp to deliver a slash of black paint to the enemy. Immediately afterwards, he strikes the opponent with the weapon and holds it there while its roller is spinning, causing it to grind against the enemy's body. Revice then pulls him arm back and punches the enemy with the Rolling Vistamp, pushing them away. |
||
| + | *Revice charges the Rolling Vistamp with black and blue energy before their entire body is covered in electricity. Revice then uses the Rolling Vistamp to deliver a punch covered in yellow electricity and red wind that leaves behind a trail of yellow paint. The punch produces several shockwaves of yellow paint upon impact. |
||
| + | <gallery> |
||
| + | Rolling Rider Punch Step 1.png|Rolling Rider Punch (Version 1) (Step 1: Charging) |
||
| + | Rolling Rider Punch Step 2.png|Rolling Rider Punch (Version 1) (Step 2: Finished charging) |
||
| + | Rolling Rider Punch Step 3.png|Rolling Rider Punch (Version 1) (Step 3: About to swing) |
||
| + | Rolling Rider Punch Step 4.png|Rolling Rider Punch (Version 1) (Step 4: Swinging) |
||
| + | Rolling Rider Punch Step 5.png|Rolling Rider Punch (Version 1) (Step 5: First paint slash) |
||
| + | Rolling Rider Punch Step 6.png|Rolling Rider Punch (Version 1) (Step 6: Second paint slash) |
||
| + | Rolling Rider Punch Step 7.png|Rolling Rider Punch (Version 1) (Step 7: Two paint slashes) |
||
| + | Rolling Rider Punch Step 8.png|Rolling Rider Punch (Version 1) (Step 8: Charging again) |
||
| + | Rolling Rider Punch Step 9.png|Rolling Rider Punch (Version 1) (Step 9: About to launch forward) |
||
| + | Rolling Rider Punch Step 10.png|Rolling Rider Punch (Version 1) (Step 10: Punch) |
||
| + | Rolling Rider Punch Step 11.png|Rolling Rider Punch (Version 1) (Step 11: Shockwaves) |
||
| + | Rolling Rider Punch Step 12.png|Rolling Rider Punch (Version 1) (Step 12: Continued punch) |
||
| + | Rolling Rider Punch Step 13.png|Rolling Rider Punch (Version 1) (Step 13: Explosion) |
||
| + | Rolling Rider Punch.gif|Rolling Rider Punch (Version 1) |
||
| + | Rolling Rider Punch Ver 2 Step 1.png|Rolling Rider Punch (Version 2) (Step 1: Paint slash) |
||
| + | Rolling Rider Punch Ver 2 Step 2.png|Rolling Rider Punch (Version 2) (Step 2: Slash striking enemy) |
||
| + | Rolling Rider Punch Ver 2 Step 3.png|Rolling Rider Punch (Version 2) (Step 3: Striking enemy with Rolling Vistamp) |
||
| + | Rolling Rider Punch Ver 2 Step 4.png|Rolling Rider Punch (Version 2) (Step 4: Grinding) |
||
| + | Rolling Rider Punch Ver 2 Step 5.png|Rolling Rider Punch (Version 2) (Step 5: Preparing to punch) |
||
| + | Rolling Rider Punch Ver 2 Step 6.png|Rolling Rider Punch (Version 2) (Step 6: Punch) |
||
| + | Rolling Rider Punch Ver 2 Step 7.png|Rolling Rider Punch (Version 2) (Step 7: Enemy pushed back) |
||
| + | Rolling Rider Punch 2.gif|Rolling Rider Punch (Version 2) |
||
| + | Rolling Rider Punch Ver 3 Step 1.png|Rolling Rider Punch (Version 3) (Step 1: Charging) |
||
| + | Rolling Rider Punch Ver 3 Step 2.png|Rolling Rider Punch (Version 3) (Step 2: Covered in electricity) |
||
| + | Rolling Rider Punch Ver 3 Step 3.png|Rolling Rider Punch (Version 3) (Step 3: Preparing to punch) |
||
| + | Rolling Rider Punch Ver 3 Step 4.png|Rolling Rider Punch (Version 3) (Step 4: Punch) |
||
| + | Rolling Rider Punch Ver 3 Step 5.png|Rolling Rider Punch (Version 3) (Step 5: Aftermath) |
||
| + | Rolling Rider Punch 3.gif|Rolling Rider Punch (Version 3) |
||
| + | </gallery> |
||
| + | |||
| + | | |
||
| + | Painting Finish| |
||
| + | By scanning another Vistamp on the Rolling Vistamp, the {{nihongo|'''Painting Finish'''|ペインティングフィニッシュ|Peintingu Finisshu}} can be performed. |
||
| + | {{tabber| |
||
| + | Thunder Gale| |
||
| + | This finisher has two variations. |
||
| + | {{tabber| |
||
| + | Version 1| |
||
| + | Revice charges the Rolling Vistamp with electricity while their body is covered in fire and they are surrounded by a spiral of red wind. Revice swings the Rolling Vistamp upward, creating painted symbols of lightning, a tornado, and fire. The symbols combine, creating a large tornado of fire and lightning that approaches the opponent and lifts them into the air. The tornado then dissipates into a rotating column of the symbols of numerous elements before Revice reappears in the air above the enemy. Revice punches the opponent with the Rolling Vistamp while dropping downward and lands on the fire symbol. Revice launches off of it and delivers a flying punch with the Rolling Vistamp covered in fire. Revice continues ricocheting off of various other symbols, each time delivering a punch empowered with the corresponding element. Upon landing on the lightning symbol, Revice launches back upward to the top of the column. There, Revice charges the Rolling Vistamp with electricity and drops downward before punching the enemy. The punch creates a shockwave upon impact, and the two fall together before the opponent crashes into teh ground while underneath Revice. After landing, additional electricity is released shortly before the enemy explodes. |
||
| + | <gallery> |
||
| + | Painting Finish (Thunder Gale) Step 1.png|Painting Finish (Thunder Gale) (Version 1) (Step 1: Charging) |
||
| + | Painting Finish (Thunder Gale) Step 2.png|Painting Finish (Thunder Gale) (Version 1) (Step 2: Surrounded by wind) |
||
| + | Painting Finish (Thunder Gale) Step 3.png|Painting Finish (Thunder Gale) (Version 1) (Step 3: Symbols of fire, lightning, and a tornado) |
||
| + | Painting Finish (Thunder Gale) Step 4.png|Painting Finish (Thunder Gale) (Version 1) (Step 4: Symbols combining) |
||
| + | Painting Finish (Thunder Gale) Step 5.png|Painting Finish (Thunder Gale) (Version 1) (Step 5: Tornado of fire and lightning) |
||
| + | Painting Finish (Thunder Gale) Step 6.png|Painting Finish (Thunder Gale) (Version 1) (Step 6: Tornado surrounding enemy) |
||
| + | Painting Finish (Thunder Gale) Step 7.png|Painting Finish (Thunder Gale) (Version 1) (Step 7: Lifting enemy into the air) |
||
| + | Painting Finish (Thunder Gale) Step 8.png|Painting Finish (Thunder Gale) (Version 1) (Step 8: Elemental symbols) |
||
| + | Painting Finish (Thunder Gale) Step 9.png|Painting Finish (Thunder Gale) (Version 1) (Step 9: Revice appearing above enemy) |
||
| + | Painting Finish (Thunder Gale) Step 10.png|Painting Finish (Thunder Gale) (Version 1) (Step 10: Downward flying punch) |
||
| + | Painting Finish (Thunder Gale) Step 11.png|Painting Finish (Thunder Gale) (Version 1) (Step 11: Landing on fire symbol) |
||
| + | Painting Finish (Thunder Gale) Step 12.png|Painting Finish (Thunder Gale) (Version 1) (Step 12: Launching off of symbol) |
||
| + | Painting Finish (Thunder Gale) Step 13.png|Painting Finish (Thunder Gale) (Version 1) (Step 13: Impact of flaming punch) |
||
| + | Painting Finish (Thunder Gale) Step 14.png|Painting Finish (Thunder Gale) (Version 1) (Step 14: Punch with second element) |
||
| + | Painting Finish (Thunder Gale) Step 15.png|Painting Finish (Thunder Gale) (Version 1) (Step 15: Impact of punch) |
||
| + | Painting Finish (Thunder Gale) Step 16.png|Painting Finish (Thunder Gale) (Version 1) (Step 16: Punch with third element) |
||
| + | Painting Finish (Thunder Gale) Step 17.png|Painting Finish (Thunder Gale) (Version 1) (Step 17: Impact of punch) |
||
| + | Painting Finish (Thunder Gale) Step 18.png|Painting Finish (Thunder Gale) (Version 1) (Step 18: Punch with fourth element) |
||
| + | Painting Finish (Thunder Gale) Step 19.png|Painting Finish (Thunder Gale) (Version 1) (Step 19: Impact of punch) |
||
| + | Painting Finish (Thunder Gale) Step 20.png|Painting Finish (Thunder Gale) (Version 1) (Step 20: Landing on lightning symbol) |
||
| + | Painting Finish (Thunder Gale) Step 21.png|Painting Finish (Thunder Gale) (Version 1) (Step 21: Launching upward) |
||
| + | Painting Finish (Thunder Gale) Step 22.png|Painting Finish (Thunder Gale) (Version 1) (Step 22: In the air above elements) |
||
| + | Painting Finish (Thunder Gale) Step 23.png|Painting Finish (Thunder Gale) (Version 1) (Step 23: Punch covered in electricity) |
||
| + | Painting Finish (Thunder Gale) Step 24.png|Painting Finish (Thunder Gale) (Version 1) (Step 24: Reaching opponent) |
||
| + | Painting Finish (Thunder Gale) Step 25.png|Painting Finish (Thunder Gale) (Version 1) (Step 25: Punch impact) |
||
| + | Painting Finish (Thunder Gale) Step 26.png|Painting Finish (Thunder Gale) (Version 1) (Step 26: Crashing into ground) |
||
| + | Painting Finish (Thunder Gale) Step 27.png|Painting Finish (Thunder Gale) (Version 1) (Step 27: Explosion) |
||
| + | Painting Finish (Thunder Gale).gif|Painting Finish (Thunder Gale) (Version 1) |
||
| + | </gallery> |
||
| + | |||
| + | | |
||
| + | Version 2| |
||
| + | Revice charges the Rolling Vistamp with electricity and red wind before using it to block an incoming enemy projectile. They then redirect the projectile back toward the attacker as a slash of yellow paint. The slash strikes the opponent before slicing through them. |
||
| + | <gallery> |
||
| + | Painting Finish (Thunder Gale) Ver 2 Step 1.png|Painting Finish (Thunder Gale) (Version 2) (Step 1: Charging) |
||
| + | Painting Finish (Thunder Gale) Ver 2 Step 2.png|Painting Finish (Thunder Gale) (Version 2) (Step 2: Incoming enemy projectile) |
||
| + | Painting Finish (Thunder Gale) Ver 2 Step 3.png|Painting Finish (Thunder Gale) (Version 2) (Step 3: Blocking projectile) |
||
| + | Painting Finish (Thunder Gale) Ver 2 Step 4.png|Painting Finish (Thunder Gale) (Version 2) (Step 4: Paint slash) |
||
| + | Painting Finish (Thunder Gale) Ver 2 Step 5.png|Painting Finish (Thunder Gale) (Version 2) (Step 5: Slash striking enemy) |
||
| + | Painting Finish (Thunder Gale) Ver 2 Step 6.png|Painting Finish (Thunder Gale) (Version 2) (Step 6: Slicing through enemy) |
||
| + | Painting Finish (Thunder Gale) 2.gif|Painting Finish (Thunder Gale) (Version 2) |
||
| + | </gallery> |
||
| + | }} |
||
| + | }} |
||
| + | }} |
||
| + | | |
||
| + | Rolling Vistamp + Revicelasher| |
||
| + | '''Rolling Rider Punch + Revi Vicelash (Rolling)''': Revi wields the Rolling Vistamp and Vice wields the Revicelasher. The Rolling Vistamp's roller is covered in red, yellow and cyan energy while the Revicelasher's blade is covered by black energy. Revi and Vice deliver several slashes of black ink to the surrounding enemies, destroying them in an explosion. The Riders then launch two more slashes that fly into another group of enemies, destroying them as well and resulting in a second explosion. |
||
| + | <gallery> |
||
| + | Rolling Rider Punch + Revi Vicelash Step 1.png|Rolling Rider Punch + Revi Vicelash (Rolling) (Step 1: Charging) |
||
| + | Rolling Rider Punch + Revi Vicelash Step 2.png|Rolling Rider Punch + Revi Vicelash (Rolling) (Step 2: Slashing enemies) |
||
| + | Rolling Rider Punch + Revi Vicelash Step 3.png|Rolling Rider Punch + Revi Vicelash (Rolling) (Step 3: Vice slashing again) |
||
| + | Rolling Rider Punch + Revi Vicelash Step 4.png|Rolling Rider Punch + Revi Vicelash (Rolling) (Step 4: Revi slashing again) |
||
| + | Rolling Rider Punch + Revi Vicelash Step 5.png|Rolling Rider Punch + Revi Vicelash (Rolling) (Step 5: Explosion) |
||
| + | Rolling Rider Punch + Revi Vicelash Step 6.png|Rolling Rider Punch + Revi Vicelash (Rolling) (Step 6: Preparing to launch slashes) |
||
| + | Rolling Rider Punch + Revi Vicelash Step 7.png|Rolling Rider Punch + Revi Vicelash (Rolling) (Step 7: Flying slashes) |
||
| + | Rolling Rider Punch + Revi Vicelash Step 8.png|Rolling Rider Punch + Revi Vicelash (Rolling) (Step 8: Slashing striking enemies) |
||
| + | Rolling Rider Punch + Revi Vicelash Step 9.png|Rolling Rider Punch + Revi Vicelash (Rolling) (Step 9: Second explosion) |
||
| + | </gallery> |
||
| + | |||
| + | | |
||
| + | Thunder Gale Vistamp| |
||
| + | By scanning another Vistamp on the Thunder Gale Vistamp, a {{nihongo|'''Lightning Tornado'''|ライトニングトルネド|Raitoningu Torunedo}} finisher using its power can be performed. |
||
| + | {{tabber| |
||
| + | Mammoth| |
||
| + | Revice channels yellow lightning, red wind, and blue energy boomerangs into the Thunder Gale Vistamp. Upon finishing, Revice's body glows and they dash forward at high speeds while surrounded by lightning, producing a blue sonic boom. Lightning appears in front of the enemy before Revice reappears and punches them, producing a blue shockwave along with streams of red wind. Revice then launches forward and crashes the opponent through a wall. |
||
| + | <gallery> |
||
| + | Lightning Tornado (Mammoth) Step 1.png|Lightning Tornado (Mammoth) (Step 1: Vistamp glowing) |
||
| + | Lightning Tornado (Mammoth) Step 2.png|Lightning Tornado (Mammoth) (Step 2: Channeling lightning, wind, and energy boomerangs) |
||
| + | Lightning Tornado (Mammoth) Step 3.png|Lightning Tornado (Mammoth) (Step 3: Revice glowing) |
||
| + | Lightning Tornado (Mammoth) Step 4.png|Lightning Tornado (Mammoth) (Step 4: Dashing) |
||
| + | Lightning Tornado (Mammoth) Step 5.png|Lightning Tornado (Mammoth) (Step 5: Lightning in front of enemy) |
||
| + | Lightning Tornado (Mammoth) Step 6.png|Lightning Tornado (Mammoth) (Step 6: Punch) |
||
| + | Lightning Tornado (Mammoth) Step 7.png|Lightning Tornado (Mammoth) (Step 7: Launching forward) |
||
| + | Lightning Tornado (Mammoth) Step 8.png|Lightning Tornado (Mammoth) (Step 8: Crashing through wall) |
||
| + | Lightning Tornado (Mammoth).gif|Lightning Tornado (Mammoth) |
||
| + | </gallery> |
||
| + | }} |
||
| + | |||
| + | | |
||
| + | Crimson Vail Vistamp| |
||
| + | {{tabber| |
||
| + | Crimson Impact| |
||
| + | {{nihongo|'''Crimson Impact'''|クリムゾンインパクト|Kurimuzon Inpakuto}}: Crimson Vail charges the Crimson Vistamp with red and black energy before using it it deliver a slash of crimson paint to the opponent. |
||
| + | <gallery> |
||
| + | Crimson Impact Step 1.png|Crimson Impact (Step 1: Charging) |
||
| + | Crimson Impact Step 2.png|Crimson Impact (Step 2: About to strike enemy) |
||
| + | Crimson Impact Step 3.png|Crimson Impact (Step 3: Paint slash) |
||
| + | Crimson Impact Step 4.png|Crimson Impact (Step 4: Aftermath) |
||
| + | Crimson Impact.gif|Crimson Impact |
||
| + | </gallery> |
||
| + | |||
| + | | |
||
| + | Crimson Finish| |
||
| + | {{nihongo|'''Crimson Finish'''|クリムゾンフィニッシュ|Kurimuzon Finisshu}}: Crimson Vail charges the Crimson Vistamp with red energy before using it to deliver a running punch to the opponent. Afterward, he turns to face his opponent again and his lower leg is covered in red energy as crimson paint flows into it. Crimson Vail then delivers a side kick to the enemy, with his leg now emanating additional crimson and black energy similar to fire. The kick creates several waves of red energy upon impact. |
||
| + | <gallery> |
||
| + | Crimson Finish Step 1.png|Crimson Finish (Step 1: Charging) |
||
| + | Crimson Finish Step 2.png|Crimson Finish (Step 2: Running towards enemy) |
||
| + | Crimson Finish Step 3.png|Crimson Finish (Step 3: Punch) |
||
| + | Crimson Finish Step 4.png|Crimson Finish (Step 4: Crimson paint flowing into foot covered in red energy) |
||
| + | Crimson Finish Step 5.png|Crimson Finish (Step 5: Kick surrounded by crimson and black energy) |
||
| + | Crimson Finish Step 6.png|Crimson Finish (Step 6: Kick impact) |
||
| + | Crimson Finish Step 7.png|Crimson Finish (Step 7: Damaged enemy) |
||
| + | Destream Finish vs Crimson Finish.gif|Crimson Finish |
||
| + | </gallery> |
||
}} |
}} |
||
}} |
}} |
||
==Transformation Device + Weapon== |
==Transformation Device + Weapon== |
||
| − | {{ |
+ | {{tabber| |
| − | Revice Driver + Ohinbuster50 |
+ | Revice Driver + Ohinbuster50| |
'''Finifini Finish + Volcano Stamping Slash''': The Barid Shield glows before Vice inhales and blows a stream of cold air across it, covering the surface of the shield in ice. Vice continues directing the cold air past the shield, forming a blade of ice. Revi and Vice jump into the air, with Revi wielding the Ohinbuster50 as its blade is covered in fire. A red projection of the Volcano Vistamp's seal and a light blue projection of the Barid Rex Vistamp's seal appear behind the two Riders before they each deliver a slash, with Revi performing a slash of fire and Vice performing a slash of ice. The flames from Revi's slash form into a fire tornado around the enemy before both the fire and opponent are encased in a column of ice. Revi then deliver another simultaneous slash to the ice column, with Revi performing a red energy slash and Vice performing a light blue energy slash, shattering the ice. |
'''Finifini Finish + Volcano Stamping Slash''': The Barid Shield glows before Vice inhales and blows a stream of cold air across it, covering the surface of the shield in ice. Vice continues directing the cold air past the shield, forming a blade of ice. Revi and Vice jump into the air, with Revi wielding the Ohinbuster50 as its blade is covered in fire. A red projection of the Volcano Vistamp's seal and a light blue projection of the Barid Rex Vistamp's seal appear behind the two Riders before they each deliver a slash, with Revi performing a slash of fire and Vice performing a slash of ice. The flames from Revi's slash form into a fire tornado around the enemy before both the fire and opponent are encased in a column of ice. Revi then deliver another simultaneous slash to the ice column, with Revi performing a red energy slash and Vice performing a light blue energy slash, shattering the ice. |
||
<gallery> |
<gallery> |
||
| Line 985: | Line 2,976: | ||
Finifini Finish + Volcano Stamping Slash Step 14.png|Finifini Finish + Volcano Stamping Slash (Step 14: Second slashes) |
Finifini Finish + Volcano Stamping Slash Step 14.png|Finifini Finish + Volcano Stamping Slash (Step 14: Second slashes) |
||
Finifini Finish + Volcano Stamping Slash Step 15.png|Finifini Finish + Volcano Stamping Slash (Step 15: Ice shards) |
Finifini Finish + Volcano Stamping Slash Step 15.png|Finifini Finish + Volcano Stamping Slash (Step 15: Ice shards) |
||
| + | Finifini Finish + Volcano Stamping Slash.gif|Finifini Finish + Volcano Stamping Slash |
||
</gallery> |
</gallery> |
||
| + | |||
| − | {{!}}-{{!}} |
||
| + | | |
||
| − | Livegun + Ohinbuster50= |
||
| + | Livegun + Ohinbuster50| |
||
| − | '''Bat Justice Finish + Ohing Strike''': Gold energy gathers at the end of the Livegun's barrel while a cyan projection of the Ohinstamp's seal appears in front of the Ohinbuster50's barrel along with several blank pink and blue energy stamps. Live then fires both weapons, creating a blue projection of the Ohinstamp's seal and a gold projection of the Bat Vistamp's seal along with a burst of gold energy. A large gold blade-shaped energy projectile is fired from the Livegun while a ball of blue energy is fired from the Ohinbuster50. The two projectiles pierce the opponent, leaving large holes. |
||
| + | '''Bat Justis Finish + Ohing Strike''': Gold energy gathers at the end of the Livegun's barrel while a cyan projection of the Ohinstamp's seal appears in front of the Ohinbuster50's barrel along with several blank pink and blue energy stamps. Live then fires both weapons, creating a blue projection of the Ohinstamp's seal and a gold projection of the Bat Vistamp's seal along with a burst of gold energy. A large gold blade-shaped energy projectile is fired from the Livegun while a ball of blue energy is fired from the Ohinbuster50. The two projectiles pierce the opponent, leaving large holes. |
||
<gallery> |
<gallery> |
||
| − | Bat Justice Finish + Ohing Strike Step 1.png|Bat |
+ | Bat Justice Finish + Ohing Strike Step 1.png|Bat Justis Finish + Ohing Strike (Step 1: Charging) |
| − | Bat Justice Finish + Ohing Strike Step 2.png|Bat |
+ | Bat Justice Finish + Ohing Strike Step 2.png|Bat Justis Finish + Ohing Strike (Step 2: Firing) |
| − | Bat Justice Finish + Ohing Strike Step 3.png|Bat |
+ | Bat Justice Finish + Ohing Strike Step 3.png|Bat Justis Finish + Ohing Strike (Step 3: Projectiles) |
| − | Bat Justice Finish + Ohing Strike Step 4.png|Bat |
+ | Bat Justice Finish + Ohing Strike Step 4.png|Bat Justis Finish + Ohing Strike (Step 4: Projectiles approaching enemy) |
| − | Bat Justice Finish + Ohing Strike Step 5.png|Bat |
+ | Bat Justice Finish + Ohing Strike Step 5.png|Bat Justis Finish + Ohing Strike (Step 5: Piercing enemy) |
| − | Bat Justice Finish + Ohing Strike Step 6.png|Bat |
+ | Bat Justice Finish + Ohing Strike Step 6.png|Bat Justis Finish + Ohing Strike (Step 6: Aftermath) |
| − | Bat Justis Finish + Ohing Strike.gif|Bat |
+ | Bat Justis Finish + Ohing Strike.gif|Bat Justis Finish + Ohing Strike |
</gallery> |
</gallery> |
||
}} |
}} |
||
| + | ==Combinations== |
||
| + | {{tabber| |
||
| + | Revice Riders| |
||
| + | {{tabber| |
||
| + | 2 Riders| |
||
| + | {{tabber| |
||
| + | Live/Jeanne| |
||
| + | {{tabber| |
||
| + | Jackal Genome/Kujaku Genome| |
||
| + | '''Kujaku Stamping Smash + Jackal Justis Finish''': Jeanne covers Lovekov in blue energy and throws the two fans before Live moves at high speeds while covered in light gold energy. Live attacks enemies with both melee attacks and shots fired from the Livegun while the fans fly around and slash other opponents. |
||
| + | <gallery> |
||
| + | Kujaku Stamping Smash + Jackal Justice Finish Step 1.png|Kujaku Stamping Smash + Jackal Justis Finish (Step 1: Lovekov covered in blue energy) |
||
| + | Kujaku Stamping Smash + Jackal Justice Finish Step 2.png|Kujaku Stamping Smash + Jackal Justis Finish (Step 2: Jeanne throwing fans) |
||
| + | Kujaku Stamping Smash + Jackal Justice Finish Step 3.png|Kujaku Stamping Smash + Jackal Justis Finish (Step 3: Live covered in light gold energy) |
||
| + | Kujaku Stamping Smash + Jackal Justice Finish Step 4.png|Kujaku Stamping Smash + Jackal Justis Finish (Step 4: Fans flying and Live moving) |
||
| + | Kujaku Stamping Smash + Jackal Justice Finish Step 5.png|Kujaku Stamping Smash + Jackal Justis Finish (Step 5: Live's melee attacks) |
||
| + | Kujaku Stamping Smash + Jackal Justice Finish Step 6.png|Kujaku Stamping Smash + Jackal Justis Finish (Step 6: Live preparing to fire) |
||
| + | Kujaku Stamping Smash + Jackal Justice Finish Step 7.png|Kujaku Stamping Smash + Jackal Justis Finish (Step 7: Live firing Livegun) |
||
| + | Kujaku Stamping Smash + Jackal Justice Finish Step 8.png|Kujaku Stamping Smash + Jackal Justis Finish (Step 8: Lovekov slashing enemies) |
||
| + | Kujaku Stamping Smash + Jackal Justice Finish Step 9.png|Kujaku Stamping Smash + Jackal Justis Finish (Step 9: Explosions) |
||
| + | Kujaku Stamping Smash + Jackal Justis Finish.gif|Kujaku Stamping Smash + Jackal Justis Finish |
||
| + | </gallery> |
||
| + | | |
||
| + | Holy Live/Cobra Genome| |
||
| + | '''Holy Justis Finish + Cobra Stamping Smash''': This finisher has two variations. |
||
| + | *Holy Live and Jeanne both jump into the air. Holy Live then performs a flying kick covered in light blue energy while Jeanne performs a flying kick covered in orange and blue energy. After the kicks strike the target, the Riders remain in contact for a brief moment before each raising their leg and kicking the enemy again, creating an explosion and launching the opponent away. |
||
| + | *Holy Live performs a flying kick covered in light blue and cyan energy while Jeanne performs a flying kick covered in red, orange, and blue energy. The kicks strike a pair of enemies as the Riders fly past, creating a burst of energy featuring all of the colors combined before the enemies explode. |
||
| + | <gallery> |
||
| + | Holy Justice Finish + Cobra Stamping Smash Step 1.png|Holy Justis Finish + Cobra Stamping Smash (Version 1) (Step 1: Riders in the air) |
||
| + | Holy Justice Finish + Cobra Stamping Smash Step 2.png|Holy Justis Finish + Cobra Stamping Smash (Version 1) (Step 2: Flying kicks) |
||
| + | Holy Justice Finish + Cobra Stamping Smash Step 3.png|Holy Justis Finish + Cobra Stamping Smash (Version 1) (Step 3: Striking enemy) |
||
| + | Holy Justice Finish + Cobra Stamping Smash Step 4.png|Holy Justis Finish + Cobra Stamping Smash (Version 1) (Step 4: Continued contact) |
||
| + | Holy Justice Finish + Cobra Stamping Smash Step 5.png|Holy Justis Finish + Cobra Stamping Smash (Version 1) (Step 5: Raising legs) |
||
| + | Holy Justice Finish + Cobra Stamping Smash Step 6.png|Holy Justis Finish + Cobra Stamping Smash (Version 1) (Step 6: Second kicks) |
||
| + | Holy Justice Finish + Cobra Stamping Smash Step 7.png|Holy Justis Finish + Cobra Stamping Smash (Version 1) (Step 7: Enemy launched away) |
||
| + | Holy Justis Finish + Cobra Stamping Smash.gif|Holy Justis Finish + Cobra Stamping Smash (Version 1) |
||
| + | Holy Justice Finish + Cobra Stamping Smash Ver 2 Step 1.png|Holy Justis Finish + Cobra Stamping Smash (Version 2) (Step 1: Flying kicks) |
||
| + | Holy Justice Finish + Cobra Stamping Smash Ver 2 Step 2.png|Holy Justis Finish + Cobra Stamping Smash (Version 2) (Step 2: Combined energy colors upon impact) |
||
| + | Holy Justice Finish + Cobra Stamping Smash Ver 2 Step 3.png|Holy Justis Finish + Cobra Stamping Smash (Version 2) (Step 3: Explosion) |
||
| + | Holy Justis Finish + Cobra Stamping Smash 2.gif|Holy Justis Finish + Cobra Stamping Smash (Version 2) |
||
| + | </gallery> |
||
| + | }} |
||
| + | | |
||
| − | ==Combinations== |
||
| + | Jack Revice/Jeanne| |
||
| − | {{#tag:tabber| |
||
| + | '''Kujaku Stamping Smash + Rolling Rider Punch''': Jeanne jumps into the air and spins vertically while covered in fire, launching multiple consecutive fireballs at the enemy. She then stops spinning and collides with the opponent herself, causing them to be surrounded by fire. Jack Revice uses the Rolling Vistamp to deliver three slashes of black paint to the enemy, causing the surrounding fire to become black as well. The fire then flows into the enemy until they explode. |
||
| − | 2 Riders= |
||
| − | {{#tag:tabber| |
||
| − | Revice/Live= |
||
| − | {{#tag:tabber| |
||
| − | Revice Brachio/Bat Genome= |
||
| − | '''Brachio Stamping Finish + Bat Justice Finish''': Live gathers gold energy at the end of the Livegun's barrel. When the enemy launches projectiles, Revice Brachio rears back and produces a magenta energy shockwave from their head that freezes the projectiles in time. Revice then swings their neck at the frozen projectiles, creating multiple gold projections of clock faces and destroying the projectiles. Afterward, Revice swings their neck upward into the enemy, launching the opponent into the air. Live fires gold sonic waves from the Livegun that attack the opponent in midair. Revice then jumps into the air and slams their neck down into the opponent, creating a red projection of the Brachio Vistamp's seal along with more clock projections and sending the enemy crashing to the ground. |
||
<gallery> |
<gallery> |
||
| − | + | Kujaku Stamping Smash + Rolling Rider Punch Step 1.png|Kujaku Stamping Smash + Rolling Rider Punch (Step 1: Jeanne jumping) |
|
| − | + | Kujaku Stamping Smash + Rolling Rider Punch Step 2.png|Kujaku Stamping Smash + Rolling Rider Punch (Step 2: Launching fireballs) |
|
| − | + | Kujaku Stamping Smash + Rolling Rider Punch Step 3.png|Kujaku Stamping Smash + Rolling Rider Punch (Step 3: Fireball impact) |
|
| − | + | Kujaku Stamping Smash + Rolling Rider Punch Step 4.png|Kujaku Stamping Smash + Rolling Rider Punch (Step 4: Continued attacking) |
|
| − | + | Kujaku Stamping Smash + Rolling Rider Punch Step 5.png|Kujaku Stamping Smash + Rolling Rider Punch (Step 5: Flying towards enemy) |
|
| − | + | Kujaku Stamping Smash + Rolling Rider Punch Step 6.png|Kujaku Stamping Smash + Rolling Rider Punch (Step 6: Colliding with enemy) |
|
| − | + | Kujaku Stamping Smash + Rolling Rider Punch Step 7.png|Kujaku Stamping Smash + Rolling Rider Punch (Step 7: Enemy surrounded by fire) |
|
| − | + | Kujaku Stamping Smash + Rolling Rider Punch Step 8.png|Kujaku Stamping Smash + Rolling Rider Punch (Step 8: First paint slash) |
|
| − | + | Kujaku Stamping Smash + Rolling Rider Punch Step 9.png|Kujaku Stamping Smash + Rolling Rider Punch (Step 9: Impact of first slash) |
|
| − | + | Kujaku Stamping Smash + Rolling Rider Punch Step 10.png|Kujaku Stamping Smash + Rolling Rider Punch (Step 10: Aftermath of first slash) |
|
| − | + | Kujaku Stamping Smash + Rolling Rider Punch Step 11.png|Kujaku Stamping Smash + Rolling Rider Punch (Step 11: Second paint slash) |
|
| − | + | Kujaku Stamping Smash + Rolling Rider Punch Step 12.png|Kujaku Stamping Smash + Rolling Rider Punch (Step 12: Impact of second slash) |
|
| − | + | Kujaku Stamping Smash + Rolling Rider Punch Step 13.png|Kujaku Stamping Smash + Rolling Rider Punch (Step 13: Aftermath of second slash) |
|
| − | + | Kujaku Stamping Smash + Rolling Rider Punch Step 14.png|Kujaku Stamping Smash + Rolling Rider Punch (Step 14: Third paint slash) |
|
| − | + | Kujaku Stamping Smash + Rolling Rider Punch Step 15.png|Kujaku Stamping Smash + Rolling Rider Punch (Step 15: Impact of third slash) |
|
| − | + | Kujaku Stamping Smash + Rolling Rider Punch Step 16.png|Kujaku Stamping Smash + Rolling Rider Punch (Step 16: Fully black fire) |
|
| + | Kujaku Stamping Smash + Rolling Rider Punch Step 17.png|Kujaku Stamping Smash + Rolling Rider Punch (Step 17: Enemy absorbing fire) |
||
| + | Kujaku Stamping Smash + Rolling Rider Punch Step 18.png|Kujaku Stamping Smash + Rolling Rider Punch (Step 18: Enemy about to explode) |
||
| + | Kujaku Stamping Smash + Rolling Rider Punch Step 19.png|Kujaku Stamping Smash + Rolling Rider Punch (Step 19: Explosion) |
||
| + | Kujaku Stamping Smash + Rolling Rider Punch.gif|Kujaku Stamping Smash + Rolling Rider Punch |
||
</gallery> |
</gallery> |
||
| + | |||
| − | {{!}}-{{!}} |
||
| + | | |
||
| − | Rex Genome/Bat Genome= |
||
| + | Jack Revice/Live| |
||
| − | '''Rex Stamping Finish + Bat Justice Finish''': Vice runs toward the enemy and kicks them into the air shortly before Revi and Live jump into the air themselves and simultaneously kick the opponent in mid-air, creating a shcokwave and sending the enemy crashing back to the ground. Revi and Live land and each perform a flying kick, with Revi's kick covered in pink and blue energy while Live's kick is covered in green and purple energy. Red projections of the Rex and Bat Vistamps' seals appear and the Riders pass through them before continuing to fly toward the opponent. Upon reaching the enemy, Revi and Live kick again, breaking through the target's body and launching the enemy into the air before the Riders slide to a stop. |
||
| + | '''Rolling Rider Punch + Jackal Justis Finish''': Jack Revice uses the Rolling Vistamp, with its roller spinning, to deliver a slash of black paint to an enemy, then does the same to a second. Jack Revice then performs a spinning slash of black paint that strikes both enemies simultaneously. Afterwards, Live jumps high into the air and fires a volley of gold energy projectiles at the enemies, causing them to explode. |
||
<gallery> |
<gallery> |
||
| − | + | Rolling Rider Punch + Jackal Justice Finish Step 1.png|Rolling Rider Punch + Jackal Justis Finish (Step 1: Roller spinning) |
|
| − | + | Rolling Rider Punch + Jackal Justice Finish Step 2.png|Rolling Rider Punch + Jackal Justis Finish (Step 2: First paint slash) |
|
| − | + | Rolling Rider Punch + Jackal Justice Finish Step 3.png|Rolling Rider Punch + Jackal Justis Finish (Step 3: Aftermath of first slash) |
|
| − | + | Rolling Rider Punch + Jackal Justice Finish Step 4.png|Rolling Rider Punch + Jackal Justis Finish (Step 4: Swinging at second enemy) |
|
| − | + | Rolling Rider Punch + Jackal Justice Finish Step 5.png|Rolling Rider Punch + Jackal Justis Finish (Step 5: Second paint slash) |
|
| − | + | Rolling Rider Punch + Jackal Justice Finish Step 6.png|Rolling Rider Punch + Jackal Justis Finish (Step 6: Spinning slash) |
|
| − | + | Rolling Rider Punch + Jackal Justice Finish Step 7.png|Rolling Rider Punch + Jackal Justis Finish (Step 7: Third slash striking enemies) |
|
| − | + | Rolling Rider Punch + Jackal Justice Finish Step 8.png|Rolling Rider Punch + Jackal Justis Finish (Step 8: Aftermath of third slash) |
|
| − | + | Rolling Rider Punch + Jackal Justice Finish Step 9.png|Rolling Rider Punch + Jackal Justis Finish (Step 9: Live jumping into the air) |
|
| − | + | Rolling Rider Punch + Jackal Justice Finish Step 10.png|Rolling Rider Punch + Jackal Justis Finish (Step 10: Live firing) |
|
| − | + | Rolling Rider Punch + Jackal Justice Finish Step 11.png|Rolling Rider Punch + Jackal Justis Finish (Step 11: Enemies struck by projectiles) |
|
| − | + | Rolling Rider Punch + Jackal Justice Finish Step 12.png|Rolling Rider Punch + Jackal Justis Finish (Step 12: Explosion) |
|
| + | Rolling Rider Punch + Jackal Justis Finish.gif|Rolling Rider Punch + Jackal Justis Finish |
||
| − | Rex Stamping Finish + Bat Justice Finish Step 13.png|Rex Stamping Finish + Bat Justice Finish (Step 13: Preparing to kick again) |
||
| + | </gallery> |
||
| − | Rex Stamping Finish + Bat Justice Finish Step 14.png|Rex Stamping Finish + Bat Justice Finish (Step 14: Kicking through enemy) |
||
| + | |||
| − | Rex Stamping Finish + Bat Justice Finish Step 15.png|Rex Stamping Finish + Bat Justice Finish (Step 15: Enemy launched) |
||
| + | | |
||
| − | Rex Stamping Finish + Bat Justice Finish Step 16.png|Rex Stamping Finish + Bat Justice Finish (Step 16: Revi and Live sliding to a stop and enemy in the air) |
||
| + | Demons Troopers| |
||
| − | Rex Stamping Finish + Bat Justice Finish.gif|Rex Stamping Finish + Bat Justice Finish |
||
| + | '''Demons Finish (Trooper Spider) + Beta Stamping Strike''': Demons Trooper α produces silk that encircles and restrains two enemies before glowing red. The Demons Trooper then punches one of the opponents with his lower right arm covered in crimson energy, producing a burst of magenta energy upon impact, before doing the same to the second opponent with his left arm. With his lower right leg covered in crimson energy, the Demons Trooper performs a roundhouse kick that produces a yellow energy slash along with strands of silk. The kick strikes both opponents, producing more magenta energy upon impact. As the enemies are on the ground in front of him, Demons Trooper β charges the Ohinbuster50, with bright yellow energy gathering at the end of the barrel and rings of orange energy surrounding the weapon. The Demons Trooper then fires a yellow energy construct of a stag beetle's horns that is surrounded by blue, purple, and cyan energy. The horns strike the opponents, destroying them and resulting in an explosion. |
||
| + | <gallery> |
||
| + | Demons Finish (Trooper Spider) + Beta Stamping Strike Step 1.png|Demons Finish (Trooper Spider) + Beta Stamping Strike (Step 1: Silk) |
||
| + | Demons Finish (Trooper Spider) + Beta Stamping Strike Step 2.png|Demons Finish (Trooper Spider) + Beta Stamping Strike (Step 2: Silk restraining enemy and glowing) |
||
| + | Demons Finish (Trooper Spider) + Beta Stamping Strike Step 3.png|Demons Finish (Trooper Spider) + Beta Stamping Strike (Step 3: Right arm covered in energy) |
||
| + | Demons Finish (Trooper Spider) + Beta Stamping Strike Step 4.png|Demons Finish (Trooper Spider) + Beta Stamping Strike (Step 4: First punch) |
||
| + | Demons Finish (Trooper Spider) + Beta Stamping Strike Step 5.png|Demons Finish (Trooper Spider) + Beta Stamping Strike (Step 5: Left arm covered in energy) |
||
| + | Demons Finish (Trooper Spider) + Beta Stamping Strike Step 6.png|Demons Finish (Trooper Spider) + Beta Stamping Strike (Step 6: Second punch) |
||
| + | Demons Finish (Trooper Spider) + Beta Stamping Strike Step 7.png|Demons Finish (Trooper Spider) + Beta Stamping Strike (Step 7: Leg covered in energy) |
||
| + | Demons Finish (Trooper Spider) + Beta Stamping Strike Step 8.png|Demons Finish (Trooper Spider) + Beta Stamping Strike (Step 8: Roundhouse kick) |
||
| + | Demons Finish (Trooper Spider) + Beta Stamping Strike Step 9.png|Demons Finish (Trooper Spider) + Beta Stamping Strike (Step 9: Silk strand) |
||
| + | Demons Finish (Trooper Spider) + Beta Stamping Strike Step 10.png|Demons Finish (Trooper Spider) + Beta Stamping Strike (Step 10: Charging) |
||
| + | Demons Finish (Trooper Spider) + Beta Stamping Strike Step 11.png|Demons Finish (Trooper Spider) + Beta Stamping Strike (Step 11: Firing) |
||
| + | Demons Finish (Trooper Spider) + Beta Stamping Strike Step 12.png|Demons Finish (Trooper Spider) + Beta Stamping Strike (Step 12: Striking enemies) |
||
| + | Demons Finish (Trooper Spider) + Beta Stamping Strike Step 13.png|Demons Finish (Trooper Spider) + Beta Stamping Strike (Step 13: Explosion) |
||
| + | Demons Finish (Trooper Spider) + Beta Stamping Strike.gif|Demons Finish (Trooper Spider) + Beta Stamping Strike |
||
| + | </gallery> |
||
| + | '''Demons Finish (Trooper Kuwagata) + Demons Finish (Trooper Spider)''': Over Demons' O Wingal Shade appears on the shoulder of Demons Trooper β, who extends the wing and wraps it around the opponent. Demons Trooper α then entangles the opponent with silk produced from his hand. The end of the silk remains connected to his hand as he pulls it, restraining the target. |
||
| + | <gallery> |
||
| + | Demons Finish (Trooper Kuwagata) + Demons Finish (Trooper Spider) Step 1.png|Demons Finish (Trooper Kuwagata) + Demons Finish (Trooper Spider) (Step 1: Equipped with O Wingal Shade) |
||
| + | Demons Finish (Trooper Kuwagata) + Demons Finish (Trooper Spider) Step 2.png|Demons Finish (Trooper Kuwagata) + Demons Finish (Trooper Spider) (Step 2: Wrapping wing around enemy) |
||
| + | Demons Finish (Trooper Kuwagata) + Demons Finish (Trooper Spider) Step 3.png|Demons Finish (Trooper Kuwagata) + Demons Finish (Trooper Spider) (Step 3: Entangling enemy with silk) |
||
| + | Demons Finish (Trooper Kuwagata) + Demons Finish (Trooper Spider).gif|Demons Finish (Trooper Kuwagata) + Demons Finish (Trooper Spider) |
||
| + | </gallery> |
||
| + | |||
| + | | |
||
| + | Jeanne/Aguilera| |
||
| + | {{tabber| |
||
| + | Hashibiroko Genome/Queen Bee Genome| |
||
| + | '''Hashibiroko Stamping Smash + Queen Bee Stamping Break''': Lovekov's blade is covered in purple energy while the blades of Aguilera's Needle Kunai are covered in yellow energy. Jeanne then delivers a downward purple energy slash to the enemy as Aguilera simultaneously delivers a horizontal yellow energy slash, resulting in an explosion. |
||
| + | <gallery> |
||
| + | Hashibiroko Stamping Smash + Queen Bee Stamping Break Step 1.png|Hashibiroko Stamping Smash + Queen Bee Stamping Break (Step 1: Charging) |
||
| + | Hashibiroko Stamping Smash + Queen Bee Stamping Break Step 2.png|Hashibiroko Stamping Smash + Queen Bee Stamping Break (Step 2: Preparing to slash) |
||
| + | Hashibiroko Stamping Smash + Queen Bee Stamping Break Step 3.png|Hashibiroko Stamping Smash + Queen Bee Stamping Break (Step 3: Energy slashes) |
||
| + | Hashibiroko Stamping Smash + Queen Bee Stamping Break Step 4.png|Hashibiroko Stamping Smash + Queen Bee Stamping Break (Step 4: Explosion) |
||
| + | Hashibiroko Stamping Smash + Queen Bee Stamping Break.gif|Hashibiroko Stamping Smash + Queen Bee Stamping Break |
||
| + | </gallery> |
||
| + | |||
| + | | |
||
| + | Tricera Genome/Buffalo Genome| |
||
| + | '''Tricera Liberal Smash + Buffalo Stamping Destroy''': Spiraling cyan energy surrounds Lovekov's barrels while Aguilera's weapons float beside her and spin while covered in energy that continually changes between red, green, and yellow. Jeanne then fires two beams of cyan energy, producing a blue shockwave, as Aguilera sends the spinning wheels flying at the opponent. The beams produce a blue and white shockwave upon impact, while the wheels produce a yellow shockwave. The attacks continue to push against the enemy before destroying them, resulting in an explosion. |
||
| + | <gallery> |
||
| + | Tricera Liberal Smash + Buffalo Stamping Destroy Step 1.png|Tricera Liberal Smash + Buffalo Stamping Destroy (Step 1: Jeanne charging and wheels covered in red energy) |
||
| + | Tricera Liberal Smash + Buffalo Stamping Destroy Step 2.png|Tricera Liberal Smash + Buffalo Stamping Destroy (Step 2: Wheels covered in green energy) |
||
| + | Tricera Liberal Smash + Buffalo Stamping Destroy Step 3.png|Tricera Liberal Smash + Buffalo Stamping Destroy (Step 3: Wheels covered in yellow energy) |
||
| + | Tricera Liberal Smash + Buffalo Stamping Destroy Step 4.png|Tricera Liberal Smash + Buffalo Stamping Destroy (Step 4: Aguilera preparing to send wheels forward) |
||
| + | Tricera Liberal Smash + Buffalo Stamping Destroy Step 5.png|Tricera Liberal Smash + Buffalo Stamping Destroy (Step 5: Jeanne aiming) |
||
| + | Tricera Liberal Smash + Buffalo Stamping Destroy Step 6.png|Tricera Liberal Smash + Buffalo Stamping Destroy (Step 6: Firing) |
||
| + | Tricera Liberal Smash + Buffalo Stamping Destroy Step 7.png|Tricera Liberal Smash + Buffalo Stamping Destroy (Step 7: Beams and wheels approaching enemy) |
||
| + | Tricera Liberal Smash + Buffalo Stamping Destroy Step 8.png|Tricera Liberal Smash + Buffalo Stamping Destroy (Step 8: Impact of beams) |
||
| + | Tricera Liberal Smash + Buffalo Stamping Destroy Step 9.png|Tricera Liberal Smash + Buffalo Stamping Destroy (Step 9: Impact of wheels) |
||
| + | Tricera Liberal Smash + Buffalo Stamping Destroy Step 10.png|Tricera Liberal Smash + Buffalo Stamping Destroy (Step 10: Continued attacking) |
||
| + | Tricera Liberal Smash + Buffalo Stamping Destroy Step 11.png|Tricera Liberal Smash + Buffalo Stamping Destroy (Step 11: Enemy destroyed) |
||
| + | Tricera Liberal Smash + Buffalo Stamping Destroy Step 12.png|Tricera Liberal Smash + Buffalo Stamping Destroy (Step 12: Explosion) |
||
</gallery> |
</gallery> |
||
}} |
}} |
||
| + | |||
| − | {{!}}-{{!}} |
||
| + | | |
||
| − | Live/Jeanne= |
||
| + | Ultimate Revi/EvilytyLive| |
||
| − | '''Kujaku Stamping Smash + Jackal Justice Finish''': Jeanne covers Lovekov in blue energy and throws the two fans before Live moves at high speeds while covered in light gold energy. Live attacks enemies with both melee attacks and shots fired from the Livegun while the fans fly around and slash other opponents. |
||
| + | '''Revi Giffard Finish + Evilyty Perfect Finale''': White light appears at the end of the Livegun's barrel while Revi forms a sphere of magenta and blue energy in his hand, with a circle of red energy appearing around his hand as he aims. Live then fires a sustained barrage of bladed projectiles made of black and white energy, with the barrel producing a cyan shockwave every time he fires. Immediately after, Revi throws the sphere of energy, with a double helix of magenta and blue energy resembling DNA trailing behind it. The sphere and projectiles fly through a crowd of enemies, destroying all of them and resulting in several explosions. The sphere then strikes a final enemy further back, producing another explosion. |
||
<gallery> |
<gallery> |
||
| − | + | Revi Giffard Finish + Evilyty Perfect Finale Step 1.png|Revi Giffard Finish + Evilyty Perfect Finale (Step 1: Live charging and Revi forming sphere) |
|
| − | + | Revi Giffard Finish + Evilyty Perfect Finale Step 2.png|Revi Giffard Finish + Evilyty Perfect Finale (Step 2: Aiming) |
|
| − | + | Revi Giffard Finish + Evilyty Perfect Finale Step 3.png|Revi Giffard Finish + Evilyty Perfect Finale (Step 3: Live firing) |
|
| − | + | Revi Giffard Finish + Evilyty Perfect Finale Step 4.png|Revi Giffard Finish + Evilyty Perfect Finale (Step 4: Throwing sphere) |
|
| − | + | Revi Giffard Finish + Evilyty Perfect Finale Step 5.png|Revi Giffard Finish + Evilyty Perfect Finale (Step 5: Impact of projectiles and sphere approaching crowd) |
|
| − | + | Revi Giffard Finish + Evilyty Perfect Finale Step 6.png|Revi Giffard Finish + Evilyty Perfect Finale (Step 6: Impact of sphere) |
|
| − | + | Revi Giffard Finish + Evilyty Perfect Finale Step 7.png|Revi Giffard Finish + Evilyty Perfect Finale (Step 7: First enemy exploding) |
|
| − | + | Revi Giffard Finish + Evilyty Perfect Finale Step 8.png|Revi Giffard Finish + Evilyty Perfect Finale (Step 8: Second enemy exploding) |
|
| − | + | Revi Giffard Finish + Evilyty Perfect Finale Step 9.png|Revi Giffard Finish + Evilyty Perfect Finale (Step 9: Third enemy exploding) |
|
| + | Revi Giffard Finish + Evilyty Perfect Finale Step 10.png|Revi Giffard Finish + Evilyty Perfect Finale (Step 10: Sphere striking final enemy) |
||
| + | Revi Giffard Finish + Evilyty Perfect Finale Step 11.png|Revi Giffard Finish + Evilyty Perfect Finale (Step 11: Final explosion) |
||
| + | Revi Giffard Finish + Evilyty Perfect Finale.gif|Revi Giffard Finish + Evilyty Perfect Finale |
||
</gallery> |
</gallery> |
||
| − | {{!}}-{{!}} |
||
| − | Revi/Vice= |
||
| − | '''Finifini Finish + Volcano Stamping Slash''': Vice coats the Barid Shield in ice, forming a blade, and Revi coats the Ohinbuster in flames, and both both riders jump and do a double slash, encasing the enemy in fire and ice, and do another slash, breaking the ice and enemy within. |
||
}} |
}} |
||
| + | |||
| − | {{!}}-{{!}} |
||
| + | | |
||
| − | 3 Riders= |
||
| + | 3 Riders| |
||
| − | {{#tag:tabber| |
||
| + | {{tabber| |
||
| − | Revice/Live/Jeanne= |
||
| + | Revi/Vice/Live| |
||
| − | '''Finifini Finish + Bat Justice Finish + Cobra Stamping Smash''': Vice generates a cyan and purple energy barrier from the Barid Shield to block oncoming enemy projectiles before lying on the ground with the shield on top of him. Revi, Live, and Jeanne use the Barid Shield as a platform to jump off of before each performs a flying kick. Revi's kick is covered in ice as well as surrounded by cyan and purple energy, Live's kick is surrounded by green and purple energy, and Jeanne's kick is surrounded by blue and yellow energy. After striking the targets, the Riders break past and land behind them before the opponents explode. |
||
| + | {{tabber| |
||
| + | Revice Brachio/Bat Genome| |
||
| + | '''Brachio Stamping Finish + Bat Justis Finish''': Live gathers gold energy at the end of the Livegun's barrel. When the enemy launches projectiles, Revice Brachio rears back and produces a magenta energy shockwave from their head that freezes the projectiles in time. Revice then swings their neck at the frozen projectiles, creating multiple gold projections of clock faces and destroying the projectiles. Afterward, Revice swings their neck upward into the enemy, launching the opponent into the air. Live fires gold sonic waves from the Livegun that attack the opponent in midair. Revice then jumps into the air and slams their neck down into the opponent, creating a red projection of the Brachio Vistamp's seal along with more clock projections and sending the enemy crashing to the ground. |
||
<gallery> |
<gallery> |
||
| − | + | Bat Justice Finish + Brachio Stamping Finish Remix Step 1.png|Brachio Stamping Finish + Bat Justis Finish (Step 1: Live charging) |
|
| − | + | Bat Justice Finish + Brachio Stamping Finish Remix Step 2.png|Brachio Stamping Finish + Bat Justis Finish (Step 2: Enemy projectiles) |
|
| − | + | Bat Justice Finish + Brachio Stamping Finish Remix Step 3.png|Brachio Stamping Finish + Bat Justis Finish (Step 3: Revice Brachio creating shockwave) |
|
| − | + | Bat Justice Finish + Brachio Stamping Finish Remix Step 4.png|Brachio Stamping Finish + Bat Justis Finish (Step 4: Projectiles frozen in time) |
|
| − | + | Bat Justice Finish + Brachio Stamping Finish Remix Step 5.png|Brachio Stamping Finish + Bat Justis Finish (Step 5: Destroying projectiles) |
|
| − | + | Bat Justice Finish + Brachio Stamping Finish Remix Step 6.png|Brachio Stamping Finish + Bat Justis Finish (Step 6: Preparing to swing at enemy) |
|
| − | + | Bat Justice Finish + Brachio Stamping Finish Remix Step 7.png|Brachio Stamping Finish + Bat Justis Finish (Step 7: Striking enemy) |
|
| − | + | Bat Justice Finish + Brachio Stamping Finish Remix Step 8.png|Brachio Stamping Finish + Bat Justis Finish (Step 8: Enemy launched into the air) |
|
| − | + | Bat Justice Finish + Brachio Stamping Finish Remix Step 9.png|Brachio Stamping Finish + Bat Justis Finish (Step 9: Live preparing to fire) |
|
| − | + | Bat Justice Finish + Brachio Stamping Finish Remix Step 10.png|Brachio Stamping Finish + Bat Justis Finish (Step 10: Firing gold sonic waves) |
|
| − | + | Bat Justice Finish + Brachio Stamping Finish Remix Step 11.png|Brachio Stamping Finish + Bat Justis Finish (Step 11: Sonic waves attacking enemy) |
|
| + | Bat Justice Finish + Brachio Stamping Finish Remix Step 12.png|Brachio Stamping Finish + Bat Justis Finish (Step 12: Revice Brachio jumping above enemy) |
||
| + | Bat Justice Finish + Brachio Stamping Finish Remix Step 13.png|Brachio Stamping Finish + Bat Justis Finish (Step 13: Swinging downward) |
||
| + | Bat Justice Finish + Brachio Stamping Finish Remix Step 14.png|Brachio Stamping Finish + Bat Justis Finish (Step 14: Slamming enemy) |
||
| + | Bat Justice Finish + Brachio Stamping Finish Remix Step 15.png|Brachio Stamping Finish + Bat Justis Finish (Step 15: Enemy crashing) |
||
| + | Brachio Stamping Finish (Revice Brachio) + Bat Justis Finish.gif|Brachio Stamping Finish + Bat Justis Finish |
||
| + | </gallery> |
||
| + | |||
| + | | |
||
| + | Rex Genome/Bat Genome| |
||
| + | '''Rex Stamping Finish + Bat Justis Finish''': Vice runs toward the enemy and kicks them into the air shortly before Revi and Live jump into the air themselves and simultaneously kick the opponent in mid-air, creating a shcokwave and sending the enemy crashing back to the ground. Revi and Live land and each perform a flying kick, with Revi's kick covered in pink and blue energy while Live's kick is covered in green and purple energy. Red projections of the Rex and Bat Vistamps' seals appear and the Riders pass through them before continuing to fly toward the opponent. Upon reaching the enemy, Revi and Live kick again, breaking through the target's body and launching the enemy into the air before the Riders slide to a stop. |
||
| + | <gallery> |
||
| + | Rex Stamping Finish + Bat Justice Finish Step 1.png|Rex Stamping Finish + Bat Justis Finish (Step 1: Vice kicking enemy) |
||
| + | Rex Stamping Finish + Bat Justice Finish Step 2.png|Rex Stamping Finish + Bat Justis Finish (Step 2: Enemy launched into the air) |
||
| + | Rex Stamping Finish + Bat Justice Finish Step 3.png|Rex Stamping Finish + Bat Justis Finish (Step 3: Revi and Live jumping) |
||
| + | Rex Stamping Finish + Bat Justice Finish Step 4.png|Rex Stamping Finish + Bat Justis Finish (Step 4: Revi and Live above enemy) |
||
| + | Rex Stamping Finish + Bat Justice Finish Step 5.png|Rex Stamping Finish + Bat Justis Finish (Step 5: Revi and Live kicking enemy) |
||
| + | Rex Stamping Finish + Bat Justice Finish Step 6.png|Rex Stamping Finish + Bat Justis Finish (Step 6: Enemy flying back toward ground) |
||
| + | Rex Stamping Finish + Bat Justice Finish Step 7.png|Rex Stamping Finish + Bat Justis Finish (Step 7: Enemy landing) |
||
| + | Rex Stamping Finish + Bat Justice Finish Step 8.png|Rex Stamping Finish + Bat Justis Finish (Step 8: Revi and Live Landing) |
||
| + | Rex Stamping Finish + Bat Justice Finish Step 9.png|Rex Stamping Finish + Bat Justis Finish (Step 9: Flying kicks) |
||
| + | Rex Stamping Finish + Bat Justice Finish Step 10.png|Rex Stamping Finish + Bat Justis Finish (Step 10: Vistamp seal proections) |
||
| + | Rex Stamping Finish + Bat Justice Finish Step 11.png|Rex Stamping Finish + Bat Justis Finish (Step 11: Passing through seals) |
||
| + | Rex Stamping Finish + Bat Justice Finish Step 12.png|Rex Stamping Finish + Bat Justis Finish (Step 12: Continued kicks) |
||
| + | Rex Stamping Finish + Bat Justice Finish Step 13.png|Rex Stamping Finish + Bat Justis Finish (Step 13: Preparing to kick again) |
||
| + | Rex Stamping Finish + Bat Justice Finish Step 14.png|Rex Stamping Finish + Bat Justis Finish (Step 14: Kicking through enemy) |
||
| + | Rex Stamping Finish + Bat Justice Finish Step 15.png|Rex Stamping Finish + Bat Justis Finish (Step 15: Enemy launched) |
||
| + | Rex Stamping Finish + Bat Justice Finish Step 16.png|Rex Stamping Finish + Bat Justis Finish (Step 16: Revi and Live sliding to a stop and enemy in the air) |
||
| + | Rex Stamping Finish + Bat Justis Finish.gif|Rex Stamping Finish + Bat Justis Finish |
||
| + | </gallery> |
||
| + | |||
| + | | |
||
| + | Ultimate Revi/Ultimate Vice/EvilytyLive| |
||
| + | '''Revi Giffard Finish + Vice Giffard Finish + Evilyty Perfect Finale''': Revi and Vice put their hands together, creating oppositely charged magnetic fields. Simultaneously, Revi's body is covered in red energy while Vice is covered in blue energy. The respective energies then flow into the Riders' other arms as a vortex of magenta and cyan energy forms at the point where their hands met. Each of the Rider points their free hand forward and fires a curved stream of energy from it, with Revi's being red and Vice's being blue. The streams open a small hole where the meet while producing red and blue magnetic fields. The rift is pulled open by the streams, creating a black hole that begins sucking the surroundings into it. This also creates dimensional tears leading to Giff's realm, releasing its contents into the human world. The target is dragged toward the black hole with the aid of the magnetic fields. Revi and Vice then stamp their sides of the Giffard Rex Vistamp together, causing additional magnetic fields to pull the enemy. Live flies up to the enemy while covered in green energy. He then performs a flying kick with his foot covered in cyan energy as he produces a large trail of multicolored energy. After the kick strikes the enemy, a teal energy copy of Kamen Rider Evil appears beside Live. The two kick the enemy again, producing cyan energy upon impact. The enemy is launched away, leaving behind a a trail of multicolored energy themselves. As a result, the opponent is pulled into the black hole. Giant waves of multicolored energy are created before the black hole closes, trapping the enemy within. |
||
| + | <gallery> |
||
| + | Revi Giffard Finish + Vice Giffard Finish + Evilyty Perfect Finale Step 1.png|Revi Giffard Finish + Vice Giffard Finish + Evilyty Perfect Finale (Step 1: Magnetic fields and covered in energy) |
||
| + | Revi Giffard Finish + Vice Giffard Finish + Evilyty Perfect Finale Step 2.png|Revi Giffard Finish + Vice Giffard Finish + Evilyty Perfect Finale (Step 2: Producing streams of energy) |
||
| + | Revi Giffard Finish + Vice Giffard Finish + Evilyty Perfect Finale Step 3.png|Revi Giffard Finish + Vice Giffard Finish + Evilyty Perfect Finale (Step 3: Hole and magnetic fields created) |
||
| + | Revi Giffard Finish + Vice Giffard Finish + Evilyty Perfect Finale Step 4.png|Revi Giffard Finish + Vice Giffard Finish + Evilyty Perfect Finale (Step 4: Pulling rift open) |
||
| + | Revi Giffard Finish + Vice Giffard Finish + Evilyty Perfect Finale Step 5.png|Revi Giffard Finish + Vice Giffard Finish + Evilyty Perfect Finale (Step 5: Black hole) |
||
| + | Revi Giffard Finish + Vice Giffard Finish + Evilyty Perfect Finale Step 6.png|Revi Giffard Finish + Vice Giffard Finish + Evilyty Perfect Finale (Step 6: Giff launched into air) |
||
| + | Revi Giffard Finish + Vice Giffard Finish + Evilyty Perfect Finale Step 7.png|Revi Giffard Finish + Vice Giffard Finish + Evilyty Perfect Finale (Step 7: Tears into Giff's realm) |
||
| + | Revi Giffard Finish + Vice Giffard Finish + Evilyty Perfect Finale Step 8.png|Revi Giffard Finish + Vice Giffard Finish + Evilyty Perfect Finale (Step 8: People released from Giff's realm) |
||
| + | Revi Giffard Finish + Vice Giffard Finish + Evilyty Perfect Finale Step 9.png|Revi Giffard Finish + Vice Giffard Finish + Evilyty Perfect Finale (Step 9: Giff pulled by magnetic fields) |
||
| + | Revi Giffard Finish + Vice Giffard Finish + Evilyty Perfect Finale Step 10.png|Revi Giffard Finish + Vice Giffard Finish + Evilyty Perfect Finale (Step 10: Removing Giffard Rex Vistamp sides) |
||
| + | Revi Giffard Finish + Vice Giffard Finish + Evilyty Perfect Finale Step 11.png|Revi Giffard Finish + Vice Giffard Finish + Evilyty Perfect Finale (Step 11: Stamping Giffard Rex Vistamp sides together) |
||
| + | Revi Giffard Finish + Vice Giffard Finish + Evilyty Perfect Finale Step 12.png|Revi Giffard Finish + Vice Giffard Finish + Evilyty Perfect Finale (Step 12: Additional magnetic fields) |
||
| + | Revi Giffard Finish + Vice Giffard Finish + Evilyty Perfect Finale Step 13.png|Revi Giffard Finish + Vice Giffard Finish + Evilyty Perfect Finale (Step 13: Live flying) |
||
| + | Revi Giffard Finish + Vice Giffard Finish + Evilyty Perfect Finale Step 14.png|Revi Giffard Finish + Vice Giffard Finish + Evilyty Perfect Finale (Step 14: Preparing to perform flying kick) |
||
| + | Revi Giffard Finish + Vice Giffard Finish + Evilyty Perfect Finale Step 15.png|Revi Giffard Finish + Vice Giffard Finish + Evilyty Perfect Finale (Step 15: Flying kick) |
||
| + | Revi Giffard Finish + Vice Giffard Finish + Evilyty Perfect Finale Step 16.png|Revi Giffard Finish + Vice Giffard Finish + Evilyty Perfect Finale (Step 16: Approaching enemy) |
||
| + | Revi Giffard Finish + Vice Giffard Finish + Evilyty Perfect Finale Step 17.png|Revi Giffard Finish + Vice Giffard Finish + Evilyty Perfect Finale (Step 17: Striking enemy) |
||
| + | Revi Giffard Finish + Vice Giffard Finish + Evilyty Perfect Finale Step 18.png|Revi Giffard Finish + Vice Giffard Finish + Evilyty Perfect Finale (Step 18: Energy copy of Evil) |
||
| + | Revi Giffard Finish + Vice Giffard Finish + Evilyty Perfect Finale Step 19.png|Revi Giffard Finish + Vice Giffard Finish + Evilyty Perfect Finale (Step 19: Kicking enemy away) |
||
| + | Revi Giffard Finish + Vice Giffard Finish + Evilyty Perfect Finale Step 20.png|Revi Giffard Finish + Vice Giffard Finish + Evilyty Perfect Finale (Step 20: Enemy pulled into black hole) |
||
| + | Revi Giffard Finish + Vice Giffard Finish + Evilyty Perfect Finale Step 21.png|Revi Giffard Finish + Vice Giffard Finish + Evilyty Perfect Finale (Step 21: Waves of multicolored energy) |
||
| + | Revi Giffard Finish + Vice Giffard Finish + Evilyty Perfect Finale Step 22.png|Revi Giffard Finish + Vice Giffard Finish + Evilyty Perfect Finale (Step 22: Black hole closing) |
||
| + | Revi Giffard Finish + Vice Giffard Finish + Evilyty Perfect Finale Step 23.png|Revi Giffard Finish + Vice Giffard Finish + Evilyty Perfect Finale (Step 23: Black hole closed) |
||
</gallery> |
</gallery> |
||
}} |
}} |
||
| + | |||
| + | | |
||
| + | Live/Jeanne/Destream| |
||
| + | '''Bat Justis Finish + Cobra Liberal Smash + Destream Finish''': Live's leg is covered in green energy as he performs a backwards kick, with swirling gold energy and a clear energy construct of a bat appearing from the foot just before striking the enemy. Upon impact, the kick produces a green and gold shockwave as well as an explosion. Jeanne's leg is then covered in light blue energy with Lovekov's snake form coiled around it. She performs a roundhouse kick that creates a blue and yellow energy slash. The slash produces a cyan shockwave upon impact, followed by a yellow shockwave and an explosion. Finally, Destream jumps forward with his lower leg covered in cyan energy. Several components made of cyan energy appear around him before assembling into a mechanical Hercules beetle head around his leg. The beetle head spins and is surrounded by a cone of cyan and red energy, acting similar to a drill as Destream kicks the opponent. Blue and red energy is released as it drills into opponent before resulting in an explosion. After a brief moment, the enemy themselves explodes as a result of the combined attacks. |
||
| + | <gallery> |
||
| + | Bat Justice Finish + Cobra Liberal Smash + Destream Finish Step 1.png|Bat Justis Finish + Cobra Liberal Smash + Destream Finish (Step 1: Live's leg covered in green energy) |
||
| + | Bat Justice Finish + Cobra Liberal Smash + Destream Finish Step 2.png|Bat Justis Finish + Cobra Liberal Smash + Destream Finish (Step 2: Kick) |
||
| + | Bat Justice Finish + Cobra Liberal Smash + Destream Finish Step 3.png|Bat Justis Finish + Cobra Liberal Smash + Destream Finish (Step 3: Impact) |
||
| + | Bat Justice Finish + Cobra Liberal Smash + Destream Finish Step 4.png|Bat Justis Finish + Cobra Liberal Smash + Destream Finish (Step 4: Jeanne's ;eg covered in blue energy) |
||
| + | Bat Justice Finish + Cobra Liberal Smash + Destream Finish Step 5.png|Bat Justis Finish + Cobra Liberal Smash + Destream Finish (Step 5: Kick producing energy slash) |
||
| + | Bat Justice Finish + Cobra Liberal Smash + Destream Finish Step 6.png|Bat Justis Finish + Cobra Liberal Smash + Destream Finish (Step 6:Impact ) |
||
| + | Bat Justice Finish + Cobra Liberal Smash + Destream Finish Step 7.png|Bat Justis Finish + Cobra Liberal Smash + Destream Finish (Step 7: Explosion) |
||
| + | Bat Justice Finish + Cobra Liberal Smash + Destream Finish Step 8.png|Bat Justis Finish + Cobra Liberal Smash + Destream Finish (Step 8: Aftermath) |
||
| + | Bat Justice Finish + Cobra Liberal Smash + Destream Finish Step 9.png|Bat Justis Finish + Cobra Liberal Smash + Destream Finish (Step 9: Destream's leg covered in cyan energy) |
||
| + | Bat Justice Finish + Cobra Liberal Smash + Destream Finish Step 10.png|Bat Justis Finish + Cobra Liberal Smash + Destream Finish (Step 10: Energy components) |
||
| + | Bat Justice Finish + Cobra Liberal Smash + Destream Finish Step 11.png|Bat Justis Finish + Cobra Liberal Smash + Destream Finish (Step 11: Assembling into beetle head) |
||
| + | Bat Justice Finish + Cobra Liberal Smash + Destream Finish Step 12.png|Bat Justis Finish + Cobra Liberal Smash + Destream Finish (Step 12: Generating energy drill) |
||
| + | Bat Justice Finish + Cobra Liberal Smash + Destream Finish Step 13.png|Bat Justis Finish + Cobra Liberal Smash + Destream Finish (Step 13: Drilling into enemy) |
||
| + | Bat Justice Finish + Cobra Liberal Smash + Destream Finish Step 14.png|Bat Justis Finish + Cobra Liberal Smash + Destream Finish (Step 14: Explosion) |
||
| + | Bat Justice Finish + Cobra Liberal Smash + Destream Finish Step 15.png|Bat Justis Finish + Cobra Liberal Smash + Destream Finish (Step 15: Aftermath) |
||
| + | Bat Justice Finish + Cobra Liberal Smash + Destream Finish Step 16.png|Bat Justis Finish + Cobra Liberal Smash + Destream Finish (Step 16: Enemy about to explode) |
||
| + | Bat Justice Finish + Cobra Liberal Smash + Destream Finish Step 17.png|Bat Justis Finish + Cobra Liberal Smash + Destream Finish (Step 17: Enemy exploding) |
||
| + | </gallery> |
||
}} |
}} |
||
| + | |||
| + | | |
||
| + | 4 Riders| |
||
| + | {{tabber| |
||
| + | Revi/Vice/Live/Jeanne| |
||
| + | {{tabber| |
||
| + | Barid Rex Genome/Bat Genome/Cobra Genome| |
||
| + | '''Finifini Finish + Bat Justis Finish + Cobra Stamping Smash''': Vice generates a cyan and purple energy barrier from the Barid Shield to block oncoming enemy projectiles before lying on the ground with the shield on top of him. Revi, Live, and Jeanne use the Barid Shield as a platform to jump off of before each performs a flying kick. Revi's kick is covered in ice as well as surrounded by cyan and purple energy, Live's kick is surrounded by green and purple energy, and Jeanne's kick is surrounded by blue and yellow energy. After striking the targets, the Riders break past and land behind them before the opponents explode. |
||
| + | <gallery> |
||
| + | Finifini Finish + Bat Justice Finish + Cobra Stamping Smash Step 1.png|Finifini Finish + Bat Justis Finish + Cobra Stamping Smash (Step 1: Energy shield blocking projectiles) |
||
| + | Finifini Finish + Bat Justice Finish + Cobra Stamping Smash Step 2.png|Finifini Finish + Bat Justis Finish + Cobra Stamping Smash (Step 2: Energy shield disappearing) |
||
| + | Finifini Finish + Bat Justice Finish + Cobra Stamping Smash Step 3.png|Finifini Finish + Bat Justis Finish + Cobra Stamping Smash (Step 3: Barid Shield shining) |
||
| + | Finifini Finish + Bat Justice Finish + Cobra Stamping Smash Step 4.png|Finifini Finish + Bat Justis Finish + Cobra Stamping Smash (Step 4: Vice lying down with shield) |
||
| + | Finifini Finish + Bat Justice Finish + Cobra Stamping Smash Step 5.png|Finifini Finish + Bat Justis Finish + Cobra Stamping Smash (Step 5: Riders stepping on shield) |
||
| + | Finifini Finish + Bat Justice Finish + Cobra Stamping Smash Step 6.png|Finifini Finish + Bat Justis Finish + Cobra Stamping Smash (Step 6: Riders jumping) |
||
| + | Finifini Finish + Bat Justice Finish + Cobra Stamping Smash Step 7.png|Finifini Finish + Bat Justis Finish + Cobra Stamping Smash (Step 7: Flying kicks) |
||
| + | Finifini Finish + Bat Justice Finish + Cobra Stamping Smash Step 8.png|Finifini Finish + Bat Justis Finish + Cobra Stamping Smash (Step 8: Impact) |
||
| + | Finifini Finish + Bat Justice Finish + Cobra Stamping Smash Step 9.png|Finifini Finish + Bat Justis Finish + Cobra Stamping Smash (Step 9: Riders landing) |
||
| + | Finifini Finish + Bat Justice Finish + Cobra Stamping Smash Step 10.png|Finifini Finish + Bat Justis Finish + Cobra Stamping Smash (Step 10: Explosion) |
||
| + | Finifini Finish + Bat Justis Finish + Cobra Stamping Smash.gif|Finifini Finish + Bat Justis Finish + Cobra Stamping Smash |
||
| + | </gallery> |
||
| + | |||
| + | | |
||
| + | Ultimate Revi/Ultimate Vice/EvilytyLive/Invincible Jeanne| |
||
| + | '''Revi Giffard Finish + Vice Giffard Finish + Evilyty Perfect Finale + King Cobra Stamping Smash''': Revi, Vice, Live, and Jeanne each perform a flying kick. Revi's leg is surrounded by magenta energy, Vice's is surrounded by blue, Live's is surrounded by cyan, and Jeanne's is surrounded by orange. The Riders fly into the sky along with the enemy upon striking them, producing multicolored energy. The opponent's body glows purple before imploding, producing a giant wave of multicolored energy that expands across the sky. |
||
| + | <gallery> |
||
| + | Giffard Finish + Evilyty Perfect Finale + King Cobra Stamping Smash Step 1.png|Revi Giffard Finish + Vice Giffard Finish + Evilyty Perfect Finale + King Cobra Stamping Smash (Step 1: Jeanne's kick) |
||
| + | Giffard Finish + Evilyty Perfect Finale + King Cobra Stamping Smash Step 2.png|Revi Giffard Finish + Vice Giffard Finish + Evilyty Perfect Finale + King Cobra Stamping Smash (Step 2: Vice's kick) |
||
| + | Giffard Finish + Evilyty Perfect Finale + King Cobra Stamping Smash Step 3.png|Revi Giffard Finish + Vice Giffard Finish + Evilyty Perfect Finale + King Cobra Stamping Smash (Step 3: Revi's kick) |
||
| + | Giffard Finish + Evilyty Perfect Finale + King Cobra Stamping Smash Step 4.png|Revi Giffard Finish + Vice Giffard Finish + Evilyty Perfect Finale + King Cobra Stamping Smash (Step 4: Live's kick) |
||
| + | Giffard Finish + Evilyty Perfect Finale + King Cobra Stamping Smash Step 5.png|Revi Giffard Finish + Vice Giffard Finish + Evilyty Perfect Finale + King Cobra Stamping Smash (Step 5: Four Riders' kicks) |
||
| + | Giffard Finish + Evilyty Perfect Finale + King Cobra Stamping Smash Step 6.png|Revi Giffard Finish + Vice Giffard Finish + Evilyty Perfect Finale + King Cobra Stamping Smash (Step 6: Breaking through building) |
||
| + | Giffard Finish + Evilyty Perfect Finale + King Cobra Stamping Smash Step 7.png|Revi Giffard Finish + Vice Giffard Finish + Evilyty Perfect Finale + King Cobra Stamping Smash (Step 7: Flying through sky) |
||
| + | Giffard Finish + Evilyty Perfect Finale + King Cobra Stamping Smash Step 8.png|Revi Giffard Finish + Vice Giffard Finish + Evilyty Perfect Finale + King Cobra Stamping Smash (Step 8: Riders with enemy) |
||
| + | Giffard Finish + Evilyty Perfect Finale + King Cobra Stamping Smash Step 9.png|Revi Giffard Finish + Vice Giffard Finish + Evilyty Perfect Finale + King Cobra Stamping Smash (Step 9: Enemy glowing) |
||
| + | Giffard Finish + Evilyty Perfect Finale + King Cobra Stamping Smash Step 10.png|Revi Giffard Finish + Vice Giffard Finish + Evilyty Perfect Finale + King Cobra Stamping Smash (Step 10: Light before enemy implodes) |
||
| + | Giffard Finish + Evilyty Perfect Finale + King Cobra Stamping Smash Step 11.png|Revi Giffard Finish + Vice Giffard Finish + Evilyty Perfect Finale + King Cobra Stamping Smash (Step 11: Implosion) |
||
| + | Giffard Finish + Evilyty Perfect Finale + King Cobra Stamping Smash Step 12.png|Revi Giffard Finish + Vice Giffard Finish + Evilyty Perfect Finale + King Cobra Stamping Smash (Step 12: Multicolored energy wave) |
||
| + | Giffard Finish + Evilyty Perfect Finale + King Cobra Stamping Smash Step 13.png|Revi Giffard Finish + Vice Giffard Finish + Evilyty Perfect Finale + King Cobra Stamping Smash (Step 13: Multicolored energy expanding) |
||
| + | Giffard Finish + Evilyty Perfect Finale + King Cobra Stamping Smash Step 14.png|Revi Giffard Finish + Vice Giffard Finish + Evilyty Perfect Finale + King Cobra Stamping Smash (Step 14: Rift) |
||
| + | </gallery> |
||
| + | }} |
||
| + | }} |
||
| + | }} |
||
| + | |||
| + | | |
||
| + | Revice Riders & Legend Riders| |
||
| + | {{tabber| |
||
| + | 2 Riders| |
||
| + | {{tabber| |
||
| + | Espada/Live| |
||
| + | '''Trueno del Sol + Bat Justis Finish''': Espada launches a golden energy slash covered in electricity that clashes with the enemy's own energy slash, causing both to be destroyed in an explosion. Espada runs through the explosion and delivers another slash directly to to the opponent. Immediately afterward, Live delivers a flying kick covered in green energy that upon impact creates green and gold shockwaves, which then transition to magenta and purple. The kick also creates an explosion that launches the opponent away. The enemy then crashes and explodes themselves. |
||
| + | <gallery> |
||
| + | Trueno del Sol + Bat Justice Finish Step 1.png|Trueno del Sol + Bat Justis Finish (Step 1: Energy slash) |
||
| + | Trueno del Sol + Bat Justice Finish Step 2.png|Trueno del Sol + Bat Justis Finish (Step 2: Clashing with enemy's slash) |
||
| + | Trueno del Sol + Bat Justice Finish Step 3.png|Trueno del Sol + Bat Justis Finish (Step 3: Explosion) |
||
| + | Trueno del Sol + Bat Justice Finish Step 4.png|Trueno del Sol + Bat Justis Finish (Step 4: Espada appearing from explosion) |
||
| + | Trueno del Sol + Bat Justice Finish Step 5.png|Trueno del Sol + Bat Justis Finish (Step 5: Second slash) |
||
| + | Trueno del Sol + Bat Justice Finish Step 6.png|Trueno del Sol + Bat Justis Finish (Step 6: Live's kick) |
||
| + | Trueno del Sol + Bat Justice Finish Step 7.png|Trueno del Sol + Bat Justis Finish (Step 7: Impact) |
||
| + | Trueno del Sol + Bat Justice Finish Step 8.png|Trueno del Sol + Bat Justis Finish (Step 8: Shockwaves changing color) |
||
| + | Trueno del Sol + Bat Justice Finish Step 9.png|Trueno del Sol + Bat Justis Finish (Step 9: Explosion from kick) |
||
| + | Trueno del Sol + Bat Justice Finish Step 10.png|Trueno del Sol + Bat Justis Finish (Step 10: Enemy launched) |
||
| + | Trueno del Sol + Bat Justice Finish Step 11.png|Trueno del Sol + Bat Justis Finish (Step 11: Enemy crashing) |
||
| + | </gallery> |
||
| + | |||
| + | | |
||
| + | Jeanne/Kenzan| |
||
| + | '''Cobra Stamping Smash + Shippuu Kenbu Ichiren''': Jeanne destroys several enemy projectiles with a series of kicks before striking the opponent with her fist. Meanwhile, Lovekov appears in a snake-like form composed of light blue energy and coils around Jeanne's leg. Jeanne delivers an upward kick to the enemy, creating an orange and blue shockwave upon impact as well as launching them into the air. Kenzan appears in the air alongside the enemy with Fuusouken Hayate's blade covered in green energy before delivering a slash of green wind. Multiple additional slashes then strike the opponent until they explode. |
||
| + | <gallery> |
||
| + | Cobra Stamping Smash + Shippuu Kenbu Ichiren Step 1.png|Cobra Stamping Smash + Shippuu Kenbu Ichiren (Step 1: Destroying projectiles with kicks) |
||
| + | Cobra Stamping Smash + Shippuu Kenbu Ichiren Step 2.png|Cobra Stamping Smash + Shippuu Kenbu Ichiren (Step 2: Lovekov appearing while Jeanne attacks) |
||
| + | Cobra Stamping Smash + Shippuu Kenbu Ichiren Step 3.png|Cobra Stamping Smash + Shippuu Kenbu Ichiren (Step 3: Lovekov coiling around Jeanne's leg) |
||
| + | Cobra Stamping Smash + Shippuu Kenbu Ichiren Step 4.png|Cobra Stamping Smash + Shippuu Kenbu Ichiren (Step 4: Upward kick) |
||
| + | Cobra Stamping Smash + Shippuu Kenbu Ichiren Step 5.png|Cobra Stamping Smash + Shippuu Kenbu Ichiren (Step 5: Enemy launched upward) |
||
| + | Cobra Stamping Smash + Shippuu Kenbu Ichiren Step 6.png|Cobra Stamping Smash + Shippuu Kenbu Ichiren (Step 6: Kenzan in the air) |
||
| + | Cobra Stamping Smash + Shippuu Kenbu Ichiren Step 7.png|Cobra Stamping Smash + Shippuu Kenbu Ichiren (Step 7: Initial slash) |
||
| + | Cobra Stamping Smash + Shippuu Kenbu Ichiren Step 8.png|Cobra Stamping Smash + Shippuu Kenbu Ichiren (Step 8: Additional slashes) |
||
| + | Cobra Stamping Smash + Shippuu Kenbu Ichiren Step 9.png|Cobra Stamping Smash + Shippuu Kenbu Ichiren (Step 9: Explosion) |
||
| + | </gallery> |
||
| + | |||
| + | | |
||
| + | Jeanne/Sabela| |
||
| + | '''Turtle Stamping Smash + Shot Insect''': Jeanne charges Lovekov's barrel with green energy while Sabela covers Eneiken Noroshi's bade with magenta energy. Jeanne then fires green energy artillery shell while Sabela thrusts her sword forward, producing a beam of magenta energy surrounded by smoke. The attacks strike the enemy simultaneously before producing a green and magenta shockwave followed by an explosion that launches the opponent away. |
||
| + | <gallery> |
||
| + | Turtle Stamping Smash + Shot Insect Step 1.png|Turtle Stamping Smash + Shot Insect (Step 1: Charging) |
||
| + | Turtle Stamping Smash + Shot Insect Step 2.png|Turtle Stamping Smash + Shot Insect (Step 2: Preparing to attack) |
||
| + | Turtle Stamping Smash + Shot Insect Step 3.png|Turtle Stamping Smash + Shot Insect (Step 3: Firing) |
||
| + | Turtle Stamping Smash + Shot Insect Step 4.png|Turtle Stamping Smash + Shot Insect (Step 4: Impact) |
||
| + | Turtle Stamping Smash + Shot Insect Step 5.png|Turtle Stamping Smash + Shot Insect (Step 5: Shockwave) |
||
| + | Turtle Stamping Smash + Shot Insect Step 6.png|Turtle Stamping Smash + Shot Insect (Step 6: Explosion) |
||
| + | </gallery> |
||
| + | }} |
||
| + | |||
| + | | |
||
| + | 3 Riders| |
||
| + | {{tabber| |
||
| + | Xross Saber/Century/Revice| |
||
| + | '''Ginga Dai Hakusatsu + Rider Kick + Neo Batta Stamping Finish''': Saber channels blue and purple energy to his foot and performs a flying kick covered in sparkling dark blue and light purple energy. Century summons the Dest Cyclone and performs a flying kick into it as it spins, generating swirling cyan and red energy. Two large magenta energy constructs of the Neo Batta Vistamp appear in front of Revi and Vice. They each perform a flying kick into one of the Vistamp constructs, producing a yellow shockwave with a circuitry design along with additional magenta energy. The Vistamps are then surrounded by a different green energy circuitry before the kicks produce a trail of green energy lines. The four Riders' kicks bore through a giant enemy's body, leaving a hole. When the enemy explodes as a result, a giant light green energy construct of the Neo Batta Vistamp drops down to extinguish the explosion. The Vistamp construct then twists, producing a wave of energy that repairs any surrounding damage. |
||
| + | <gallery> |
||
| + | Ginga Dai Bakuhatsu + Rider Kick + Neo Batta Stamping Finish Step 1.png|Ginga Dai Bakuhatsu + Rider Kick + Neo Batta Stamping Finish (Step 1: Saber channeling energy) |
||
| + | Ginga Dai Bakuhatsu + Rider Kick + Neo Batta Stamping Finish Step 2.png|Ginga Dai Bakuhatsu + Rider Kick + Neo Batta Stamping Finish (Step 2: Saber's flying kicks) |
||
| + | Ginga Dai Bakuhatsu + Rider Kick + Neo Batta Stamping Finish Step 3.png|Ginga Dai Bakuhatsu + Rider Kick + Neo Batta Stamping Finish (Step 3: Century with Dest Cyclone) |
||
| + | Ginga Dai Bakuhatsu + Rider Kick + Neo Batta Stamping Finish Step 4.png|Ginga Dai Bakuhatsu + Rider Kick + Neo Batta Stamping Finish (Step 4: Century's flying kick) |
||
| + | Ginga Dai Bakuhatsu + Rider Kick + Neo Batta Stamping Finish Step 5.png|Ginga Dai Bakuhatsu + Rider Kick + Neo Batta Stamping Finish (Step 5: Vistamp energy constructs) |
||
| + | Ginga Dai Bakuhatsu + Rider Kick + Neo Batta Stamping Finish Step 6.png|Ginga Dai Bakuhatsu + Rider Kick + Neo Batta Stamping Finish (Step 6: Kicking Vistamp constructs) |
||
| + | Ginga Dai Bakuhatsu + Rider Kick + Neo Batta Stamping Finish Step 7.png|Ginga Dai Bakuhatsu + Rider Kick + Neo Batta Stamping Finish (Step 7: Circuitry design) |
||
| + | Ginga Dai Bakuhatsu + Rider Kick + Neo Batta Stamping Finish Step 8.png|Ginga Dai Bakuhatsu + Rider Kick + Neo Batta Stamping Finish (Step 8: Four flying kicks) |
||
| + | Ginga Dai Bakuhatsu + Rider Kick + Neo Batta Stamping Finish Step 9.png|Ginga Dai Bakuhatsu + Rider Kick + Neo Batta Stamping Finish (Step 9: Preparing to strike enemy) |
||
| + | Ginga Dai Bakuhatsu + Rider Kick + Neo Batta Stamping Finish Step 10.png|Ginga Dai Bakuhatsu + Rider Kick + Neo Batta Stamping Finish (Step 10: Striking enemy) |
||
| + | Ginga Dai Bakuhatsu + Rider Kick + Neo Batta Stamping Finish Step 11.png|Ginga Dai Bakuhatsu + Rider Kick + Neo Batta Stamping Finish (Step 11: Saber boring through enemy) |
||
| + | Ginga Dai Bakuhatsu + Rider Kick + Neo Batta Stamping Finish Step 12.png|Ginga Dai Bakuhatsu + Rider Kick + Neo Batta Stamping Finish (Step 12: Century boring through enemy) |
||
| + | Ginga Dai Bakuhatsu + Rider Kick + Neo Batta Stamping Finish Step 13.png|Ginga Dai Bakuhatsu + Rider Kick + Neo Batta Stamping Finish (Step 13: Revice boring through enemy) |
||
| + | Ginga Dai Bakuhatsu + Rider Kick + Neo Batta Stamping Finish Step 14.png|Ginga Dai Bakuhatsu + Rider Kick + Neo Batta Stamping Finish (Step 14: Damaged enemy) |
||
| + | Ginga Dai Bakuhatsu + Rider Kick + Neo Batta Stamping Finish Step 15.png|Ginga Dai Bakuhatsu + Rider Kick + Neo Batta Stamping Finish (Step 15: Enemy falling into volcano) |
||
| + | Ginga Dai Bakuhatsu + Rider Kick + Neo Batta Stamping Finish Step 16.png|Ginga Dai Bakuhatsu + Rider Kick + Neo Batta Stamping Finish (Step 16: Riders landing) |
||
| + | Ginga Dai Bakuhatsu + Rider Kick + Neo Batta Stamping Finish Step 17.png|Ginga Dai Bakuhatsu + Rider Kick + Neo Batta Stamping Finish (Step 17: Explosion) |
||
| + | Ginga Dai Bakuhatsu + Rider Kick + Neo Batta Stamping Finish Step 18.png|Ginga Dai Bakuhatsu + Rider Kick + Neo Batta Stamping Finish (Step 18: Giant Neo Batta Vistamp construct) |
||
| + | Ginga Dai Bakuhatsu + Rider Kick + Neo Batta Stamping Finish Step 19.png|Ginga Dai Bakuhatsu + Rider Kick + Neo Batta Stamping Finish (Step 19: Vistamp construct twisting) |
||
| + | Ginga Dai Bakuhatsu + Rider Kick + Neo Batta Stamping Finish Step 20.png|Ginga Dai Bakuhatsu + Rider Kick + Neo Batta Stamping Finish (Step 20: Energy wave) |
||
| + | Ginga Dai Bakuhatsu + Rider Kick + Neo Batta Stamping Finish Step 21.png|Ginga Dai Bakuhatsu + Rider Kick + Neo Batta Stamping Finish (Step 21: Environment repaired) |
||
| + | </gallery> |
||
| + | }} |
||
| + | |||
| + | | |
||
| + | 4 Riders| |
||
| + | {{tabber| |
||
| + | Demons/Sabela/Durendal/Calibur| |
||
| + | '''Demons Finish + Shot Insect + Ocean Ikkoku Giri + Kurayami Iai Dokugo Issen''': Demons fires silk from his hand into the air to form the radial threads of a spider web above a group of enemies. Sabela produces her own silk from the tip of Eneiken Noroshi to form the web's spiral threads, completing it. The completed web drops onto the enemies below, covering them with the silk and trapping them. Meanwhile, Durendal covers Jikokuken Kaiji's blade in cyan energy while Calibur covers Ankokuken Kurayami's blade in purple energy. Durendal then performs a cyan energy slash as Calibur performs a purple energy slash. The two slashes slice through the crowd of enemies, resulting in a large explosion. |
||
| + | <gallery> |
||
| + | Demons Finish + Shot Insect + Ocean Ikkoku Giri + Kurayami Iai Dokugo Issen Step 1.png|Demons Finish + Shot Insect + Ocean Ikkoku Giri + Kurayami Iai Dokugo Issen (Step 1: Demons firing silk) |
||
| + | Demons Finish + Shot Insect + Ocean Ikkoku Giri + Kurayami Iai Dokugo Issen Step 2.png|Demons Finish + Shot Insect + Ocean Ikkoku Giri + Kurayami Iai Dokugo Issen (Step 2: Forming radials of web) |
||
| + | Demons Finish + Shot Insect + Ocean Ikkoku Giri + Kurayami Iai Dokugo Issen Step 3.png|Demons Finish + Shot Insect + Ocean Ikkoku Giri + Kurayami Iai Dokugo Issen (Step 3: Radials formed) |
||
| + | Demons Finish + Shot Insect + Ocean Ikkoku Giri + Kurayami Iai Dokugo Issen Step 4.png|Demons Finish + Shot Insect + Ocean Ikkoku Giri + Kurayami Iai Dokugo Issen (Step 4: Sabela forming spirals) |
||
| + | Demons Finish + Shot Insect + Ocean Ikkoku Giri + Kurayami Iai Dokugo Issen Step 5.png|Demons Finish + Shot Insect + Ocean Ikkoku Giri + Kurayami Iai Dokugo Issen (Step 5: Completed web) |
||
| + | Demons Finish + Shot Insect + Ocean Ikkoku Giri + Kurayami Iai Dokugo Issen Step 6.png|Demons Finish + Shot Insect + Ocean Ikkoku Giri + Kurayami Iai Dokugo Issen (Step 6: Web dropping) |
||
| + | Demons Finish + Shot Insect + Ocean Ikkoku Giri + Kurayami Iai Dokugo Issen Step 7.png|Demons Finish + Shot Insect + Ocean Ikkoku Giri + Kurayami Iai Dokugo Issen (Step 7: Trapped enemies) |
||
| + | Demons Finish + Shot Insect + Ocean Ikkoku Giri + Kurayami Iai Dokugo Issen Step 8.png|Demons Finish + Shot Insect + Ocean Ikkoku Giri + Kurayami Iai Dokugo Issen (Step 8: Durendal and Calibur charging) |
||
| + | Demons Finish + Shot Insect + Ocean Ikkoku Giri + Kurayami Iai Dokugo Issen Step 9.png|Demons Finish + Shot Insect + Ocean Ikkoku Giri + Kurayami Iai Dokugo Issen (Step 9: Energy slashes) |
||
| + | Demons Finish + Shot Insect + Ocean Ikkoku Giri + Kurayami Iai Dokugo Issen Step 10.png|Demons Finish + Shot Insect + Ocean Ikkoku Giri + Kurayami Iai Dokugo Issen (Step 10: Slashes slicing enemies) |
||
| + | Demons Finish + Shot Insect + Ocean Ikkoku Giri + Kurayami Iai Dokugo Issen Step 11.png|Demons Finish + Shot Insect + Ocean Ikkoku Giri + Kurayami Iai Dokugo Issen (Step 11: Explosion) |
||
| + | </gallery> |
||
| + | }} |
||
| + | |||
| + | | |
||
| + | 6 Riders| |
||
| + | {{tabber| |
||
| + | Jeanne/Aguilera/Sabela/Poppy/Zero-Two/Tsukuyomi| |
||
| + | '''Cobra Stamping Smash + Queen Bee Stamping Break + Eien no Hitosashi + Critical Crews-Aid + Zero-Two Big Bang + Time Jack''': Jeanne, Aguilera, Sabela, Poppy, Zero-Two, and Tsukuyomi each jump into the air and deliver a flying kick to the opponent. Tsukuyomi's foot is surrounded by golden light and produces a trail of gold sparkles. Her kick results in a golden shockwave upon impact. Zero-Two's foot is surrounded by red energy and she produces a trail of red and green lines of energy as she flies through the air. Her kick results in a green shockwave upon impact and produces a circuity symbol of green and blue energy. Poppy's foot is surrounded by pink energy, with the Rider herself surrounded by multicolored circles and stars. Her kick results in a magenta, green, and yellow shockwave upon impact. Sabela's foot is surrounded by magenta energy and she produces a trail of smoke as she flies through the air. Her kick results in a burst of smoke and magenta particles upon impact. Aguilera's foot is surrounded by purple and orange energy, with the Rider herself surrounded by multiple purple energy bees. Her kick results in a red shockwave upon impact. Lovekov takes the form of a cyan energy snake coiled around Jeanne's leg, and the Rider herself is surrounded by blue and orange energy as she flies through the air. Her kick results in a blue and orange shockwave upon impact as well as an explosion. All of the Riders land shortly before the enemy explodes. |
||
| + | <gallery> |
||
| + | Girls Remix combination finisher Step 1.png|Step 1: Tsukuyomi's flying kick |
||
| + | Girls Remix combination finisher Step 2.png|Step 2: Impact of Tsukuyomi's kick |
||
| + | Girls Remix combination finisher Step 3.png|Step 3: Zero-Two's flying kick |
||
| + | Girls Remix combination finisher Step 4.png|Step 4: Impact of Zero-Two's kick |
||
| + | Girls Remix combination finisher Step 5.png|Step 5: Poppy's flying kick |
||
| + | Girls Remix combination finisher Step 6.png|Step 6: Impact of Poppy's kick |
||
| + | Girls Remix combination finisher Step 7.png|Step 7: Sabela's flying kick |
||
| + | Girls Remix combination finisher Step 8.png|Step 8: Impact of Sabela's kick |
||
| + | Girls Remix combination finisher Step 9.png|Step 9: Aguilera's flying kick |
||
| + | Girls Remix combination finisher Step 10.png|Step 10: Impact of Aguilera's kick |
||
| + | Girls Remix combination finisher Step 11.png|Step 11: Jeanne's flying kick |
||
| + | Girls Remix combination finisher Step 12.png|Step 12: Impact of Jeanne's kick |
||
| + | Girls Remix combination finisher Step 13.png|Step 13: Riders landing |
||
| + | Girls Remix combination finisher Step 14.png|Step 14: Enemy about to explode |
||
| + | Girls Remix combination finisher Step 15.png|Step 15: Explosion |
||
| + | </gallery> |
||
| + | }} |
||
| + | }} |
||
| + | }} |
||
| + | |||
[[Category:Kamen Rider Revice]] |
[[Category:Kamen Rider Revice]] |
||
[[Category:Kamen Rider Finishers]] |
[[Category:Kamen Rider Finishers]] |
||
Latest revision as of 04:53, 1 March 2024

|
| "Are you a machine, or a human?" |
| Due to lack of information and factual inaccuracy, Kikai has no idea about this page. Check out the discussion page and revision history for further clues about what needs to be updated in this article. |
| Reason: Needs to be updated with recent media (i.e. Juuga vs. Orteca and Revice Forward). |
- "(Vistamp name) Stamping Finish!"
- ―Revice Driver finisher announcement[src]
- "Ohing Strike!"
- ―Ohinbuster50's finisher announcement in Gun Mode[src]
- "Ohing Slash!"
- ―Ohinbuster50's finisher announcement in Axe Mode[src]
- "Hissatsu Shonin! (Vistamp name) Stamping Strike!"
- ―Ohinbuster50's finisher announcement in Gun Mode when a Vistamp is scanned[src]
- "Hissatsu Shonin! (Vistamp name) Stamping Slash!"
- ―Ohinbuster50's finisher announcement in Axe Mode when a Vistamp is scanned[src]
- "Hissatsu Shonin! (Vistamp name) Darkness Finish!"
- ―Two Sidriver finisher announcement for Kamen Rider Evil[src]
- "Hissatsu Shonin! (Vistamp name) Justis Finish!"
- ―Two Sidriver finisher announcement for Kamen Rider Live[src]
- "Charge! Demons Finish!"
- ―Demons Driver finisher announcement[src]
- "More! (Vistamp name) Demons Requiem!"
- ―Demons Driver Genomix finisher announcement[src]
- "(Vistamp name) Stamping Smash!"
- ―Libera Driver finisher announcement[src]
- "Hissatsu Shonin! (Vistamp name) Liberal Smash!"
- ―Libera Driver second finisher announcement[src]
- "Charge! Vailing Impact!"
- ―Vail Driver standard announcements[src]
- "(Vistamp name) Stamping Break!"
- ―Week Endriver finisher announcement[src]
- "Hissatsu Shonin! (Vistamp name) Stamping Destroy!"
- ―Week Endriver second finisher announcement[src]
- "Charge! Destream Finish!"
- ―Destream Driver finisher announcement[src]
- "More! (Vistamp name) Destream Nova!"
- ―Destream Driver Genomix finisher announcement[src]
- "Vail Up! Crimson Impact!"
- ―Crimson Vail Vistamp first finisher announcement[src]
- "Vail Up! Crimson Finish!"
- ―Crimson Vail Vistamp second finisher announcement[src]
- "Painting Finish!"
- ―Crimson Vail Vistamp scanned Vistamp finisher announcement[src]
- "Impulse Genome Edge!"
- ―Juuga Driver first finisher announcement[src]
- "Crash Genome Edge!"
- ―Juuga Driver second finisher announcement[src]
- "Powered Genome Edge!"
- ―Juuga Driver third finisher announcement[src]
- "Amazing Finish!"
- ―Juuga Driver fourth finisher announcement[src]
Transformation Devices
- Revice Driver
- Two Sidriver
- Libera Driver
- Demons Driver
- Vail Driver
- Week Endriver
- Destream Driver
- Chimera Driver
- Juuga Driver
- Revice
- Igarashi
- Standard
- Super
- Rex
- Eagle
- Mammoth
- Ptera
- Megalodon
- Lion
- Jackal
- Kong
- Kamakiri
- Brachio
- Neo Batta
- Kangaroo
- Rex Genome
- Revice Rex
Rex Stamping Finish (レックススタンピングフィニッシュ, Rekkusu Sutanpingu Finisshu): This finisher has six variations.
- Version 1
- Version 2
- Version 3
- Version 4
- Version 5
- Version 6
- Version 7
- Version 8
Revi and Vice both leap into the air as a purple energy construct of a numbering stamp with cyan numbers then appears from Revi's foot. Initially displaying the number 48, it changes to 49 and then finally 50 when Revi and Vice pass through the construct while peforming flying kicks surrouded in spiraling purple and cyan energy, with a pink number "5" on the sole of Revi's foot and "0" on the sole of Vice's foot. A large red projection of the Rex Vistamp's seal is created upon impact, which a blue number "50" attaches to. The enemy is then launched backward while leaving behind a vortex of dark blue energy until exploding, creating multicolored fireworks-like sparks before a second explosive wave occurs.
The Rex Vistamp emblem on Vice's chest glows and produces magenta energy that travels down his body before covering his legs. Revi delivers a kick covered in pink and blue energy to the enemy before performing a second kick covered in the same energy that launches the enemy into the air. Meanwhile, Vice grabs a second enemy's arms and pulls them on top of himself before launching the opponent into the air with a kick covered in pink and blue energy of his own. Revi and Vice then jump into the air along with two large pink energy constructs of the Rex Vistamp. Each of them performs a flying kick into one of the Vistamp constructs and flies downward along with it, which produces a dome of pink and blue energy. The Vistamp constructs collide with the enemies and transform into large red projections of the Rex Vistamp's seal. Then, Revi and Vice each perform a second kick that creates another Rex Vistamp seal and sends the enemy flying back toward the ground. Revi's kick creates a blue energy line while Vice's kick creates a pink energy line. The enemies fall along the energy lines and crash into the ground before exploding.
Revi activates the Rex Stamping Finish alone while falling and performs a flying kick into a pink energy construct of the Rex Vistamp that pierces the enemy's body, leaving a large hole. When Revi performed this finisher, Vice was spinning though the air due to reverting to Rex Genome after flying as Ptera Genome. After Revi's attack breaks through the enemy, the spinning Vice collides with the enemy, destroying them.
Revi jumps into the air with his right leg covered in pink energy while a large pink energy construct of the Rex Vistamp appears. He then performs a flying kick into the Vistamp construct, creating a red projection of the Rex Vistamps's seal before the attack is surrounded by pink and blue energy.
The Rex Vistamp emblem on Vice's chest glows and produces magenta energy that travels down his body and down his left leg. At the same time, four blue and pink energy strands of DNA flow from the Revice Driver and into Revi's right leg. As a result, the two Riders' legs are covered in magenta energy. They then each deliver a side kick to an enemy against a well, producing a red projection of the Rex Vistamp's seal and creating an imprint of the same seal in the wall behind the opponent. Revi and Vice turn away before the enemy explodes.
Revi and Vice jump into the air as two large pink energy constructs of the Rex Vistamp appear. They each perform a flying kick into one of the Vistamp constructs before the attacks are surrounded by pink and blue energy. After the kicks strike the target, the enemy is launched backward in an explosion.
Revi jumps into the air while flipping sideways, producing a shockwave of teal energy on the ground beneath him. In the process, he passes over the enemy and lands behind them, producing another teal shockwave. Revi's arm is then surrounded by magenta flame-like energy as more magenta energy flows into it. He uses the arm to deliver an uppercut to the opponent, producing a magenta shockwave and causing them to fly into the air while spinning.
Revi jumps into the air while a large magenta energy construct flies in front of him. It then combines with his leg as he performs a flying kick, with his foot covered in magenta energy and surrounded by lines of multicolored energy. The kick produces a magenta shockwave upon impact.
Rex Stamping Finish (レックススタンピングフィニッシュ, Rekkusu Sutanpingu Finisshu): Revice Rex leaps into the air and somersaults several times before performing a flying kick covered in pink and blue energy. The kick produces a shockwave and a large projection of the Rex Vistamp's seal upon impact.
- Eagle Genome
- Revice Eagle
Eagle Stamping Finish (イーグルスタンピングフィニッシュ, Īguru Sutanpingu Finisshu): Two large green energy constructs of the Eagle Vistamp appear as Revi and Vice are in the air. They each perform a flying kick into one of the Vistamp constructs, with the resulting attack being surrounded by pink and blue energy as well as producing green shockwaves. Larger versions of the seals on the Vistamp constructs appear upon striking the target before the two Riders pass through the body of the enemy.
Eagle Stamping Finish (イーグルスタンピングフィニッシュ, Īguru Sutanpingu Finisshu): This finisher has two variations.
- Revice Eagle grabs the enemy by the leg using one of their talons before kicking the opponent into the air. Revice then flies up above the enemy and rams into them while spinning and surrounded by spiraling green and purple energy. Eventually, Revice breaks through the target's body, causing the enemy to explode and leaving behind a large projection of the Eagle Vistamp's seal.
- Revice Eagle is surrounded by spiraling green and purple energy and rams a group of enemies, launching them into the air. Revice continues to ram the opponents individually while flying through the air, eventually being surrounded by lightning as well.
- Mammoth Genome
- Revice Mammoth
Mammoth Stamping Finish (マンモススタンピングフィニッシュ, Manmosu Sutanpingu Finisshu): This finisher has two variations.
- Vice charges his Glacier Shields with light red energy while Revi charges his Mammoth Gashers with the same energy. Revi throws the Mammoth Gashers toward the enemy, leaving behind trails of red energy, while Vice strikes the ground with the Glacier Shields, causing twelve large energy copies of the shields to energy from the ground in a semicircle around the enemy. The Mammoth Gashers miss the enemy but then swing back around due to being boomerangs and strike the enemy from behind. The Mammoth Gashers then rebound off of the Glacier Shield projections and continue striking the enemy from multiple angles. Afterward, the Mammoth Gashers return to Revi before the Glacier shields stack above the enemy and crush them.
- Revi throws both Mammoth Gashers, which simultaneously slash the opponent. As Revi battles the enemy himself, the Mammoth Gashers continue flying around and occasionally slash the target. Revi is soon joined by Vice, who fights alongside him. The two Riders then simultaneously punch the enemy, creating a red shockwave, before the Mammoth Gashers slash the opponent for the final time.
Ptera Stamping Finish (プテラスタンピングフィニッシュ, Putera Sutanpingu Finisshu): Revi jumps off of Vice Ptera Genome before dashing away at high speeds. A red projection of the Ptera Vistamp's seal then appears behind Vice before he generates blue energy blades similar to wings from his sides. Vice uses the energy blades to delivering a flying slash to the target, causing the target to be launched away and crash into a nearby building. Vice then delivers a second flying slash once the target has recovered, then flies behind them before spinning like a top and grinding against the opponent. Revi then appears while running on the side of a building with his accelerator still active before jumping off and kicking the enemy, creating a large multicolored projection of the Ptera Vistamp's seal.
- Megalodon Genome
- Revice Megalodon
Megalodon Stamping Finish (メガロドンスタンピングフィニッシュ, Megarodon Sutanpingu Finisshu): This finisher has two variations:
- Revi and Vice perform a series of punches, kicks, and slashes covered in pink energy at high speeds while leaving behind afterimages.
- Revi and Vice jump into the air, with a pink number "5" appearing on the sole of Revi's foot and "0" appearing on Vice's foot. The two then perform flying kicks, with Revi's kick covered in spiraling blue and pink energy while Vice's kick is covered in spiraling pink and green energy. After impact, the Riders' kicks continue clashing against the enemy for a period of time before breaking past, leaving behind a blue number 50.
Megalodon Stamping Finish (メガロドンスタンピングフィニッシュ, Megarodon Sutanpingu Finisshu): Underwater, Revice Megalodon delivers a tail strike to the opponent, launching them into the air. Revice then jumps out of the water in pursuit and is covered in magenta and purple energy before biting the enemy, resulting in an explosion with blue electricity and a large red projection of the Megalodon Vistamp's seal.
- Lion Genome
- Revice Lion
Lion Stamping Finish (ライオンスタンピングフィニッシュ, Raion Sutanpingu Finisshu): This finisher has two variations.
- Revice Lion jumps onto an enemy and bites them before jumping back off, flipping, and landing on the opponent again. Revice Lion then scratches the enemy with their hind claws before biting and scratching at the same time. Eventually, the combined Riders jump off of the enemy and land back on the ground.
- Revice Lion charges their body with gold energy before ramming the opponent, creating a shockwave and leaving behind a red projection of the Lion Vistamp's seal
Jackal Stamping Finish (ジャッカルピングフィニッシュ, Jakkaru Sutanpingu Finisshu): Revi jumps into the air and performs a flying kick covered in blue and purple energy. Vice then appears and attaches to Revi's foot, substantially increasing the amount of energy surrounding it. After the kick strikes the opponent, the energy forms into a spiral before Revi breaks past the enemy.
- Kong Genome
- Revice Kong
Kong Stamping Finish (コングスタンピングフィニッシュ, Kongu Sutanpingu Finisshu): Revi and Vice aim their gauntlets at an enemy jumping into the air and fire them. The rocket-propelled gauntlets collide with the opponent before detonating, creating a large explosion and causing the enemy to fall out of the air.
- Kamakiri Genome
- Revice Kamakiri
Kamakiri Stamping Finish (カマキリスタンピングフィニッシュ, Kamakiri Sutanpingu Finisshu): Revice Kamakiri hops a short distance into into the air before delivering two simultaneous blue energy slashes to the target using both arm blades upon landing. Revice peforms two more double slashes, followed by an upward slash that launches the enemy into the air. Revice jumps into the air to meet the opponent and delivers a downward double slash, producing energy of the same color that radiates outward, then finally performs a X-shaped slash that results in an explosion with the Kamakiri Vistamp's seal.
- Brachio Genome
- Revice Brachio
Brachio Stamping Finish (ブラキオスタンピングフィニッシュ, Burakio Sutanpingu Finisshu): Revi and Vice each cover their right leg with magenta energy and run forward, creating energy shockwaves upon each step. They then both leap into the air and perform flying kicks, with a magenta number "5" on the sole of Revi's foot and a blue "0" on the sole of Vice's foot. A magenta energy construct of a numbering stamp with blue numbers then appears from Revi's foot. Initially displaying the number 48, it changes to 49 and then finally 50 when Revi and Vice pass through the construct, causing both of their flying kicks to be surrounded by additional magenta and blue energy before striking the enemy.
- Neo Batta Genome
- Revice Neo Batta
Neo Batta Stamping Finish (ネオバッタスタンピングフィニッシュ, Neo Batta Sutanpingu Finisshu): This finisher has two variations.
- Lines of magenta and light green energy flow from the legs of Revi and Vice before a magenta energy construct of a grasshopper's leg surrounds Revi's right leg while a light green version of the same energy construct surrounds Vice's right leg. Lines of energy with matching colors are produced from the grasshopper leg constructs while an energy circuitry pattern of the same color appears under each Rider. Revi and Vice then kick off of the ground to launch themselves forward, leaving behind a trail of the same energy lines. Upon reaching the enemy, Revi and Vice perform a series of kicks together while rebounding off of surrounding surfaces, with Revi's kicks producing magenta energy upon impact and Vice's kicks producing yellow energy.
- Revi and Vice leap towards separate enemies while producing lines of light green energy. They then each deliver a flying kick, with Revi's foot covered in magenta energy.
Kangaroo Stamping Finish (カンガルースタンピングフィニッシュ, Kangarū Sutanpingu Finisshu): Vice jumps into the air and delivers a flying kick to an opponent, resulting in a cartoon "Boom!" explosion effect. At the same time, Revi somersaults into the air before a large pink energy construct of the Kangaroo Vistamp appears. Revi performs a flying kick into the Vistamp energy construct, which is surrounded by pink, purple, and cyan energy, and strikes a second opponent. The Vistamp construct then dissipates into the enemy's body while a large red projection of the Kangaroo Vistamp's seal appears, followed by an explosion. After a brief moment, both enemies struck by the two Riders' attacks explode.
- Barid Rex
- Volcano
- Rolling
- Thunder Gale
- Giffard Rex
- Gold Spino
- Finifini Finish
- Baribari Stamp Fever
- Max Baribari Stamp Fever
Finifini Finish (フィニフィニフィニッシュ, Finifini Finisshu): This finisher has four variations.
- Clouds gather overhead, blocking out the sun as the temperature rapidly drops before Revi somersaults into the air. A ring of cold blue energy destroys any enemy projectiles in its path while freezing the air behind it, creating a pillar of ice as it goes. When the pillar reaches the opponents, it encases them in a solid block of ice. Revi then performs a flying kick surrounded by swirling light blue energy with an number 5 on the sole of his foot. The kick breaks through the ice pillar, then shatters the ice encasing the opponents, causing the shards to scatter through the air.
- Revi jumps toward the enemy as spinning light blue energy and cold wind surrounds his leg before performing a series four kicks that each create a sparkling blue energy slash. Revi then passes by the enemy and lands behind them.
- Revi produces a stream of cold air from both arms, freezing the target and encasing them in a solid block of ice that then shatters.
- Revi grabs the enemy and directly blasts them with cold air. When the rapidly cooling opponent drops to the ground, they are frozen in place.
Baribari Stamp Fever (バリバリスタンプフィーバー, Baribari Sutanpu Fībā): Revi scans up to ten Vistamps on the Barid Rex Vistamp and summons giant versions of the corresponding Remixes, which can attack individually or combine.
- Brachio
- Kong/Kamakiri/Jackal
- Rex/Ptera/Brachio
A light blue version of the Brachio Vistamp's seal appears from the Revice Driver and enlarges before becoming a block of ice. The ice shatters, revealing a giant version of Revice Brachio. The Remix swipes at enemies with its neck before rearing back and stomping the ground.
Light blue versions of the Kong, Kamakiri, and Jackal Vistamps' seals appear above Revi and enlarge before shattering, revealing giant versions of Revice Kong, Revice Kamakiri, and Revice Jackal. Revice Kong becomes a red energy version of itself while Revice Jackal becomes a yellow energy version. The energy Remixes overlap with Revice Kamakiri and the three combine. The combined Remix takes the form of a normal-sized Revice Kamakiri armed with red energy gauntlets resembling Revice Kong's fists and wielding larger energy versions of its own sickles while riding on a yellow energy version of Revice Jackal's skateboard. The Remix engages in several high-speed clashes with the opponent before breaking their guard and punching them, causing the enemy to collapse. As the opponent gets up, the Remix performs simultaneous blue energy slashes using both of its sickles, cutting through the enemy's weapons when they attempt to block the attack.
Light blue versions of the Rex, Ptera, and Brachio Vistamps' seals appear from the Revice Driver, protecting Revi from the enemy's attack. The seals enlarge before shattering, revealing giant projections of Revice Rex, Revice Ptera, and Revice Brachio. The Revice Ptera projection turns blue while Revice Brachio becomes orange as the two overlap with Revice Rex. The three Remixes combine, producing Revice Rex with Revice Ptera's photon wings. The combined Remix generates a projection of Revice Brachio's head and neck and uses it to smash the enemy. The Revice Brachio head then hits the enemy upward to launch them into the air. The combined Remix flies up to the enemy and slashes them twice with its wings. With the enemy still in the air, Revi somersaults into the sky and performs a flying kick alongside the Remix. After impact, the kick travels down toward the ground along with the enemy. Eventually the Remix disappears, leaving only Revi as the kick leaves behind a trail of ice. When the enemy strikes the ground underneath Revi, the ground freezes within them before the enemy is encased in a spiked mass of ice. An explosion is produced inside and expands until it shatters the ice.
Max Baribari Stamp Fever (マックスバリバリスタンプフィーバー, Makkusu Baribari Sutanpu Fībā): As Revi hovers in the air, a giant egg carton appears behind him. The carton contains ten pink eggs, with each of them featuring the seal of one of Revice's ten main Vistamps. The carton opens and three eggs fly out before opening to release Revice Rex, Revice Mammoth, and Revice Brachio. Revi lands on Revice Rex and rides it as the three Remixes attack the target. Revice Rex breathes fire, Revice Mammoth breathes ice from its nose, and Revice Brachio attacks with its neck.
Four more eggs open to release Revice Ptera, Revice Eagle, Revice Megalodon, and Revice Kamakiri. Revi then takes the place of his own Ptera Genome in Revice Ptera. Revice Ptera launches a volley of shots from its machine guns before Revice Megalodon bites the target and Revice Kamakiri delivers blue energy slashes with its sickles. Revice Eagle then creates a green and purple gust of wind, followed by Revi delivering a kick that creates blue and purple energy while riding on the summoned Vice Ptera Genome. Finally, Revice Ptera attacks with its machine guns again while Revice Kamakiri launches crescent blue energy slashes that it remotely controls and Revice Eagle rams the opponent.
The last three eggs open to release Revice Jackal, Revice Lion, and Revice Kong. Revi then takes the place of his own Jackal Genome in Revice Jackal. Revice Kong delivers punches while Revice Lion attacks with its claws. Revice Jackal then launches into the air flips upside down as Revi fires purple energy blasts from the Ohinbuster50.
Fully assembled, the ten Remixes transform into light blue orbs of energy that fly up tp meet Revi in the air. Revi then performs a fling kick while surrounded by the energy orbs, which transform into images of the ten Remixes. The kick creates a large explosion upon impact, which expands further.
- Volcano Festival
- Burst Remix
Volcano Festival (ボルケーノフェスティバル, Borukēno Fuesutibaru): This finisher has three variations.
- Revi and Vice fly into the air, avoiding an enemy's attack in the process. As they fly, Vice uses the Barid Shield to defend Revi from more attacks and separates the shield into flying pieces to provide wider protection. A red projection of the Volcano Vistamp's seal and a light blue projection of the Barid Rex Vistamp's seal appear behind the two Riders before they both deliver flying kicks covered in purple and blue energy. The kicks produce orange and blue energy upon coming into contact with a ranged attack from the enemy. The two Riders then empower themselves, with Revi first covering his body in fire before Vice is surrounded by cold air and shards of ice. Their elemental powers combine to strengthen the kicks, with the surrounding energy becoming multicolored in the process, before breaking through the enemy's projectile. The kicks break through the opponent's body upon impact, producing more multicolored energy before the two Riders land behind the enemy.
- Revi delivers several punches covered in fire, creating a burst of orange energy upon each impact. At the same time, Vice bashes the enemy with the Barid Shield before punching them, with each attack covered in cold air and creating a burst of blue energy upon each impact. For their final attack, Revi and Vice both punch the enemy at each time.
- Revi and Vice jump into the air, with Revi covered in fire while Vice is surrounded by cold air and snowflakes. A red projection of the Volcano Vistamp's seal and a light blue projection of the Barid Rex Vistamp's seal appear behind the two Riders before they both deliver flying kicks covered in purple and blue energy. Their elemental powers combine, resulting in the Riders being surrounded by multicolored energy. The kicks produce blue energy upon impact, and continue creating light blue shockwaves as remain in contact with the enemy. Both Riders then kick the enemy again, creating a ray of of multicolored light that pierces through the opponent's body before the latter explodes.
Burst Remix (バーストリミックス, Basuto Rimikkusu): A giant purple and yellow egg with a blue version of the Rex Vistamp's seal on it appears from above and crashes into the ground. The egg heats up until it becomes red hot while a red projection of the Volcano Vistamp's seal appears in front of Revi and a cyan projection of the Barid Rex Vistamp's seal appears in front of Vice. The two Riders punch the egg, shattering it to reveal a version of Revice Rex with its head covered in fire and body covered in cold energy. The Remix runs up to an enemy and bites them before flinging them away, creating a large red projection of the Rex Vistamp's seal.
- Rolling Stamping Finish
Rolling Stamping Finish (ローリングスタンピングフィニッシュ, Rōringu Sutanpingu Finisshu): This finisher has two variations.
- Version 1
- Version 2
Jack Revice glows blue and produces black paint from under his feet before turning into paint himself and sinking into the liquid. The paint flows forward and surrounds two enemies. Revice resurfaces behind the enemies and delivers a kick covered in blue energy, launching them into the air. He then flies around the opponents by riding on a mass of black and purple paint, forming a vortex of paint that covers the enemies before dispersing. Two energy constructs of the Rolling Vistamp with their rollers adjacent to each other appear in the air and fly into the airborne enemies, crushing them between the rollers and releasing them from the other end. The constructs continue flying forward until they reach Revice, who performs a flying kick surrounded in black paint with purple energy on the sole of his foot. Revice passes through the rollers, launching him at high speeds back toward the enemies. The kick produces light blue shockwaves and dark purple energy upon impact, followed by a red projection of the Rolling Vistamp's seal. Revice then flies past the enemies as they explode.
Two energy constructs of the Rolling Vistamp with their rollers adjacent to each other appear in the air before the enemy is enclosed in a spherical cage of purple energy surrounded by black energy. Jack Revice jumps up to the Rolling Vistamp constructs while the enemy is raised into the air. The Vistamp constructs pin Revice between their rollers, launching him toward the enemy at high speeds as he performs a flying kick with his foot covered in purple energy. The kick produces purple and black energy upon striking the enemy and disperses the surrounding energy cage. Revice remains in contact with the enemy as the point of impact glows purple and is surrounded by dark purple energy. He then launches the enemy away with his legs, producing large cyan shockwave with a purple version of the Rolling Vistamp's seal.
- Bakubaku Revicetrike
- Hissatsu Bakufuu Bakurai Stamping Finish
Bakubaku Revicetrike (爆爆リバイストライク, Bakubaku Ribaisutoraiku): This finisher has five variations.
- Revice jumps into the air with their right foot covered in cyan energy before performing a flying kick covered in electricity. While doing so, Revice is surrounded by alternating bands of red and yellow energy, followed by cyan and blue energy. The energy surrounding Revice then transitions into only cyan and purple. The kick creates a blue shockwave while travelling through the air as the energy lines surrounding Revice becomes red, green, and yellow. A lightning bolt then forms in a line between an airborne opponent and Revice, who travels along the lightning's path before striking the target, creating another blue shockwave. Revice continues moving downward along with the enemy until the two crash into the ground in a large lightning strike.
- Revice covers their leg in electricity before performing a side kick that creates a blue shockwave along with lines of purple, red, and green energy upon striking the opponent. The enemy is then covered in electricity before exploding.
- Revice jumps into the air with their right foot covered in cyan energy before performing a flying kick covered in electricity. While doing so, Revice is surrounded by alternating bands of red and yellow energy, followed by cyan and blue energy. The energy surrounding Revice then transitions into only cyan and purple. The kick creates an explosion with blue and yellow electricity upon impact. Revice then reappears behind the enemy, with the Rider's body glowing and covered in electricity. Revice delivers a roundhouse kick covered in electricity to the opponent, pushing them away. As a result, the enemy drags across the ground and leaves tracks in it.
- Revice glows while their foot is covered in cyan energy as well as cyan and yellow electricity. The Rider parries the enemy's attack with a kick, producing bands of red, purple, and cyan energy. Revice then delivers a side kick to the enemy, producing the same energy bands upon impact and shocking the opponent.
- Revice rapidly moves toward the enemy, appearing only as a trail of lightning. They then reappear in front of the opponent while still surrounded by lightning and deliver a punch that generates a shockwave.
Hissatsu Bakufuu Bakurai Stamping Finish (必殺爆風爆雷スタンピングフィニッシュ, Hissatsu Bakufū Bakurai Sutanpingu Finisshu): Revice briefly disappears before reappearing above the enemy while surrounded by yellow electricity and red wind. With the Revicelasher covered in electricity, Revice disappears again while dropping to the ground before delivering a downward slash of yellow electricity to the enemy. The slash causes blue electricity too appear on the opponent while pushing them back. Revice then disappears a third time and dashes forward while delivering a slash of yellow electricity surrounded by red wind, causing blue electricity to appear on the enemy again.
- Giffard Finish
- Final Remix
- Revi
- Vice
- Revi + Vice
Revi Giffard Finish (リバイギファードフィニッシュ, Ribai Gifādo Finisshu): This finisher has eight variations.
- Revi performs a flying kick with his leg covered in red energy, creating a path of red lightning between him and the enemy. The kick slams the enemy into the ground upon striking them and generates a red magnetic field before the opponent explodes.
- Revi punches the enemy with his fist surrounded by magenta and blue magnetism, producing a magenta magnetic field as well as a magenta and blue shockwave upon impact.
- Revi covers his lower arms in red energy and places his hands on two enemies. This gives a positive magnetic charge before they are additionally surrounded by spiraling red energy. Revi's foot then glows before he delivers a roundhouse kick to both opponents, producing a trail of red energy. After a brief moment, both enemies explode.
- Revi forms a sphere of magenta and blue energy in his hand and throws it, producing a red shockwave. A double helix of magenta and blue energy resembling DNA trails behind the sphere as it flies through the air. The energy sphere strikes an enemy, destroying them and resulting in an explosion. It then continues flying forward and is surrounded by several rings of red and blue energy before striking a second enemy, producing another explosion.
- Revi performs a flying kick with his entire body covered in magenta energy. After striking the enemy, the kick produces a red magnetic field that transitions from horizontal to vertical. Revi is then surrounded by an additional red magnetic field, strengthening the kick and resulting in an explosion.
- Revi performs a series of punches with his forearms covered in magenta energy. Each punch creates half of a red magnetic field upon impact. Revi then performs a final punch that creates a complete magnetic field.
- Revi's body is covered in magenta energy as he is surrounded by a magenta and blue magnetic field. All of the energy transfers to his lower leg before he delivers a roundhouse kick to the enemy, producing several magenta shockwaves upon impact and resulting in an explosion.
- Revi jumps into the air before his lower leg is covered in magenta energy as waves of red energy flow around it. He then performs a flying kick while surrounded by two red rings, producing a red shockwave upon striking the enemy.
Vice Giffard Finish (バイスギファードフィニッシュ, Baisu Gifādo Finisshu): This finisher has three variations.
- Vice performs a flying kick with his entire body covered in blue energy, producing a blue shockwave upon impact. After striking the enemy, the kick produces a blue magnetic field that transitions from horizontal to vertical. Vice is then surrounded by an additional blue magnetic field, strengthening the kick and resulting in an explosion.
- Vice's body is covered in cyan energy as he is surrounded by a magenta and blue magnetic field. All of the energy transfers to his lower leg before he delivers a roundhouse kick to the enemy, producing several blue shockwaves upon impact and resulting in an explosion.
- Vice jumps into the air before his lower leg is covered in cyan energy as waves of light blue energy flow around it. He then performs a flying kick while surrounded by two cyan rings, producing a blue shockwave upon striking the enemy.
Revi Giffard Finish + Vice Giffard Finish: This finisher has ten variations.
- Version 1
- Version 2
- Version 3
- Version 4
- Version 5
- Version 6
- Version 7
- Version 8
- Version 9
- Version 10
- Version 11
Revi's body is covered in red, positively charged energy while Vice is covered in blue, negatively charged energy. The two Riders jump toward the enemy before Vice switches his polarity, causing them to be repelled from each other in opposite directions. Vice then returns to his initial polarity so that they are pulled back toward each other and crash into the enemy, creating a red and blue magnetic field. After landing, the Riders put their hands together as Revi changes his polarity, causing them to be repelled from each other again. Revi then returns to his initial polarity, bringing them back to together. Revi and Vice simultaneously kick the opponent, creating another magnetic field.
Revi's body is covered in red, positively charged energy while Vice is covered in blue, negatively charged energy. The two Riders jump into the air and spin while covered in their respective energies. They then fly in opposite directions before forming a magnetic pole between them. With Revi and Vice at either end, the pole spins around its center point. This generates strong purple winds that lift the enemy into the air until they are at the center of the pole. The two Riders are then pulled back towards each other as they each perform a flying kick, with Revi's kick covered in red energy and Vice's kick covered in blue energy. The two kicks strike the enemy simultaneously, producing more red and blue energy and causing the opponent to explode.
Revi and Vice jump into the air and perform flying kicks, with Revi's body covered in red energy and Vice's body covered in blue energy. The Riders leave trails of their respective energies as they cross each other's path to attack separate opponents, creating an X-shaped pattern. The kicks then strike the enemies, producing red and blue shockwaves.
Revi and Vice somersault into the air while surrounded by energy and electricity, with Revi's colored magenta and Vice's colored blue. They are additionally surrounded by an energy field while somersaulting before both perform flying kicks, with Revi's foot covered in red energy and Vice's foot covered in blue energy. The Riders leave trails of their respective energies as they cross each other's path just before striking the opponent, creating an X-shaped pattern. The kick produce a magenta and blue shockwave upon impact before the enemy explodes.
Revi and Vice put their hands together, creating oppositely charged magnetic fields. Revi's body is then covered in red energy while Vice is covered in blue energy. The respective energies flow into the Riders' arms before they each perform a punching maneuver, creating a large, combined magnetic field, with one half colored red and the other half colored blue. Surrounding enemies are then lifted into the air by blue, negatively charged energy as a sphere of red, positively charged sphere energy appears in the middle of the crowd. As a result, the enemies are attracted to the red sphere and are gathered together around it. The sphere of enemies is then contained by a positively charged field. Revi and Vice together create a negatively charged magnetic field, pulling the sphere towards them. The energy surrounding the Rider's arms then switches polarity just as they simultaneously punch the sphere, repelling it and launching it away. The sphere then crashes into the ground and explodes, destroying all of the enemies within
Revi and Vice somersault into the air. Revi is covered in red energy and Vice is covered in blue energy as magnetic fields of the same colors surround the Riders. The respective energies flow into the Riders' feet before they both perform flying kicks. The Riders' kicks are surrounded by additional energy as each of the two opponents are surrounded by energy with the opposite polarity as the Rider targeting them. The kicks strike the opponents, creating the corresponding magnetic fields upon impact. Each enemy is then covered in more and more energy with the polarity of the kick that struck them. A combined magnetic field forms between the two enemies as a result before both explode.
Revi's arm is covered in red energy while Vice's arm is covered with blue energy. The Riders simultaneously perform punches, creating oppositely charged magnetic fields. Revi and Vice fly forward through the air as they punch, creating a sonic boom in front of them as they are surrounded by additional magenta, purple, cyan, and blue energy.
Revi and Vice jump into the air, with Revi's lower leg covered in red energy and Vice's lower leg covered in blue energy. They each perform a flying kick and together pass through a large energy projectile while remaining unharmed. While doing so, several rings of alternating red and blue energy appear in a line in front of them. The opponent is surrounded by the rings as well as cyan lightning. After the projectile dissipates, the Riders pass through the rings of energy before kicking the enemy and flying past them.
Red energy constructs of the Rex, Megalodon, Lion, Kong, and Brachio Vistamps appear from Revi's Revice Driver and line up on the underside of his forearm before transforming into five T-Rex fangs. Meanwhile, blue energy cosntructs of the Eagle, Mammoth, Ptera, Jackal, Kamakiri appear from Vice's Revice Driver and do the same, forming five blue energy fangs. The fangs on Revi's arm then transform into a red energy construct of the Giffard Rex Vistamp's Side N as the fangs on Vice's arm transform into a blue energy construct of Side S, followed by both constructs flying away. In their place, Revi's arm produces a red magentic field and Vice's arm produces a blue magnetic field, with the fields overlapping and trapping a group of enemies within. Both sides of the Giffard Rex Vistamp construct then enlarge before crushing the enemies between them, resulting in an explosion.
Revi and Vice jump into the air, with Revi's lower leg covered in magenta energy and Vice's leg covered in cyan energy, before each Rider performs a flying kick. Revi's kick produces red energy rings while Vice's kick produces blue rings. The two Riders are then surrounded by alternating waves of red and blue energy before striking opponent. More waves of red and blue energy as well as cyan lightning are created upon impact until Revi and Vice kick the opponent a second time, breaking past them.
Revi and Vice jump into the air before spinning vertically while covered in energy and surrounded by electricity of the same color. Revi's energy and electricity are red while Vice's are blue. This spinning produces purple wind as the opponent is lifted into the air via magnetism. The two Riders' opposite polarities cause them to fly in opposite directions as a magnetic field is formed between them along with a red and blue band of energy. The Riders are then pulled back toward one another and deliver a flying kick to each side of the opponent, producing more energy and electricity in their respective colors.
Bari Vol Rolling Thunder Gale Giffard Rex Final Stamping (バリボルローリングサンダーゲイルギファードレックスファイナルスタンピング, Bari Boru Rōringu Sandā Geiru Gifādo Rekkusu Fainaru Sutanpingu): This finisher has two variations.
- The emblems on Revi and Vice's chests glow before a magenta projection of the Rex Vistamp's seal appears in front of Revi and a blue version appears in front of Vice. The two seals combine into a red projection of Revice's emblem as Vice transforms into a ball-like form and bounces into the air. Revi jumps up and kicks Vice toward the opponent, producing dark crimson energy and a magenta shockwave. While flying toward the target, Vice is covered in fire and leaves a trail of lightning and cold air before striking the enemy, producing a shockwave. Vice continues spinning and grinds against the opponent, producing more fire and electricity as well as splashes of black paint. Vice then bounces off of the enemy, producing an orange shockwave as well as an explosion surrounded by fire, lightning, and wind.
- A red projection of Revice's emblem appears as Vice transforms into a ball-like form and bounces into the air. Revi then kicks Vice toward the target, producing a shockwave. Vice leaves behind a sparkling blue trail as he flies through the air and crashes through a crowd of enemies.
Gold Spino Giragira Finish (ゴールドスピノギラギラフィニッシュ, Gōrudo Supino Giragira Finisshu): Revi somersaults into the air before his body is surrounded by light red energy. He then performs a flying kick, with his foot releasing several shockwaves of darker red energy. His foot strikes the enemy, producing another shockwave and launching the target away. The opponent explodes as a result after a brief moment, with the explosion surrounded by more red energy.
- Infinity 50 Strike
- Stamping Justice Liberal Finish
Infinity 50 Strike (インフィニティ50ストライク, Infiniti Fifuti Sutoraiku): Igarashi's lower arm is surrounded by swirling magenta, green, and blue energy as they punch several enemies in succession, with each punch producing a spiraling shockwave composed of the same colors and causing the enemy to explode.
Stamping Justice Liberal Finish (スタンピングジャステイスリベラルフィニッシュ, Sutanpingu Jasuteisu Riberaru Finisshu): Igarashi jumps into their air with their right foot covered in magenta energy. A yellow energy construct of Jeanne, green construct of Live, and magenta construct of Revi then appear around them and each perform a flying kick motion, with the energy covering Igarashi's foot continually changing between those colors. The energy Riders then merge with Igarashi as they perform a flying kick themselves, causing them to be surrounded by swirling magenta, yellow, green, and blue energy. The kick passes through a group of enemies, causing all of them to explode.
- Evil
- Live
- Bat Genome
- Jackal Genome
Bat Darkness Finish (バットダークネスフィニッシュ, Batto Dākunesu Finisshu): Varies depending on which mode the Two Sidriver is in.
- Evilblade
- Driver
This finisher has six variations:
- Evil forms a teal energy blade around the Evilblade and swings it, launching a large teal energy slash with copies of the energy blade embedded in it. This large slash is followed by a series of smaller, flickering slashes. After the slashes strike the target, Evil turns before charging and swinging the Evilblade again, launching more teal energy slashes at a second enemy.
- Evil covers the Evilblade in teal energy and swings it upward, creating a teal energy slash. When the slash strikes the enemy, it forms into a spinning circular energy blade that continually attacks the opponent.
- Evil forms a teal energy blade around the Evilblade and swings it, launching a series of flickering slashes of teal energy with copies of the energy blade embedded in them. The energy slashes fly forward before continually attacking the enemy.
- Evil forms a teal energy blade around the Evilblade and delivers a large teal energy slash with copies of the energy blade embedded in it to the enemy at close range. This large slash creates an explosion and is followed by is followed by a series of smaller, flickering slashes that launch the enemy away.
- Evil forms a teal energy blade around the Evilblade and separately attacks two enemies with teal energy slashes that have copies of the energy blade embedded in it. He then delivers a giant energy slash to one of the opponents. The large slash is followed by a series of smaller slashes, destroying the enemy and causing them to explode.
- A teal energy blade forms around the Evilblade as it is held against an enemy. Evil then delivers a series of energy slashes with copies of the energy blade embedded in it. Each large slash delivered by the Evilblade directly is followed by a series of smaller slashes and results in an explosion. The final attack is an upward slash that pushes the opponent away.
This finisher has two variations:
- Teal energy from the Two Sidriver flows along the teal lines on Evil's suit before transferring to his lower leg. Evil then performs a spinning roundhouse kick while a rotating column of blue liquid appears behind him. The kick leaves behind a trail of teal liquid and creates a large teal energy slash upon impact. After the initial slash, several smaller teal energy slashes continue to attack the opponent
- Teal energy from the Two Sidriver flows along the teal lines on Evil's suit while wind and bats surround him before transferring to his lower leg, accompanied by a burst of green and purple energy. Evil leaps forward with his leg covered in the teal, green, and purple energy and a green radar-like projection of the Bat Vistamp's seal appears behind him. He then delivers a flying kick to the enemy, creating another burst of green and purple energy as well as teal sonic waves upon impact.
Jackal Darkness Finish (ジャッカルダークネスフィニッシュ, Jakkaru Dākunesu Finisshu): Evil moves at high speeds with his body covered in teal energy and leaving behind a trail of purple lightning-like energy. He appears in front of two enemies and delivers a green energy slash to each target, moving past them during the second slash before dashing away. Evil then reappears and delivers another energy slash to the first opponent, followed by a series of slashes to the second. Finally, Evil moves behind the two enemies and delivers a large crescent-shaped teal energy slash that strikes both opponents simultaneously and creates an explosion while launching them away.
- Bat Genome
- Holy Live
- EvilytyLive
Bat Justis Finish (バットジャスティスフィニッシュ, Batto Jasutisu Finisshu): Varies depending on which mode the Two Sidriver is in.
- Livegun
- Driver
This finisher has four variations:
- Live gathers gold energy at the end of the Livegun's barrel before firing a volley of gold blade-shaped energy projectiles while performing a cartwheel.
- Gold light appears at the end of the Livegun's barrel before Live turns around and fires numerous gold blade-shaped energy projectiles at a group of enemies.
- Gold light appears at the end of the Livegun's barrel before Live fires a large blast of gold energy at close range, launching the enemy away.
- Live fires two volleys of gold blade-shaped energy projectiles at the enemy from close range. He then places the Livegun's barrel against the opponent's body and fires more blade-shaped projectiles at point-blank range, pushing the enemy backward.
Live jumps into the air while green energy flows from the Two Sidriver and into his lower leg before performing a flying kick. The energy is then released in the form of green liquid that rearranges into a bat shape and changes color, culminating in a white bat construct surrounded by spiraling golden energy. The bat construct flies alongside Live's kick before both strike the enemy, creating a gold shockwave upon impact. The bat construct then disappears into the point of impact before Live's kick breaks past the enemy, leaving behind a golden sonic boom.
- Holy Justis Finish
- Winning Justis Finale
Holy Justis Finish (ホリージャスティスフィニッシュ, Hōrī Jasutisu Finisshu): Varies depending on which mode the Two Sidriver is in.
- Driver
- Livegun
This finisher has two variations:
- Holy Live flies into the air and performs a flying kick with his leg covered in light blue energy, creating a shockwave. A dome of blue energy then forms around Live as he approaches the opponent. The kick produces a shockwave of light blue energy upon impact before a mass of white feathers is scattered into the air. Soon afterwards, the enemy explodes.
- Holy Live performs a flying kick covered in light blue energy through a crowd of enemies, destroying them and resulting in multiple explosions.
- Holy Live jumps forward and extends his wings as his lower leg glows. He then performs a flying kick with his leg surrounded by spiraling cyan energy. Upon the kick striking the enemy, more of the spiraling cyan energy is produced and surrounds Live's entire body.
This finisher has four variations:
- Holy Live parries the attack of an enemy using the Livegun's blade before delivering a cyan energy slash to a second opponent. He then charges cyan energy at the end of the Livegun's barrel and fires several cyan blade-shaped energy projectiles into the first enemy at close range, causing them to explode.
- Holy Live spins and uses the Livegun's blade to release several blue and cyan energy slashes around himself. The energy slashes form a full circle and destroy any enemies near Live, resulting in multiple explosions.
- Holy Live charges the Livegun for an extended period of time, with swirling cyan and dark blue energy appearing at the end of the barrel as a large cyan blade-shaped energy projectile is formed. He then fires the projectile at the enemy, producing a blue shockwave. The projectile is surrounded by additional cyan and dark blue energy before striking the target.
- Cyan energy gathers at the end of the Livegun's barrel, which is pointed towards the enemy at point blank range. Holy Live then fires several several cyan blade-shaped energy projectiles surrounded by additional cyan and black energy. The projectiles pierce through the enemy's body and leave cyan sparkles in the air.
Winning Justis Finale (ウイニングジャスティスフイナーレ, Uiningu Jasutisu Fināre): Varies depending on which mode the Two Sidriver is in.
- Driver
- Livegun
Holy Live performs a flying kick covered in light blue energy, destroying enemy projectiles along the way before striking the opponent and producing light blue shockwaves upon impact. Live then kicks the enemy a second time with his other foot. As a result, the opponent is pushed back until crashing into a wall. Live then kicks off of the enemy shortly before the latter explodes.
Holy Live gathers blue and cyan energy at the end of the Livegun's barrel before firing a volley of cyan blade-shaped energy projectiles that tear through the enemy's body.
- Evilyty Perfect Finish
- Evilyty Perfect Finale
Evilyty Perfect Finish (エビリティパーフェクトフィニッシュ, Ebiriti Pāfekuto Finisshu): Varies depending on which mode the Two Sidriver is in.
- Evilblade
- Livegun
Live swings the Evilblade, creating a series of teal energy slashes with energy blades embedded in them. The energy slashes strike multiple enemies in succession, resulting in them exploding. Live then briefly transforms into Kamen Rider Evil and swings again while running, creating two back-to-back energy slashes to attack more enemies. Upon returning to normal, Live manifests a teal energy copy of Kamen Rider Evil beside him. The two Riders swing their Evilblades downward, causing a single energy slash to slice though a group of enemies. The copy of Evil disappears as the enemies explode.
Live covers the wing of the Perfect Wing Vistamp in teal energy and uses it to deliver a teal energy slash to the opponent. The attack leaves behind black and white feathers before causing the enemy to explode.
Evilyty Perfect Finale (エビリティパーフェクトフィナーレ, Ebiriti Pāfekuto Fināre): Varies depending on which mode the Two Sidriver is in.
- Livegun
- Driver
This finisher has three variations:
- Cyan light appears at the end of the Livegun's barrel before Live fires a sustained barrage of bladed projectiles made of black and white energy, with the barrel producing a cyan shockwave every time Live fires. He aims to the side while continuing to fire, attacking a line of enemies. The projectiles impale each opponent, causing them to explode.
- While flying through the air, Live disappears into a mass of feathers before reappearing in front of the enemy. He charges teal energy at the end of the Livegun's barrel before firing a large bladed projectile made of teal energy at close range. After the projectile strikes the enemy, it is followed by a beam of cyan energy fired from the Livegun.
- Waves of teal energy appear around the end of the Livegun's barrel before Live fires a volley of bladed projectiles made of teal energy. The projectiles are surrounded by semicircles of teal energy as they fly through the air before striking several enemies. Live then fires a cyan energy beam surrounded by additional black energy at a final target, producing a cyan shockwave upon impact. After striking the opponent, the beam traps them in a sphere of cyan energy covered by black and white feathers.
- Stamping Smash
- Liberal Smash
- Cobra
- Kujaku
- Hashibiroko
Cobra Stamping Smash (コブラスタンピングスマッシュ, Kobura Sutanpingu Sumasshu): This finisher has three variations.
- After Jeanne jumps into the air, Lovekov transforms into a small, snake-like form composed of light blue energy and flies toward her before coiling around her leg. Jeanne then delivers a kick to an enemy in the air, producing an orange and blue energy shockwave upon impact. Jeanne keeps her foot against the enemy's body as the two fall until she uses her heel to slam the enemy into the ground beneath her. Jeanne ends up on top of the enemy, who explodes shortly after.
- After Jeanne jumps into the air, Lovekov transforms into a small, snake-like form composed of light blue energy and flies toward her before coiling around her leg. Jeanne then performs a flying kick covered in blue, yellow, and red energy. After the kick strikes the first target, Jeanne continues kicking more enemies, with each kick creating a blue and orange shockwave upon impact. She then somersaults backwards and away from the enemies as they explode.
- Jeanne delivers a roundhouse kick to two enemies, producing a trail of blue and orange fire. The kick sets the opponents on fire upon impact and launches them high into the air. The enemies explode in the sky shortly after.
Kujaku Stamping Smash (クジャクスタンピングスマッシュ, Kujaku Sutanpingu Sumasshu): This finisher has two variations.
- Lovekov floats into the air and glows yellow before separating into a total of 18 blades. Jeanne jumps into the air and ten of the blades attach to her back before spreading, generating cyan and purple-colored energy peacock feathers. The remaining eight blades then rotate around Jeanne's foot and form a drill-like configuration as she performs a flying kick. Blue energy is released upon the kick's impact, followed by orange energy. Jeanne brings her foot back as the eight blades surrounding it momentarily spread apart again before she delivers a second kick, launching the enemy away.
- Jeanne throws Lovekov, who glows yellow before separating into 18 blades. Ten of the blades attach to Jeanne's back as she runs before spreading as she jumps forward, generating cyan and purple-colored energy peacock feathers. The remaining eight blades then rotate around Jeanne's foot and form a drill-like configuration as she performs a flying kick. The kick creates orange energy upon impact before causing the enemy to fly along with Jeanne until hitting a wall. Jeanne then kicks away from the enemy before the latter explodes.
Hashibiroko Stamping Smash (ハシビロコウスタンピングスマッシュ, Hashibirokou Sutanpingu Sumasshu): Lovekov's blade is covered in purple fire before Jeanne launches a purple energy slash that destroys an enemy's projectile. The slash then continues to fly forward until it strikes the enemy, producing an explosion.
- Cobra
- Kujaku
- Turtle
- Hashibiroko
Cobra Liberal Smash (コブラリベラルスマッシュ, Kobura Riberaru Sumasshu): This finisher has two variations.
- Jeanne covers her right foot in dark blue and orange energy while running, causing her footsteps to emit light blue shockwaves. She then jumps off of Lovekov before light blue and green energy flow around her leg. With her leg covered in this energy, Jeanne performs a flying kick that produces blue and yellow upon striking the enemy.
- Lovekov transforms into a small, snake-like form composed of light blue energy and coils around Jeanne's leg, producing blue light. The leg is then surrounded by additional blue energy as Jeanne performs a roundhouse kick. Her foot creates a blue and yellow energy slash that strikes the enemy, resulting in an explosion.
Kujaku Liberal Smash (クジャクリベラルスマッシュ, Kujaku Riberaru Sumasshu): This finisher has six variations.
- Jeanne heats up Lovekov and performs a fire-covered slash using both fans. She then spins in order to perform a second slash, with one fan striking the enemy after the other, before delivering a third slash while jumping. Swirling fire forms underneath Jeanne while she holds the fans out, propelling Jeanne further. As she falls back to the ground, Jeanne swings both fans downward while they are covered in fire, creating a fiery explosion to attack the enemy.
- Jeanne throws Lovekov, who is then covered in fire. Jeanne controls the movement of the fans remotely by moving her arms, which leave behind trails of orange energy. The two fans fly back toward Jeanne before performing a red and blue energy slash together. They then perform another simultaneous slash in the other direction. Finally, the fans attack separately in opposite directions, creating an X-shaped energy slash.
- Jeanne somersaults into the air and lands in front of the opponent. With Lovekov covered in fire, Jeanne delivers two flaming slashes to the enemy using both fans together. The enemy is covered with red electricity for a brief moment before being destroyed in a fiery explosion.
- Jeanne performs three consecutive slashes of blue and orange fire in order to destroy incoming enemy projectiles. She then jumps a short distance into the air and performs two simultaneous slashes of the same fire. The two slashes combine into a single X-shaped slash before striking the enemy, resulting in an explosion.
- Jeanne covers Lovekov in light orange energy and uses her to parry the attacks of two enemies. Swinging the fans together, she then delivers a slash of blue and orange fire to each opponent.
- Jeanne covers Lovekov in light orange energy and uses one of the fans to block the enemy's attack before using the other to deliver a slash of blue and orange fire. She then uses both fans to deliver an X-shaped slash of the same fire, pushing the enemy back.
Turtle Liberal Smash (タートルリベラルスマッシュ, Tātoru Riberaru Sumasshu): This finisher has two variations.
- Jeanne charges Lovekov's barrel with green energy while the sight glows red and her own visor glows green. She then fires a green energy artillery shell that explodes upon striking the enemy.
- Jeanne fires a turtle shell from Lovekov, generating a heart-shaped ring of green smoke from the barrel. Jeanne's leg is then covered in green energy before she kicks the shell, causing it to spin and be surrounded by spiraling green energy as it flies through the air. The shell crashes into a group of enemies, producing an orange shockwave and destroying them in an explosion.
Hashibiroko Liberal Smash (ハシビロコウリベラルスマッシュ, Hashibirokou Riberaru Sumasshu): This finisher has two variations.
- Jeanne covers Lovekov's blade in purple energy before delivering a downward purple energy slash to the enemy. The attack leaves purple fire in its path.
- Jeanne delivers three energy slashes to the enemy in quick succession.
- Demons
- Over Demons
- Demons Troopers
- Demons Finish
- Demons Requiem
Demons Finish (ディーモンズフィニッシュ, Demonzu Finisshu): Demons stamps a Vistamp onto the Demons Driver's screen and performs a finisher using its power.
- Spider
- Mogura
- Condor
This finisher has four variations:
- Demons jumps into the air and produces crimson energy from his body as he floats in place. Eight red energy constructs of mechanical spider legs then emerge from his back and curl forward, gathering their pointed ends in front of Demons' foot as he performs a flying kick covered in red energy. The kick produces red and purple energy upon impact before causing the enemy to fly along with Demons until the two crash through a wall.
- From his hand, Demons fires string that wraps around the enemy and restrains him. He then pulls the string, causing the enemy to be launched through the air towards him. Demons jumps towards the enemy with his hand covered in crimson energy before delivering a punch that produces a large red shockwave upon impact.
- Demons covers his leg with red energy before performing a side kick motion. Eight red energy spider legs are then generated from Demon's leg and crush the enemy. Afterward, the enemy is covered with red energy and electricity. A crimson energy web then appears around the opponent shortly before they explode.
- Demons covers his arm with red energy and approaches the enemy as eight red energy spider legs are generated from his back. Demons punches the enemy, with the spider legs bending forward to surround his fist. The punch produces an explosion of light red energy upon impact.
- Demons jumps forward before his lower leg is covered in red energy. Eight red energy constructs of mechanical spider legs then emerge from his leg and curl forward, gathering their pointed ends in front of Demons' foot as he performs a flying kick. More red energy is produced upon the kick striking the enemy. Demons then activates the Demons Finish a second time, causing eight more energy spider legs to sprout from Demons' back and point forward as well. This strengthens the kick and allows Demons to overpower the enemy, resulting in an explosion.
This finisher has two variations:
- Demons covers the Demon Digzon with spinning green and red energy like a drill before running up to the enemy and stabbing them with it. The Demon Dizon produces more green and red energy and Demons keeps it embedded in the enemy while the spinning energy continues damaging them. After a final burst of the energy, the enemy is ejected from the Demon Digzin and explodes.
- Demons launches his body forward while holding the Demon Digzin in front of him. The Demon Digzin is covered in spinning green and red energy an destroys everything in Demons' path.
Demons flies into the air and uses the Demon Rumblejoker wings to fire eight bladed feather projectiles, which embed themselves in the enemy. He then performs a flying dropkick with both feet covered in purple energy, completely destroying the opponent upon impact.
- Batta
- Mogura
- Batta + Scorpion
Batta Demons Requiem (バッタデモンズレクイエム, Batta Demonzu Rekuiemu): Demons leaps into the air and curls his body into a ball, avoiding an enemy projectile as a result. He then spins while falling towards the enemy, crashing through more projectiles in the process before performing a flying dropkick with both grasshopper legs. The kick briefly collides with the target before knocking them back.
Mogura Demons Requiem (モグラデモンズレクイエム, Mogura Demonzu Rekuiemu): Demons forms an energy construct of the Demon Digzon around his leg and performs a flying kick surrounded by spinning green, orange, and blue energy. The attack crashes through enemy projectiles before striking the target. The Demon Digzon construct then impales the enemy, causing them to explode.
Batta Scorpion Demons Requiem (バッタスコーピオンデモンズレクイエム, Batta Sukōpion Demonzu Rekuiemu): This finisher has two variations.
- Version 1
- Version 2
Demons jumps toward a group of enemies and kicks the one in the middle before kicking back off and into the air. He lands in front of a second enemy and attacks them with the Demon Ridolstinger. Demons jumps away again before delivering an axe kick to a third enemy, creating a red energy energy as he lands. He follows this up with a rotating red energy slash using both his leg and the Demon Ridolstinger. Demons then jumps into the air once again and performs a dropkick with the Demon Ridolstinger coiled around his body. The kick strikes the center enemy before Demons, still on top of them, uncoils the Demons Ridolstinger and rotates his body with the tail outstretched, striking the other two opponents with it. Demons then jumps off of the center enemy before all three opponents explode.
Demons jumps into the air and performs a flying kick, landing on the ground near the opponent. He then delivers several kicks and stabs with the Demon Ridolstinger before jumping into the air once again. Demons performs a dropkick with the Demon Ridolstinger coiled around his body, producing a dome of red energy in front of him.
- Demons Finish
- Demons Requiem
Demons Finish (ディーモンズフィニッシュ, Demonzu Finisshu): Over Demons stamps a Vistamp onto the Demons Driver's screen and performs a finisher using its power.
- Kuwagata
Over Demons extends four cable-like mechanical appendages from his back and uses the manipulators at the ends to grab four bystanders. He then activates the wing on his shoulder and flies away from the battlefield while producing a trail of cyan energy and pulling the people along with him.
- Full Genomix
Batta Condor Scorpion Anomalocaris Demons Requiem (バッタコンドルスコーピオンアノマロカリスデモンズレクイエム, Batta Kondoru Sukōpion Anomarokarisu Demonzu Rekuiemu): Over Demons jumps towards the enemy and delivers a kick covered in green energy. Upon landing, he swings his scorpion tail, which is covered in red energy. He then rams the enemy with his shoulder. After rebounding, he jumps forward and performs a dual cyan energy slash with his right claw. Now at a distance, he extends his tail and covers it in red energy before stabbing the opponent twice with it. When the opponent counterattacks, he parries the attack with another energy slash with his right claw. He then jumps toward the enemy and delivers an energy slash with his left claw. Afterwards, he performs a series of punches and kicks before delivering an upward kick that produces a trail of red energy, launching the enemy into the air. Over Demons flies up to meet them, with his wings covered in purple energy. He then launches eight feather-shaped projectiles made of purple energy. The projectiles home in on the enemy and pierce them simultaneously before dissipating. Soon afterwards, Over Demons delivers a flying kick surrounded by a dome of red energy, producing an orange shockwave upon impact. Over Demons continues flying through the air with the enemy as the kick produced red electricity. He then kicks the opponent away, producing red shockwaves as well as a sonic boom.
- Demons Finish
Demons Finish (ディーモンズフィニッシュ, Demonzu Finisshu): A Demons Trooper stamps a Vistamp onto the Demons Driver's screen and performs a finisher using its power.
- Vailing Impact
- Vailing Nova
Vailing Impact (ベイリングインパクト, Beiringu Inpakuto): This finisher has four variations.
- With an enemy against a wall, Vail performs a punching motion, creating a red shockwave that crushes the enemy. He then performs a series of punching motions so fast that his arm leaves afterimages, with each punch creating another shockwave. After a brief pause, Vail delivers a final punch to the enemy directly, creating a large red shockwave that expands outward from the opponent before they explode.
- Vail covers his lower arm in crimson energy and punches the opponent. Simultaneously, an energy construct of a rhinoceros beetle appears from behind Vail and impales the enemy as the punch makes contact. After a brief moment, the enemy explodes.
- Vail's lower leg is covered in red energy as an energy construct of a rhinoceros beetle flies behind him with its horn glowing red. Vail delivers a roundhouse kick to the opponent, leaving behind crimson energy. Simultaneously, the beetle construct slashes the enemy with its horn, leaving behind a trail of light blue energy. The force of the combined attack damages the surrounding area, and waves of multicolored energy emanate from the opponent's body. A large multicolored shockwave is then released from the opponent before they explode.
- Vail covers his lower arm in crimson energy before punching the opponent while an energy construct of a rhinoceros beetle appears beside him. Multiple streams of red and black energy are released when the punch strikes the target. After a brief moment, the enemy then explodes.
Vailing Nova (ベイリングノヴァ, Beiringu Novā): This finisher has two variations.
- Vail covers both lower arms in crimson energy and uses them to block the opponent's attack. He then performs a punch surrounded by swirling red energy using each arm, with each punch creating an explosion upon impact. An energy construct of a rhinoceros beetle also appears beside Vail's arm during each punch.
- Vail's lower leg is covered in crimson energy and surrounded by swirling light red energy as an energy construct of a rhinoceros beetle behind him. He then delivers a side kick to the enemy, producing a large red shockwave upon impact. The beetle construct rams into the enemy soon afterward, resulting in an explosion.
- Stamping Break
- Stamping Destroy
Queen Bee Stamping Break (クイーンビースタンピングブレイク, Kuīn Bī Sutanpingu Bureiku): This finisher has five variations.
- Aguilera forms a sphere of golden honey-like energy from her hand and fires it a sustained stream at the enemy. The stream produced a shockwave of golden energy upon initially striking the enemy and continually bombards them, eventually resulting in an explosion.
- Aguilera's leg is covered in magenta energy and surrounded by a burst of red energy. The energy covering her leg is then strengthened and accompanied by additional crimson and yellow energy. Aguilera performs a roundhouse kick, producing a trail of the energy covering her leg. The kick releases a large amount of red energy upon impact and launches the enemy away.
- Aguilera grabs an enemy and flies into the air with them. She releases the opponent, resulting in them continuing to move forward, while she flies higher into the air by herself. Aguilera then performs a flying kick that produces waves of orange and gold energy. The opponent crashes into a building and bounces off before Aguilera's kick strikes them, producing a shockwave and smashing the enemy into the building a second time. The surrounding wall is destroyed even more as a result shortly before the enemy explodes.
- Aguilera covers the blades of the Needle Kunai with yellow energy and uses them to parry the attacks of two enemies. She pushes the opponents away and delivers an X-shaped orange energy slash using both Needle Kunai, destroying them and resulting in an explosion. She then swings the Needle Kunai, launching several smaller kunai made of yellow energy at two more enemies. The kunai strike the opponents, causing them to explode as well.
- Aguilera jumps into the air as a mechanical bee flies beside her. The bee then turns gold and merges with her foot, causing it to be surrounded by spiraling gold energy along with red and gold lightning as Aguilera performs a lying kick. The kick produces more red lightning upon impact and shatters the target.
Queen Bee Stamping Destroy (クイーンビースタンピングデストロイ, Kuīn Bī Sutanpingu Desutoroi): This finisher has four variations.
- Aguilera covers the blades of the Needle Kunai with red and yellow energy before slashing the enemy with one of them. She then uses both weapons to stab the opponent's feet, pinning them to the ground.
- Aguilera uses the Needle Kunai to deliver a series of yellow energy slashes to multiple enemies. She first performs a slash using each Needle Kunai individually, then uses both weapons together to perform two spinning slashes. Finally, she swings both Needle Kunai forward to perform two slashes simultaneously.
- Aguilera generates numerous orange energy kunai in a circle around herself before launching them at the opponent. The kunai home in on the enemy and follow them.
- Aguilera covers the blades of the Needle Kunai with red and yellow energy before delivering a series of red energy slashes to an enemy, consisting of two horizontal slashes followed by an upward slash. Aguilera then rolls onto the ground in order to avoid the attacks of a second opponent. She stabs both enemies with the Needle Kunai, impaling them with streams of orange energy before causing them to explode.
- Destream Finish
Destream Finish (デストリームフィニッシュ, Desutorīmu Finisshu): Destream stamps a Vistamp onto the Destream Driver's screen and performs a finisher using its power.
- Hercules
Polygons made from lines of cyan energy emanate from Destream's fist before he delivers a running punch surrounded by additional red and blue energy to the enemy. Afterward, he then turns to face the enemy again before channeling streams of cyan energy into his lower leg, which is then covered by cyan energy itself. Destream performs a side kick, with several cyan energy components appearing before attaching to his leg, forming a Hercules beetle's head. The energy beetle's head spins and is surrounded by a cone of cyan and red energy, acting similar to a drill. Cyan electricity is generated as the energy beetle head strikes the enemy. After a short moment, cyan lightning is produced from the enemy just before they explode.
- Chimera
- Daimon
- King Crab Edge
- Crocodile Edge
King Crab Edge (キングクラブエッジ, Kingu Kurabu Ejji): Chimera's forearm is covered with orange energy before he punches the opponent. A silver energy construct of a crab's claw appears beside Chimera and crushes the enemy as the punch makes contact.
Crocodile Edge (クロコダイルエッジ, Kurokodairu Ejji): This finisher has two variations.
- Chimera jumps into the air as his lower leg is covered in orange and yellow energy. The energy then forms into a construct of a crocodile's head before Chimera kicks the opponent, producing an orange shockwave upon impact and launching away the enemy. The opponent's upper body then explodes after a brief moment, with their lower body exploding as well shortly after.
- Chimera's leg is covered in orange and yellow energy as he performs a roundhouse kick, with an energy construct of a crocodile head appearing as his foot strikes the opponent. Chimera and the enemy then fall to the ground. At the same time, electricity appears around the crocodile head and its open jaws surround the opponent. The crocodile head then bites down on the enemy, destroying them in an explosion.
- Octopus Edge
- Kurosai Edge
- Oomukade Edge
- Tri Chimera Edge
- Tri Chimera Charge
Octopus Edge (オクトパスエッジ, Okutopasu Ejji): This finisher has three variations
- Daimon strikes the enemy with his palm, producing a shockwave of crimson energy upon impact. His leg is then covered in orange energy before additionally being surrounded by several red energy constructs of octopus tentacles. Daimon delivers a side kick to the enemy, with the tentacles crushing them as the kick makes contact, producing shockwaves of black energy. The enemy explodes as a result after a brief moment.
- Daimon's leg is covered in orange energy before additionally being surrounded by several red energy constructs of octopus tentacles. Daimon delivers a side kick to the enemy, with the tentacles crushing them as the kick makes contact, releasing red and black energy. The attack also produces an explosion and pushes the enemy away.
- Daimon levitates into the air, producing a shockwave of red energy on the ground beneath him. Eight red energy constructs of octopus tentacles then appear from his feet. Several of the tentacles strike the enemy at a time before all of them simultaneously crush the opponent, resulting in an explosion and launching them away.
Kurosai Edge (クロサイエッジ, Kurosai Ejji): Daimon's fist is covered by purple energy before he punches the opponent. At the same time, a purple energy construct of a rhinoceros head appears beside him and also strikes the enemy, producing a shockwave as well as an explosion.
Oomukade Edge (オオムカデエッジ, Oomukade Ejji): This finisher has two variations.
- Daimon's cape transforms into two large centipede constructs made of orange energy. The centipedes fly through the air and crash into the opponent several times, with each attack releasing orange energy upon impact. The final attack additionally results in an explosion and launches the enemy away.
- Daimon jumps into the air as two large centipede constructs made of orange energy fly through the air around him. He is then surrounded by spiraling red energy before the centipedes coil together and combine with his leg. This produces waves of red and yellow energy as Daimon performs a flying kick with his foot covered in orange energy. The kick produces an orange shockwave upon impact.
Tri Chimera Edge (トライキメラエッジ, Torai Kimera Ejji): Daimon produces gold shockwaves from his body followed by a sustained, wide ray of crimson and golden energy that separates anyone in front of him from their inner demons.
Tri Chimera Charge (トライキメラチャージ, Torai Kimera Chāji): Daimon's body glows orange before a purple energy rhinoceros head and orange energy centipede appear on either side of him while several octopus tentacles made of red energy appear below his feet. This is accompanied by waves of purple, yellow, and red energy that launch nearby enemies away.
- Impulse Genome Finish
- Crash Genome Finish
- Powered Genome Finish
- Juuga Amazing Finish
Impulse Genome Finish (インパルスゲノムフィニッシュ, Inparusu Genomu Finisshu): This finisher has two variations.
- A yellow energy construct of a jackal appears from the Juuga Driver and combines with Juuga's leg, causing it to glow the same color. The energy then expands to cover the rest of Juuga's body, granting him super speed. Juuga rapidly attacks the enemy while moving at extreme speeds, producing a shockwave with each strike. The series of attacks ends with a side kick that launches the opponent away.
- Purple energy flows from the Juuga Driver and covers Juuga's lower leg. A giant purple energy construct of a T-Rex's head then appears in front him and bites the enemy as Juuga performs a side kick motion, producing an explosion.
Crash Genome Finish (クラッシュゲノムフィニッシュ, Kurasshu Genomu Finisshu): This finisher has five variations.
- Juuga covers his arm in green energy and raises it into the air, creating a green tornado that immobilizes two opponents. He then swings both arms, launching two jagged slashes of magenta energy. One of the slashes strikes each enemy, launching them away.
- Juuga's right forearm glows orange while his left glows blue. By swinging his left arm, he delivers a claw-shaped orange energy slash to the enemy that produces a blast of fire upon impact. This is followed by two cyan energy slashes that produce water using the left arm before Juuga finally delivers another fire slash.
- Juuga performs a roundhouse kick motion with his lower leg covered in magenta energy, producing a pair of jagged magenta energy slashes that strike two enemies. His arms are then equipped with blue energy blades, which he uses to perform a series of crescent-shaped slashes of light purple energy. He first performs a spinning slash using both arms, then an upward slash using both arms, and finally another spinning slash while jumping backward. Juuga then crouches and swings his arms, producing a 360 degree wave of magenta and blue energy slashes.
- Large fists made of orange energy appear on Juuga's arms before he uses them to punch the ground, creating a tremor that moves in the direction of two enemies. A giant red energy construct of a mammoth's foot then appears to the side of the enemies. When Juuga performs a roundhouse kick, the energy foot mirrors his movement and swipes horizontally. Another energy mammoth foot then appears in the air above one of the enemies and attempts to crush them when Juuga stomps the ground. Juuga does the same for the second opponent before performing another roundhouse kick.
- Golden energy covers Juuga's hand while crimson electricity appears around his arm. He then performs a punch surrounded by gold and black energy, producing additional red energy upon contact with the enemy
Powered Genome Finish (パワードゲノムフィニッシュ, Pawādo Genomu Finisshu)
Juuga Amazing Finish (ジュウガアメイジングフィニッシュ, Juuga Ameijingu Finisshu): This finisher has two variations.
- Juuga sprouts Pteranodon wings made of red energy from his back before setting his body on fire and flying into the enemy. He then performs an uppercut motion, causing a magenta energy construct of a Brachiosaurus head to appear from the ground beneath the enemy, launching them into the air. When Juuga next performs a downward punch motion, the head slams the enemy downward, causing them to crash into the ground and bounce a short distance into the air. A red energy construct of a mammoth's foot then appears above the enemy before Juuga performs a stomping motion, causing it to crush the opponent.
- Different types of energy cover Juuga's leg each time he pulls the Juuga Vistamp. First, his foot glows bright gold. Next, light gold energy flows from the Juuga Driver and down his leg. After that, black particles then surround the leg. Finally, a silver double helix flows down the leg as its footsteps create waves of gold energy. Swirling black and gold energy then appears around Juuga as he performs a spinning roundhouse kick. His foot creates an arc of black and gold energy before striking the enemy, launching them away.
- Juuga's lower leg is surrounded by black and gold energy before a large shockwave of gold and crimson energy emanates from him. As a result, the rest of his body is surrounded by black energy as well and lightning is continually produced from his leg. Juuga then jumps high into the sky and performs a flying kick, producing a sonic boom as he descends. The kick pushes the enemy across the ground after striking them.
Weapons
- Ohinbuster50
- Osutoderuhammer50
- Revicelasher
- Rolling Vistamp
- Rolling Vistamp + Revicelasher
- Thunder Gale Vistamp
- Crimson Vail Vistamp
- Ohinstamp
- Vistamp
- Axe Mode
- Gun Mode
Ohing Slash (オーイングスラッシュ, Ōingu Surasshu): The blade of the Ohinbuster50 projects a larger cyan energy blade surrounded by red energy, which disappears before the physical blade itself is covered by blue energy. Revi then swings the weapon, launching three three rotating pink energy seals of the Revice logo, with each seal surrounded by two light blue energy blades. The projectiles collide with the enemies, resulting in a large magenta explosion with a single large red and black seal of the Revice logo.
Ohing Strike (オーイングストライク, Ōingu Sutoraiku): This finisher has two variations.
- Blank pink and blue energy stamps appear in front of the Ohinbuster50's barrel while Revi charges the weapon. Eventually, Revi's body is surrounded by pink and blue energy along with pink lightning. He then fires a large screen resembling the Ohinbuster50's Ohinjector with an animated version of the Ohinstamp's seal on it. This screen is followed by several blank pink and blue screens trailing behind it. When the screen reaches enemies, the seal on it moves left and right while biting them as the screen moves forward.
- Revi slides toward the enemy while charging the Ohinbuster50, with blank blue energy stamps and blue lines of energy appearing in front of the weapon's barrel. Upon arriving at the enemy, Revi places the barrel against the target's body, with a single blank pink energy stamp surrounded by pink lightning at the point of contact. He then fires Ohinbuster50 at point-blank range, creating a projection of its Ohinjector with a blue version of the Ohinstamp's seal on it and launching the enemy away.
- Axe Mode
- Gun Mode
- Rex
- Volcano
- Rolling
- Thunder Gale
Rex Stamping Slash (レックススタンピングスラッシュ, Rekkusu Sutanpingu Surasshu): Revi leaps into the air with the Ohinbuster50's blade covered in light blue energy. A red projection of the Rex Vistamp's seal then appears behind Revi before a giant blue energy construct of a T-Rex's skull appears around him and bites the enemy as he falls. The T-Rex skull shatters shortly afterwards as Revi slashes the opponent with the Ohinbuster50 itself.
Volcano Stamping Slash (ボルケーノスタンピングスラッシュ, Borukēno Sutanpingu Surasshu): Revi delivers a series of orange energy slashes covered in flames using the Ohinbuster50, setting the enemy on fire.
Rolling Stamping Slash (ローリングスタンピングスラッシュ, Rōringu Sutanpingu Surasshu): Revice covers the Ohibuster50's blade with electricity before running toward the enemy. Revice's body is surrounded by electricity and red wind, which continue moving toward the enemy as the Rider briefly disappears. Upon reaching the opponent, Revice reappears and delivers a yellow energy slash while moving past them. The enemy is then covered in blue electricity for a brief moment before exploding.
Thunder Gale Stamping Slash (サンダーゲイルスタンピングスラッシュ, Sandā Geiru Sutanpingu Surasshu): Revice swings the Ohinbuster50 so that a red and yellow energy slash with electricity strikes the opponent, causing them to explode.
- Rex
- Rolling
Rex Stamping Strike (レックススタンピンググストライク, Rekkusu Sutanpingu Sutoraiku): This finisher has two variations.
- Revi charges the Ohinbuster50 in its gun mode, with cyan energy concentrated at the barrel and pink energy surrounding the entire weapon. He then fires a massive cyan energy construct of a T-Rex skull, with a red projection of the Rex Vistamp's seal appearing in front of the barrel. The T-Rex skull then moves through a group of enemies, biting the opponents as it goes.
- Revi charges the Ohinbuster50 with pink energy before firing a cyan energy construct of a T-Rex skull that flies toward the enemy, with a red projection of the Rex Vistamp's seal appearing in front of the weapon's barrel. When Revi used this finisher, the opponent dodged the T-Rex skull, causing it to fly toward Vice instead. Vice used the Osutoderuhammer50 to strike the T-Rex skull, causing a projection of the Osutoderuhammer50's seal to appear and redirecting the attack back toward the enemy. The T-Rex skull then collides with the enemy, creating a shockwave of dark blue energy upon impact and resulting in a fiery explosion.
Rolling Stamping Strike (ローリングスタンピングストライク, Rōringu Sutanpingu Sutoraiku): Jack Revice forms a dark blue energy orb in front of the Ohinbuster50's barrel and channels black energy into it. After the charging is finished, the orb transforms into cyan electricity surrounded by blue energy. Revice then aims the Ohinbuster50 at a falling enemy and fires a beam of black energy surrounded by cyan energy and electricity, creating a large hole in the enemy before they explode.
The Osutoderuhammer50's finisher is the Osutoderu Crash (オストデルクラッシュ), which is performed by either striking an object or scanning a Vistamp. The attack will take on the attributes of the type of object that was struck or the power of the scanned Vistamp.
- Object
- Vistamp
- Drive-in
- Splash Ra-in
- Stop Tra-in
- Metchakyu-in
- Element-in
Vice strikes a car, causing a projection of the Osutoderuhammer50's seal to appear. Vice then spins, with his body surrounded by pink energy, while holding out the Osutoderuhammer50, which produces a trail of yellow and cyan energy. He approaches the target while spinning and crashes into them, continuously striking them with the Osutoderuhammer50. Vice then moves away and briefly stops spinning before starting again and resuming his attack. At the end of the second spinning attack, a yellow projection of the design on the Osutoderuhammer50's head to appear as the enemy is launched away.
This finisher has two variations:
- Vice strikes a stone on the ground, causing a projection of the Osutoderuhammer50's seal to appear. Numerous balls of yellow energy emerge from the stone and float into the air before transforming into large rocks. Vice swings the Osutoderuhammer50, sending the rocks towards the target. The rocks then rain down, relentlessly striking the enemy and the surrounding environment.
- Revi strikes Vice's Barid Shield, causing the Osutoderuhammer50 to be covered in light blue energy and emit freezing air from its head. Revi raises the weapon, which constructs a giant version of itself made of ice. Revi then swings the Osutoderuhammer50 downward, causing the ice construct to slam into the opponent and shatter upon impact.
The Revicelasher's finisher is the Revi Vicelash (リバイバイスラッシュ, Ribai Baisurasshu), which is performed by stamping either the Ohinstamp or a Vistamp onto the Ohinjector. The latter results in an attack using the Vistamp's power.
- Ohinstamp
- Vistamp
This finisher has three variations:
- Vice delivers a series of three energy slashes to the enemy, with each slash being composed of both blue and purple energy as well as yelow and cyan energy. Each slash produces a shockwave of yellow energy upon impact, and the third slash additionally produces a yellow projection of the design on the Osutoderuhammer50's head.
- Revi jumps into the air and delivers a downward yellow energy slash to the enemy as he falls. Revi then runs toward the enemy and delivers a second slash while sliding.
- Revi covers the blade of the Revicelasher with cyan energy and slashes the opponent, creating a burst of cyan and yellow energy upon impact.
- Mammoth
- Volcano
- Brachio
- Rolling
Revi covers the Revicelasher's blade in light blue energy and delivers several slashes to the enemy. He then parries one of the opponent's attacks before performing a final blue energy slash.
Revi charges the Revicelasher with flames before forming them into a large sword of fire around the weapon's own blade. At the same time, Vice forms a large sword of ice for himself to wield. Together, the two Riders deliver a series of numerous slashes to the enemy, with Revi performing slashes of fire and Vice performing slashes of ice.
Pink energy swirls around the Reviceslasher while the weapon's blade is covered in energy of the same color. The energy blade then elongates until it is twice as tall as Revi himself. Revi swings the energy blade into multiple enemies standing outside normal melee range, striking them and launching them away. The energy blade then shortens and dissipates while the launched enemies crash into a wall.
Revice engages in several high-speed clashes with the enemy, appearing only as a trail of yellow electricity. After the two return to normal speed, Revice performs a yellow energy slash using the Revicelasher before cutting through the enemy's weapons when they attempt to block the attack. Revice then raises the Rolling Vistamp into the air as lightning strikes it. With their body glowing, Revice disappears then reappears in front of the enemy and delivers a slash of yellow paint surrounded by electricity before disappearing again. Revice then reappears and disappears to deliver a second slash in the same way. Upon reappearing for the third time, Revice instead uses the Rolling Vistamp to deliver two slashes of yellow paint. Revice reappears for the final time a short distance away from the enemy before performing a giant upward slash of yellow paint surrounded by electricity using the Revicelasher, causing the opponent to explode after a brief moment.
- Rolling Rider Punch
- Painting Finish
Rolling Rider Punch (ローリングライダーパンチ, Rōringu Raidā Panchi): This finisher has three variations.
- Jack Revice charges the Rolling Vistamp with black and blue paint-like energy before swinging it, causing a slash of black paint to appear on the enemy. He then swings again, causing another paint slash to appear in the opposite direction. The two slashes form an X shape, immobilizing the enemy. Revice charges the Rolling Vistamp again before launching forward instantaneously and striking the enemy with it, producing blue shockwaves upon impact and causing light blue energy to appear in the black paint. The enemy is then destroyed in an explosion of purple energy, scattering the paint.
- Jack Revice uses the Rolling Vistamp to deliver a slash of black paint to the enemy. Immediately afterwards, he strikes the opponent with the weapon and holds it there while its roller is spinning, causing it to grind against the enemy's body. Revice then pulls him arm back and punches the enemy with the Rolling Vistamp, pushing them away.
- Revice charges the Rolling Vistamp with black and blue energy before their entire body is covered in electricity. Revice then uses the Rolling Vistamp to deliver a punch covered in yellow electricity and red wind that leaves behind a trail of yellow paint. The punch produces several shockwaves of yellow paint upon impact.
By scanning another Vistamp on the Rolling Vistamp, the Painting Finish (ペインティングフィニッシュ, Peintingu Finisshu) can be performed.
- Thunder Gale
This finisher has two variations.
- Version 1
- Version 2
Revice charges the Rolling Vistamp with electricity while their body is covered in fire and they are surrounded by a spiral of red wind. Revice swings the Rolling Vistamp upward, creating painted symbols of lightning, a tornado, and fire. The symbols combine, creating a large tornado of fire and lightning that approaches the opponent and lifts them into the air. The tornado then dissipates into a rotating column of the symbols of numerous elements before Revice reappears in the air above the enemy. Revice punches the opponent with the Rolling Vistamp while dropping downward and lands on the fire symbol. Revice launches off of it and delivers a flying punch with the Rolling Vistamp covered in fire. Revice continues ricocheting off of various other symbols, each time delivering a punch empowered with the corresponding element. Upon landing on the lightning symbol, Revice launches back upward to the top of the column. There, Revice charges the Rolling Vistamp with electricity and drops downward before punching the enemy. The punch creates a shockwave upon impact, and the two fall together before the opponent crashes into teh ground while underneath Revice. After landing, additional electricity is released shortly before the enemy explodes.
Revice charges the Rolling Vistamp with electricity and red wind before using it to block an incoming enemy projectile. They then redirect the projectile back toward the attacker as a slash of yellow paint. The slash strikes the opponent before slicing through them.
Rolling Rider Punch + Revi Vicelash (Rolling): Revi wields the Rolling Vistamp and Vice wields the Revicelasher. The Rolling Vistamp's roller is covered in red, yellow and cyan energy while the Revicelasher's blade is covered by black energy. Revi and Vice deliver several slashes of black ink to the surrounding enemies, destroying them in an explosion. The Riders then launch two more slashes that fly into another group of enemies, destroying them as well and resulting in a second explosion.
By scanning another Vistamp on the Thunder Gale Vistamp, a Lightning Tornado (ライトニングトルネド, Raitoningu Torunedo) finisher using its power can be performed.
- Mammoth
Revice channels yellow lightning, red wind, and blue energy boomerangs into the Thunder Gale Vistamp. Upon finishing, Revice's body glows and they dash forward at high speeds while surrounded by lightning, producing a blue sonic boom. Lightning appears in front of the enemy before Revice reappears and punches them, producing a blue shockwave along with streams of red wind. Revice then launches forward and crashes the opponent through a wall.
- Crimson Impact
- Crimson Finish
Crimson Impact (クリムゾンインパクト, Kurimuzon Inpakuto): Crimson Vail charges the Crimson Vistamp with red and black energy before using it it deliver a slash of crimson paint to the opponent.
Crimson Finish (クリムゾンフィニッシュ, Kurimuzon Finisshu): Crimson Vail charges the Crimson Vistamp with red energy before using it to deliver a running punch to the opponent. Afterward, he turns to face his opponent again and his lower leg is covered in red energy as crimson paint flows into it. Crimson Vail then delivers a side kick to the enemy, with his leg now emanating additional crimson and black energy similar to fire. The kick creates several waves of red energy upon impact.
Transformation Device + Weapon
- Revice Driver + Ohinbuster50
- Livegun + Ohinbuster50
Finifini Finish + Volcano Stamping Slash: The Barid Shield glows before Vice inhales and blows a stream of cold air across it, covering the surface of the shield in ice. Vice continues directing the cold air past the shield, forming a blade of ice. Revi and Vice jump into the air, with Revi wielding the Ohinbuster50 as its blade is covered in fire. A red projection of the Volcano Vistamp's seal and a light blue projection of the Barid Rex Vistamp's seal appear behind the two Riders before they each deliver a slash, with Revi performing a slash of fire and Vice performing a slash of ice. The flames from Revi's slash form into a fire tornado around the enemy before both the fire and opponent are encased in a column of ice. Revi then deliver another simultaneous slash to the ice column, with Revi performing a red energy slash and Vice performing a light blue energy slash, shattering the ice.
Bat Justis Finish + Ohing Strike: Gold energy gathers at the end of the Livegun's barrel while a cyan projection of the Ohinstamp's seal appears in front of the Ohinbuster50's barrel along with several blank pink and blue energy stamps. Live then fires both weapons, creating a blue projection of the Ohinstamp's seal and a gold projection of the Bat Vistamp's seal along with a burst of gold energy. A large gold blade-shaped energy projectile is fired from the Livegun while a ball of blue energy is fired from the Ohinbuster50. The two projectiles pierce the opponent, leaving large holes.
Combinations
- Revice Riders
- Revice Riders & Legend Riders
- 2 Riders
- 3 Riders
- 4 Riders
- Live/Jeanne
- Jack Revice/Jeanne
- Jack Revice/Live
- Demons Troopers
- Jeanne/Aguilera
- Ultimate Revi/EvilytyLive
- Jackal Genome/Kujaku Genome
- Holy Live/Cobra Genome
Kujaku Stamping Smash + Jackal Justis Finish: Jeanne covers Lovekov in blue energy and throws the two fans before Live moves at high speeds while covered in light gold energy. Live attacks enemies with both melee attacks and shots fired from the Livegun while the fans fly around and slash other opponents.
Holy Justis Finish + Cobra Stamping Smash: This finisher has two variations.
- Holy Live and Jeanne both jump into the air. Holy Live then performs a flying kick covered in light blue energy while Jeanne performs a flying kick covered in orange and blue energy. After the kicks strike the target, the Riders remain in contact for a brief moment before each raising their leg and kicking the enemy again, creating an explosion and launching the opponent away.
- Holy Live performs a flying kick covered in light blue and cyan energy while Jeanne performs a flying kick covered in red, orange, and blue energy. The kicks strike a pair of enemies as the Riders fly past, creating a burst of energy featuring all of the colors combined before the enemies explode.
Kujaku Stamping Smash + Rolling Rider Punch: Jeanne jumps into the air and spins vertically while covered in fire, launching multiple consecutive fireballs at the enemy. She then stops spinning and collides with the opponent herself, causing them to be surrounded by fire. Jack Revice uses the Rolling Vistamp to deliver three slashes of black paint to the enemy, causing the surrounding fire to become black as well. The fire then flows into the enemy until they explode.
Rolling Rider Punch + Jackal Justis Finish: Jack Revice uses the Rolling Vistamp, with its roller spinning, to deliver a slash of black paint to an enemy, then does the same to a second. Jack Revice then performs a spinning slash of black paint that strikes both enemies simultaneously. Afterwards, Live jumps high into the air and fires a volley of gold energy projectiles at the enemies, causing them to explode.
Demons Finish (Trooper Spider) + Beta Stamping Strike: Demons Trooper α produces silk that encircles and restrains two enemies before glowing red. The Demons Trooper then punches one of the opponents with his lower right arm covered in crimson energy, producing a burst of magenta energy upon impact, before doing the same to the second opponent with his left arm. With his lower right leg covered in crimson energy, the Demons Trooper performs a roundhouse kick that produces a yellow energy slash along with strands of silk. The kick strikes both opponents, producing more magenta energy upon impact. As the enemies are on the ground in front of him, Demons Trooper β charges the Ohinbuster50, with bright yellow energy gathering at the end of the barrel and rings of orange energy surrounding the weapon. The Demons Trooper then fires a yellow energy construct of a stag beetle's horns that is surrounded by blue, purple, and cyan energy. The horns strike the opponents, destroying them and resulting in an explosion.
Demons Finish (Trooper Kuwagata) + Demons Finish (Trooper Spider): Over Demons' O Wingal Shade appears on the shoulder of Demons Trooper β, who extends the wing and wraps it around the opponent. Demons Trooper α then entangles the opponent with silk produced from his hand. The end of the silk remains connected to his hand as he pulls it, restraining the target.
- Hashibiroko Genome/Queen Bee Genome
- Tricera Genome/Buffalo Genome
Hashibiroko Stamping Smash + Queen Bee Stamping Break: Lovekov's blade is covered in purple energy while the blades of Aguilera's Needle Kunai are covered in yellow energy. Jeanne then delivers a downward purple energy slash to the enemy as Aguilera simultaneously delivers a horizontal yellow energy slash, resulting in an explosion.
Tricera Liberal Smash + Buffalo Stamping Destroy: Spiraling cyan energy surrounds Lovekov's barrels while Aguilera's weapons float beside her and spin while covered in energy that continually changes between red, green, and yellow. Jeanne then fires two beams of cyan energy, producing a blue shockwave, as Aguilera sends the spinning wheels flying at the opponent. The beams produce a blue and white shockwave upon impact, while the wheels produce a yellow shockwave. The attacks continue to push against the enemy before destroying them, resulting in an explosion.
Revi Giffard Finish + Evilyty Perfect Finale: White light appears at the end of the Livegun's barrel while Revi forms a sphere of magenta and blue energy in his hand, with a circle of red energy appearing around his hand as he aims. Live then fires a sustained barrage of bladed projectiles made of black and white energy, with the barrel producing a cyan shockwave every time he fires. Immediately after, Revi throws the sphere of energy, with a double helix of magenta and blue energy resembling DNA trailing behind it. The sphere and projectiles fly through a crowd of enemies, destroying all of them and resulting in several explosions. The sphere then strikes a final enemy further back, producing another explosion.
- Revi/Vice/Live
- Live/Jeanne/Destream
- Revice Brachio/Bat Genome
- Rex Genome/Bat Genome
- Ultimate Revi/Ultimate Vice/EvilytyLive
Brachio Stamping Finish + Bat Justis Finish: Live gathers gold energy at the end of the Livegun's barrel. When the enemy launches projectiles, Revice Brachio rears back and produces a magenta energy shockwave from their head that freezes the projectiles in time. Revice then swings their neck at the frozen projectiles, creating multiple gold projections of clock faces and destroying the projectiles. Afterward, Revice swings their neck upward into the enemy, launching the opponent into the air. Live fires gold sonic waves from the Livegun that attack the opponent in midair. Revice then jumps into the air and slams their neck down into the opponent, creating a red projection of the Brachio Vistamp's seal along with more clock projections and sending the enemy crashing to the ground.
Rex Stamping Finish + Bat Justis Finish: Vice runs toward the enemy and kicks them into the air shortly before Revi and Live jump into the air themselves and simultaneously kick the opponent in mid-air, creating a shcokwave and sending the enemy crashing back to the ground. Revi and Live land and each perform a flying kick, with Revi's kick covered in pink and blue energy while Live's kick is covered in green and purple energy. Red projections of the Rex and Bat Vistamps' seals appear and the Riders pass through them before continuing to fly toward the opponent. Upon reaching the enemy, Revi and Live kick again, breaking through the target's body and launching the enemy into the air before the Riders slide to a stop.
Revi Giffard Finish + Vice Giffard Finish + Evilyty Perfect Finale: Revi and Vice put their hands together, creating oppositely charged magnetic fields. Simultaneously, Revi's body is covered in red energy while Vice is covered in blue energy. The respective energies then flow into the Riders' other arms as a vortex of magenta and cyan energy forms at the point where their hands met. Each of the Rider points their free hand forward and fires a curved stream of energy from it, with Revi's being red and Vice's being blue. The streams open a small hole where the meet while producing red and blue magnetic fields. The rift is pulled open by the streams, creating a black hole that begins sucking the surroundings into it. This also creates dimensional tears leading to Giff's realm, releasing its contents into the human world. The target is dragged toward the black hole with the aid of the magnetic fields. Revi and Vice then stamp their sides of the Giffard Rex Vistamp together, causing additional magnetic fields to pull the enemy. Live flies up to the enemy while covered in green energy. He then performs a flying kick with his foot covered in cyan energy as he produces a large trail of multicolored energy. After the kick strikes the enemy, a teal energy copy of Kamen Rider Evil appears beside Live. The two kick the enemy again, producing cyan energy upon impact. The enemy is launched away, leaving behind a a trail of multicolored energy themselves. As a result, the opponent is pulled into the black hole. Giant waves of multicolored energy are created before the black hole closes, trapping the enemy within.
Bat Justis Finish + Cobra Liberal Smash + Destream Finish: Live's leg is covered in green energy as he performs a backwards kick, with swirling gold energy and a clear energy construct of a bat appearing from the foot just before striking the enemy. Upon impact, the kick produces a green and gold shockwave as well as an explosion. Jeanne's leg is then covered in light blue energy with Lovekov's snake form coiled around it. She performs a roundhouse kick that creates a blue and yellow energy slash. The slash produces a cyan shockwave upon impact, followed by a yellow shockwave and an explosion. Finally, Destream jumps forward with his lower leg covered in cyan energy. Several components made of cyan energy appear around him before assembling into a mechanical Hercules beetle head around his leg. The beetle head spins and is surrounded by a cone of cyan and red energy, acting similar to a drill as Destream kicks the opponent. Blue and red energy is released as it drills into opponent before resulting in an explosion. After a brief moment, the enemy themselves explodes as a result of the combined attacks.
- Revi/Vice/Live/Jeanne
- Barid Rex Genome/Bat Genome/Cobra Genome
- Ultimate Revi/Ultimate Vice/EvilytyLive/Invincible Jeanne
Finifini Finish + Bat Justis Finish + Cobra Stamping Smash: Vice generates a cyan and purple energy barrier from the Barid Shield to block oncoming enemy projectiles before lying on the ground with the shield on top of him. Revi, Live, and Jeanne use the Barid Shield as a platform to jump off of before each performs a flying kick. Revi's kick is covered in ice as well as surrounded by cyan and purple energy, Live's kick is surrounded by green and purple energy, and Jeanne's kick is surrounded by blue and yellow energy. After striking the targets, the Riders break past and land behind them before the opponents explode.
Revi Giffard Finish + Vice Giffard Finish + Evilyty Perfect Finale + King Cobra Stamping Smash: Revi, Vice, Live, and Jeanne each perform a flying kick. Revi's leg is surrounded by magenta energy, Vice's is surrounded by blue, Live's is surrounded by cyan, and Jeanne's is surrounded by orange. The Riders fly into the sky along with the enemy upon striking them, producing multicolored energy. The opponent's body glows purple before imploding, producing a giant wave of multicolored energy that expands across the sky.
- 2 Riders
- 3 Riders
- 4 Riders
- 6 Riders
- Espada/Live
- Jeanne/Kenzan
- Jeanne/Sabela
Trueno del Sol + Bat Justis Finish: Espada launches a golden energy slash covered in electricity that clashes with the enemy's own energy slash, causing both to be destroyed in an explosion. Espada runs through the explosion and delivers another slash directly to to the opponent. Immediately afterward, Live delivers a flying kick covered in green energy that upon impact creates green and gold shockwaves, which then transition to magenta and purple. The kick also creates an explosion that launches the opponent away. The enemy then crashes and explodes themselves.
Cobra Stamping Smash + Shippuu Kenbu Ichiren: Jeanne destroys several enemy projectiles with a series of kicks before striking the opponent with her fist. Meanwhile, Lovekov appears in a snake-like form composed of light blue energy and coils around Jeanne's leg. Jeanne delivers an upward kick to the enemy, creating an orange and blue shockwave upon impact as well as launching them into the air. Kenzan appears in the air alongside the enemy with Fuusouken Hayate's blade covered in green energy before delivering a slash of green wind. Multiple additional slashes then strike the opponent until they explode.
Turtle Stamping Smash + Shot Insect: Jeanne charges Lovekov's barrel with green energy while Sabela covers Eneiken Noroshi's bade with magenta energy. Jeanne then fires green energy artillery shell while Sabela thrusts her sword forward, producing a beam of magenta energy surrounded by smoke. The attacks strike the enemy simultaneously before producing a green and magenta shockwave followed by an explosion that launches the opponent away.
- Xross Saber/Century/Revice
Ginga Dai Hakusatsu + Rider Kick + Neo Batta Stamping Finish: Saber channels blue and purple energy to his foot and performs a flying kick covered in sparkling dark blue and light purple energy. Century summons the Dest Cyclone and performs a flying kick into it as it spins, generating swirling cyan and red energy. Two large magenta energy constructs of the Neo Batta Vistamp appear in front of Revi and Vice. They each perform a flying kick into one of the Vistamp constructs, producing a yellow shockwave with a circuitry design along with additional magenta energy. The Vistamps are then surrounded by a different green energy circuitry before the kicks produce a trail of green energy lines. The four Riders' kicks bore through a giant enemy's body, leaving a hole. When the enemy explodes as a result, a giant light green energy construct of the Neo Batta Vistamp drops down to extinguish the explosion. The Vistamp construct then twists, producing a wave of energy that repairs any surrounding damage.
- Demons/Sabela/Durendal/Calibur
Demons Finish + Shot Insect + Ocean Ikkoku Giri + Kurayami Iai Dokugo Issen: Demons fires silk from his hand into the air to form the radial threads of a spider web above a group of enemies. Sabela produces her own silk from the tip of Eneiken Noroshi to form the web's spiral threads, completing it. The completed web drops onto the enemies below, covering them with the silk and trapping them. Meanwhile, Durendal covers Jikokuken Kaiji's blade in cyan energy while Calibur covers Ankokuken Kurayami's blade in purple energy. Durendal then performs a cyan energy slash as Calibur performs a purple energy slash. The two slashes slice through the crowd of enemies, resulting in a large explosion.
- Jeanne/Aguilera/Sabela/Poppy/Zero-Two/Tsukuyomi
Cobra Stamping Smash + Queen Bee Stamping Break + Eien no Hitosashi + Critical Crews-Aid + Zero-Two Big Bang + Time Jack: Jeanne, Aguilera, Sabela, Poppy, Zero-Two, and Tsukuyomi each jump into the air and deliver a flying kick to the opponent. Tsukuyomi's foot is surrounded by golden light and produces a trail of gold sparkles. Her kick results in a golden shockwave upon impact. Zero-Two's foot is surrounded by red energy and she produces a trail of red and green lines of energy as she flies through the air. Her kick results in a green shockwave upon impact and produces a circuity symbol of green and blue energy. Poppy's foot is surrounded by pink energy, with the Rider herself surrounded by multicolored circles and stars. Her kick results in a magenta, green, and yellow shockwave upon impact. Sabela's foot is surrounded by magenta energy and she produces a trail of smoke as she flies through the air. Her kick results in a burst of smoke and magenta particles upon impact. Aguilera's foot is surrounded by purple and orange energy, with the Rider herself surrounded by multiple purple energy bees. Her kick results in a red shockwave upon impact. Lovekov takes the form of a cyan energy snake coiled around Jeanne's leg, and the Rider herself is surrounded by blue and orange energy as she flies through the air. Her kick results in a blue and orange shockwave upon impact as well as an explosion. All of the Riders land shortly before the enemy explodes.


